After I’d done the first Mighty Thor Mjolnir I was showing it off – the way you do – and was asked
“Can you make me one of those, but with the Thor icon on the sides?”
“Of course!” I said and then set about how I’d achieve this.

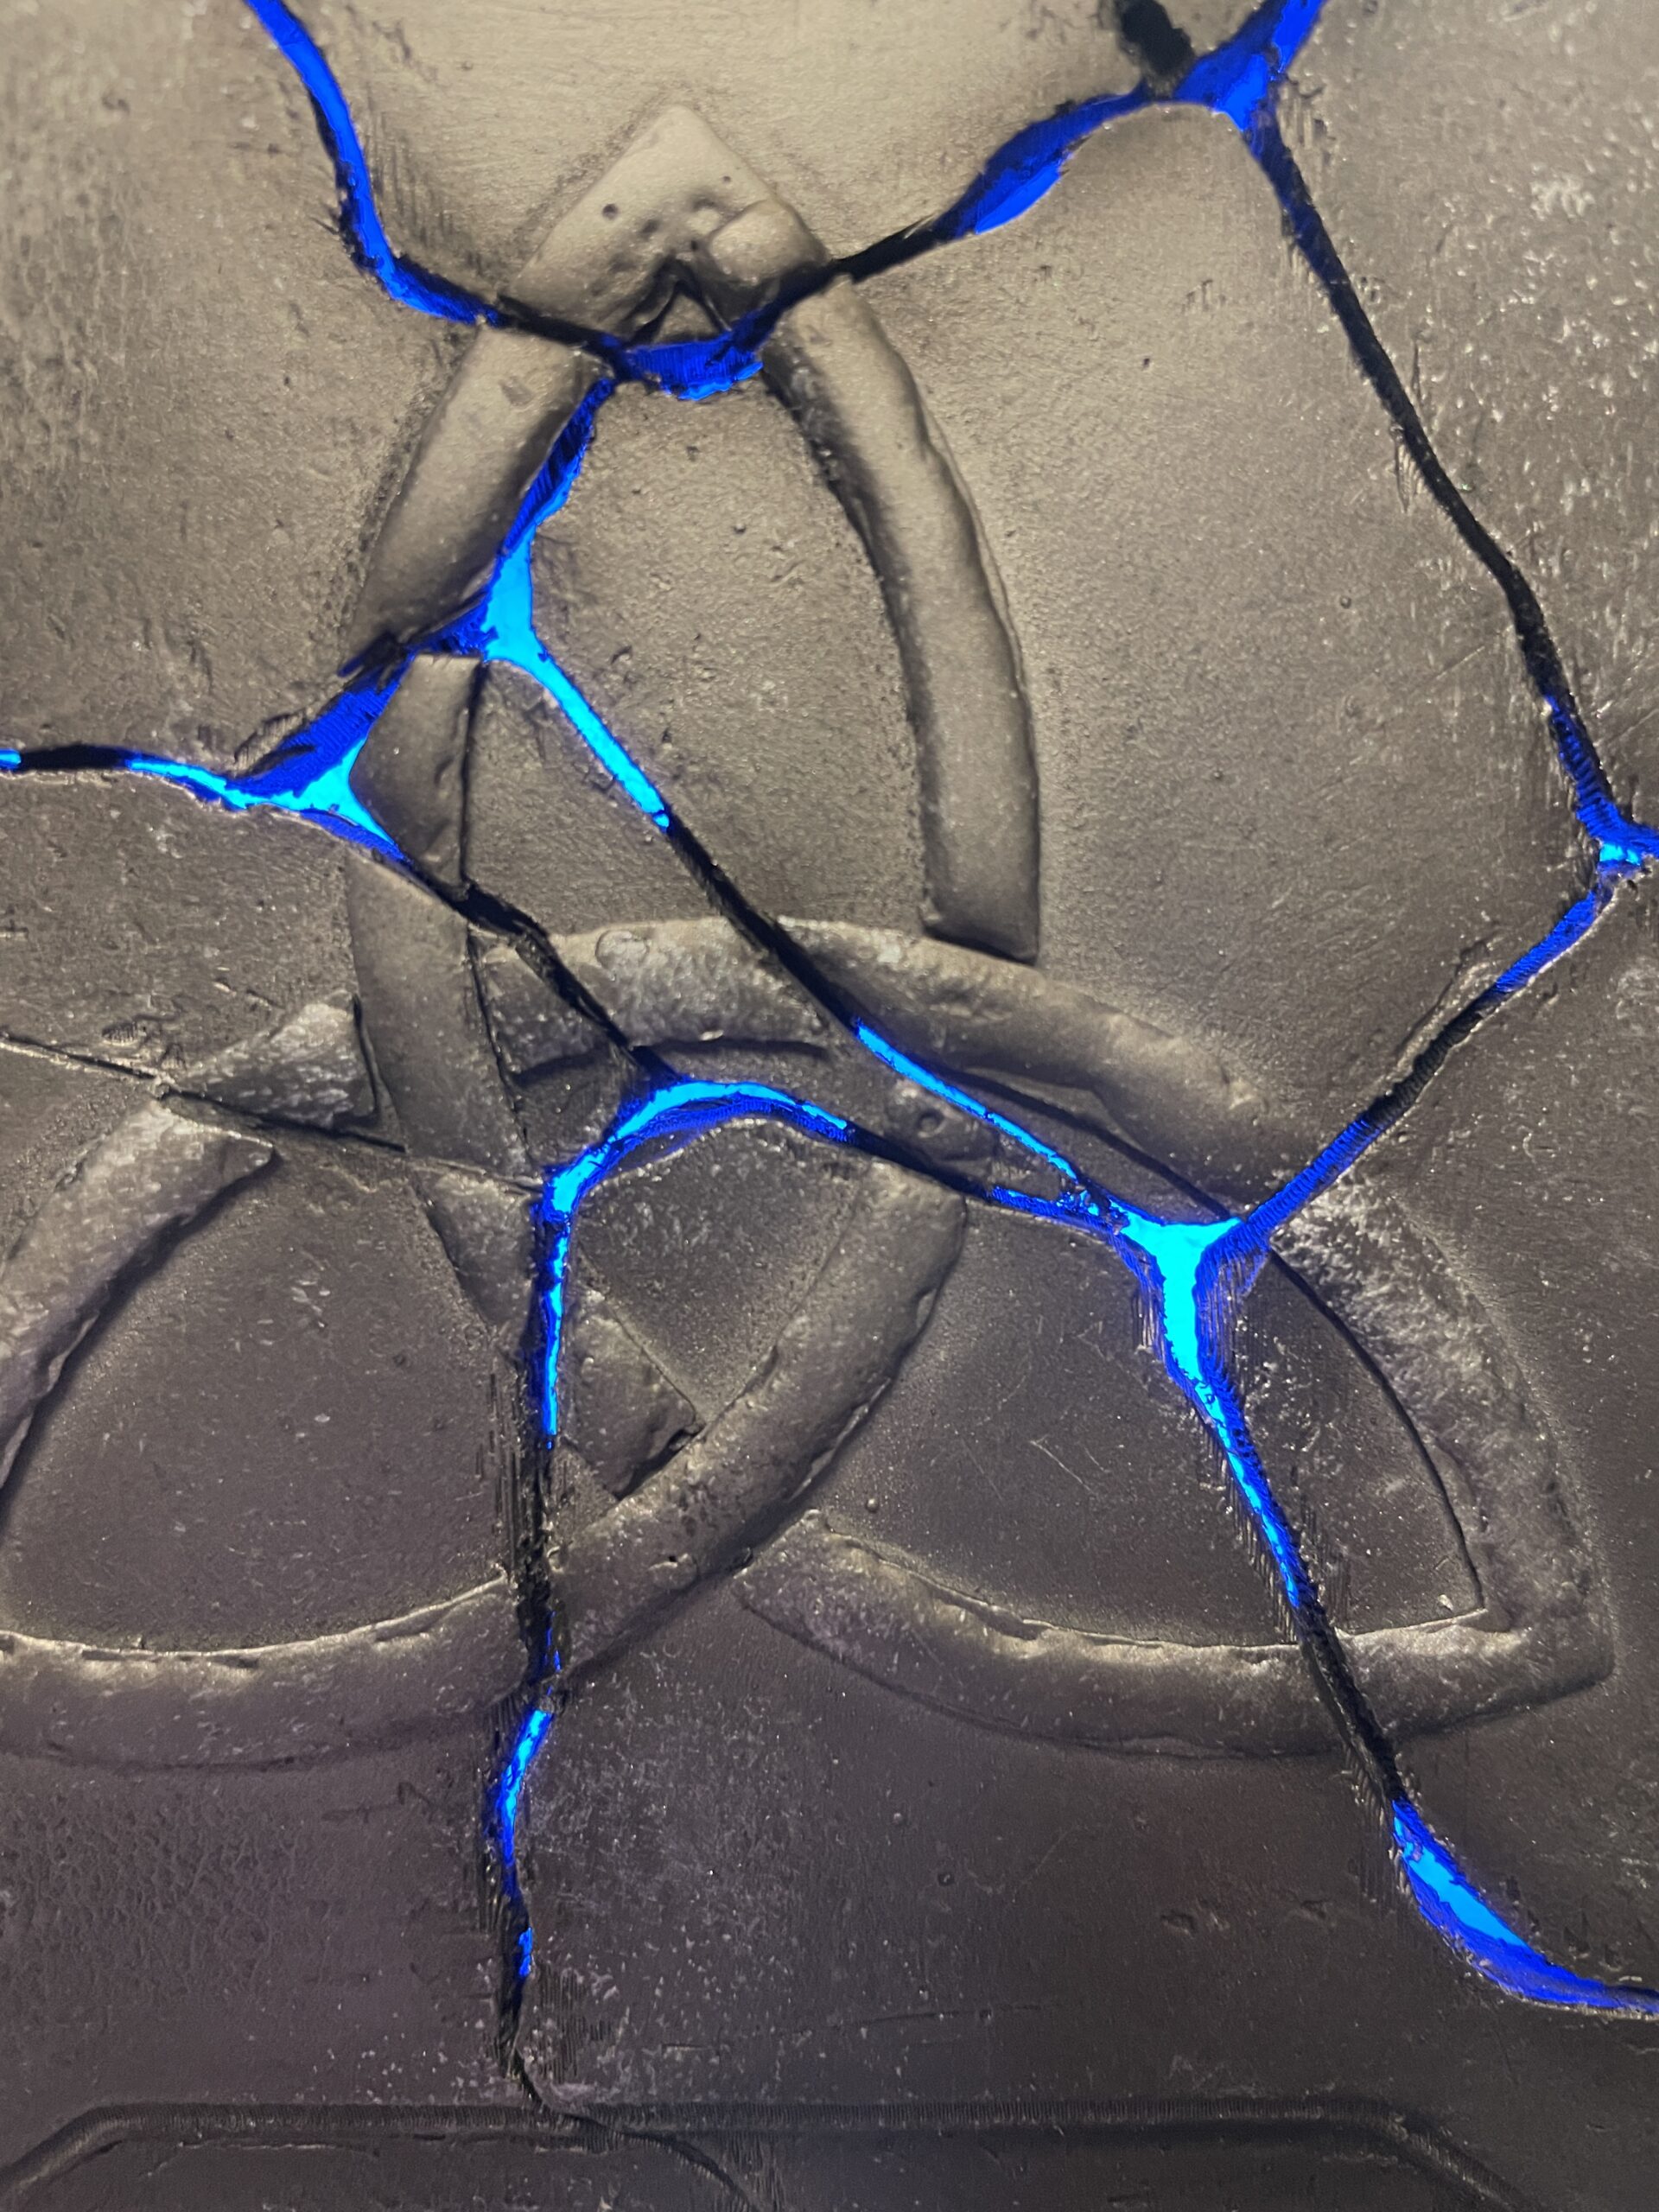
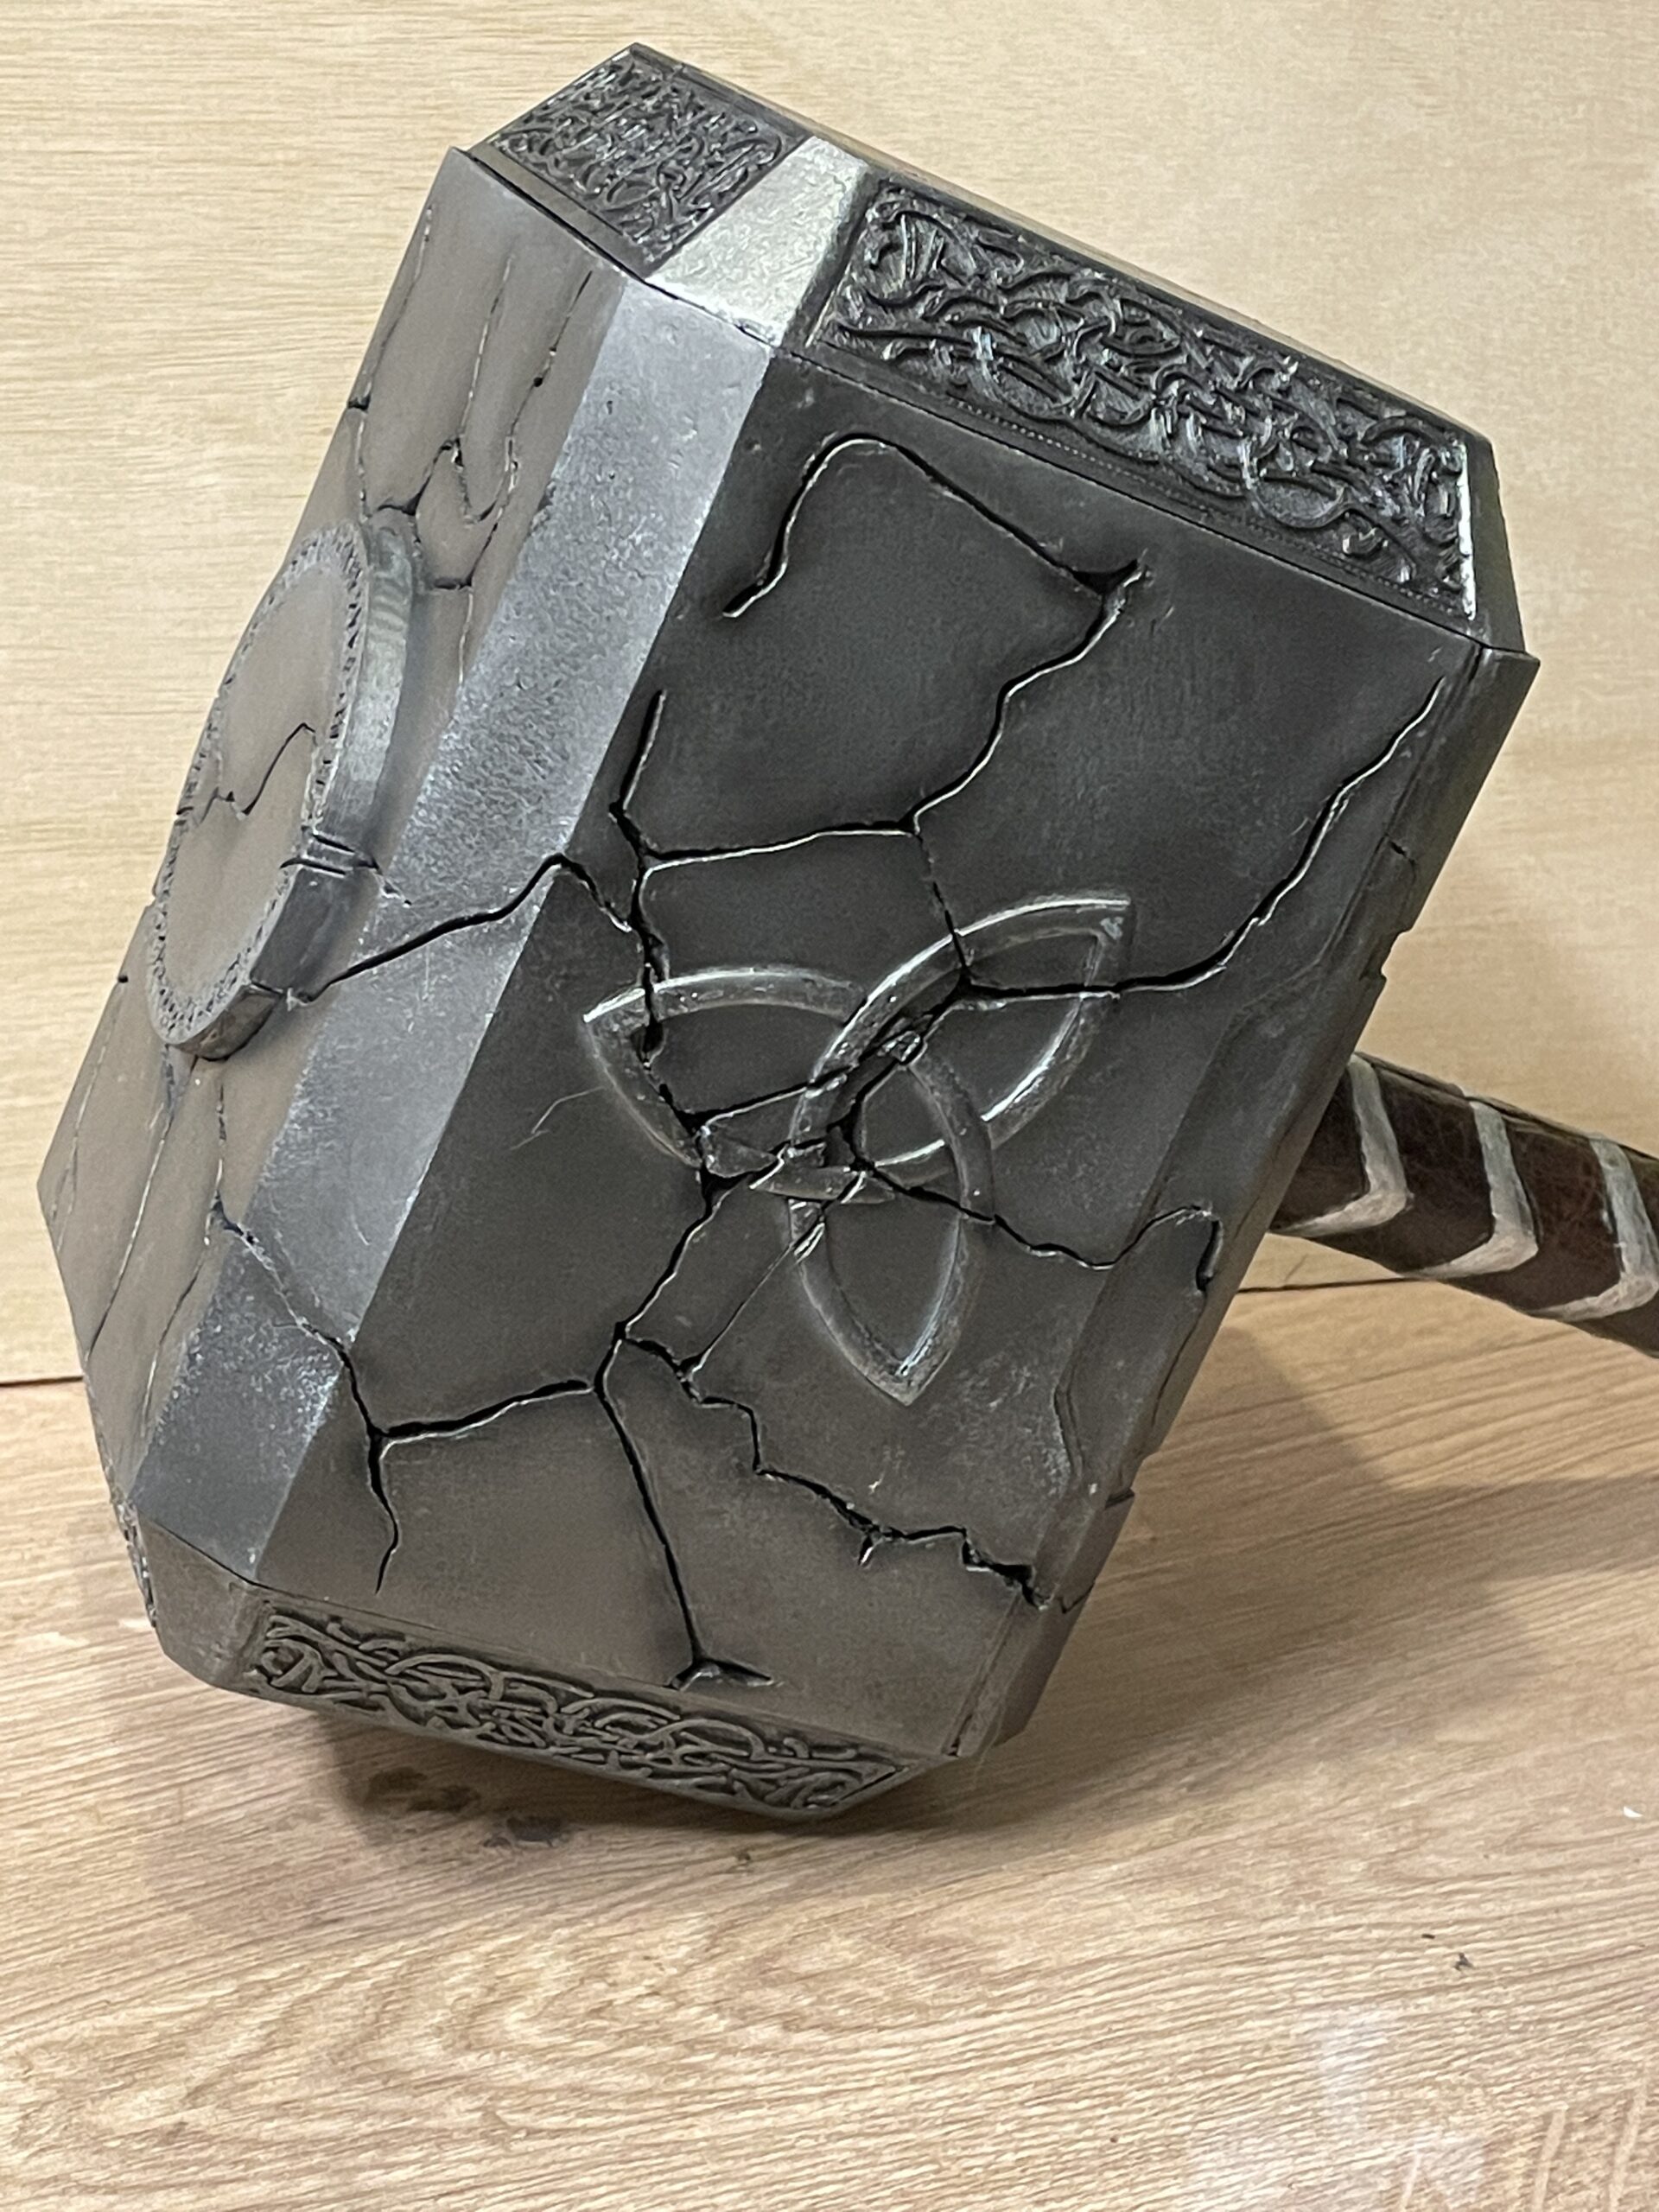
The ‘Thor icon’ they were referring to is called a Triquetra and is shown appearing on the side of the hammer in the movies when Odin whispers the charm to Mjolnir
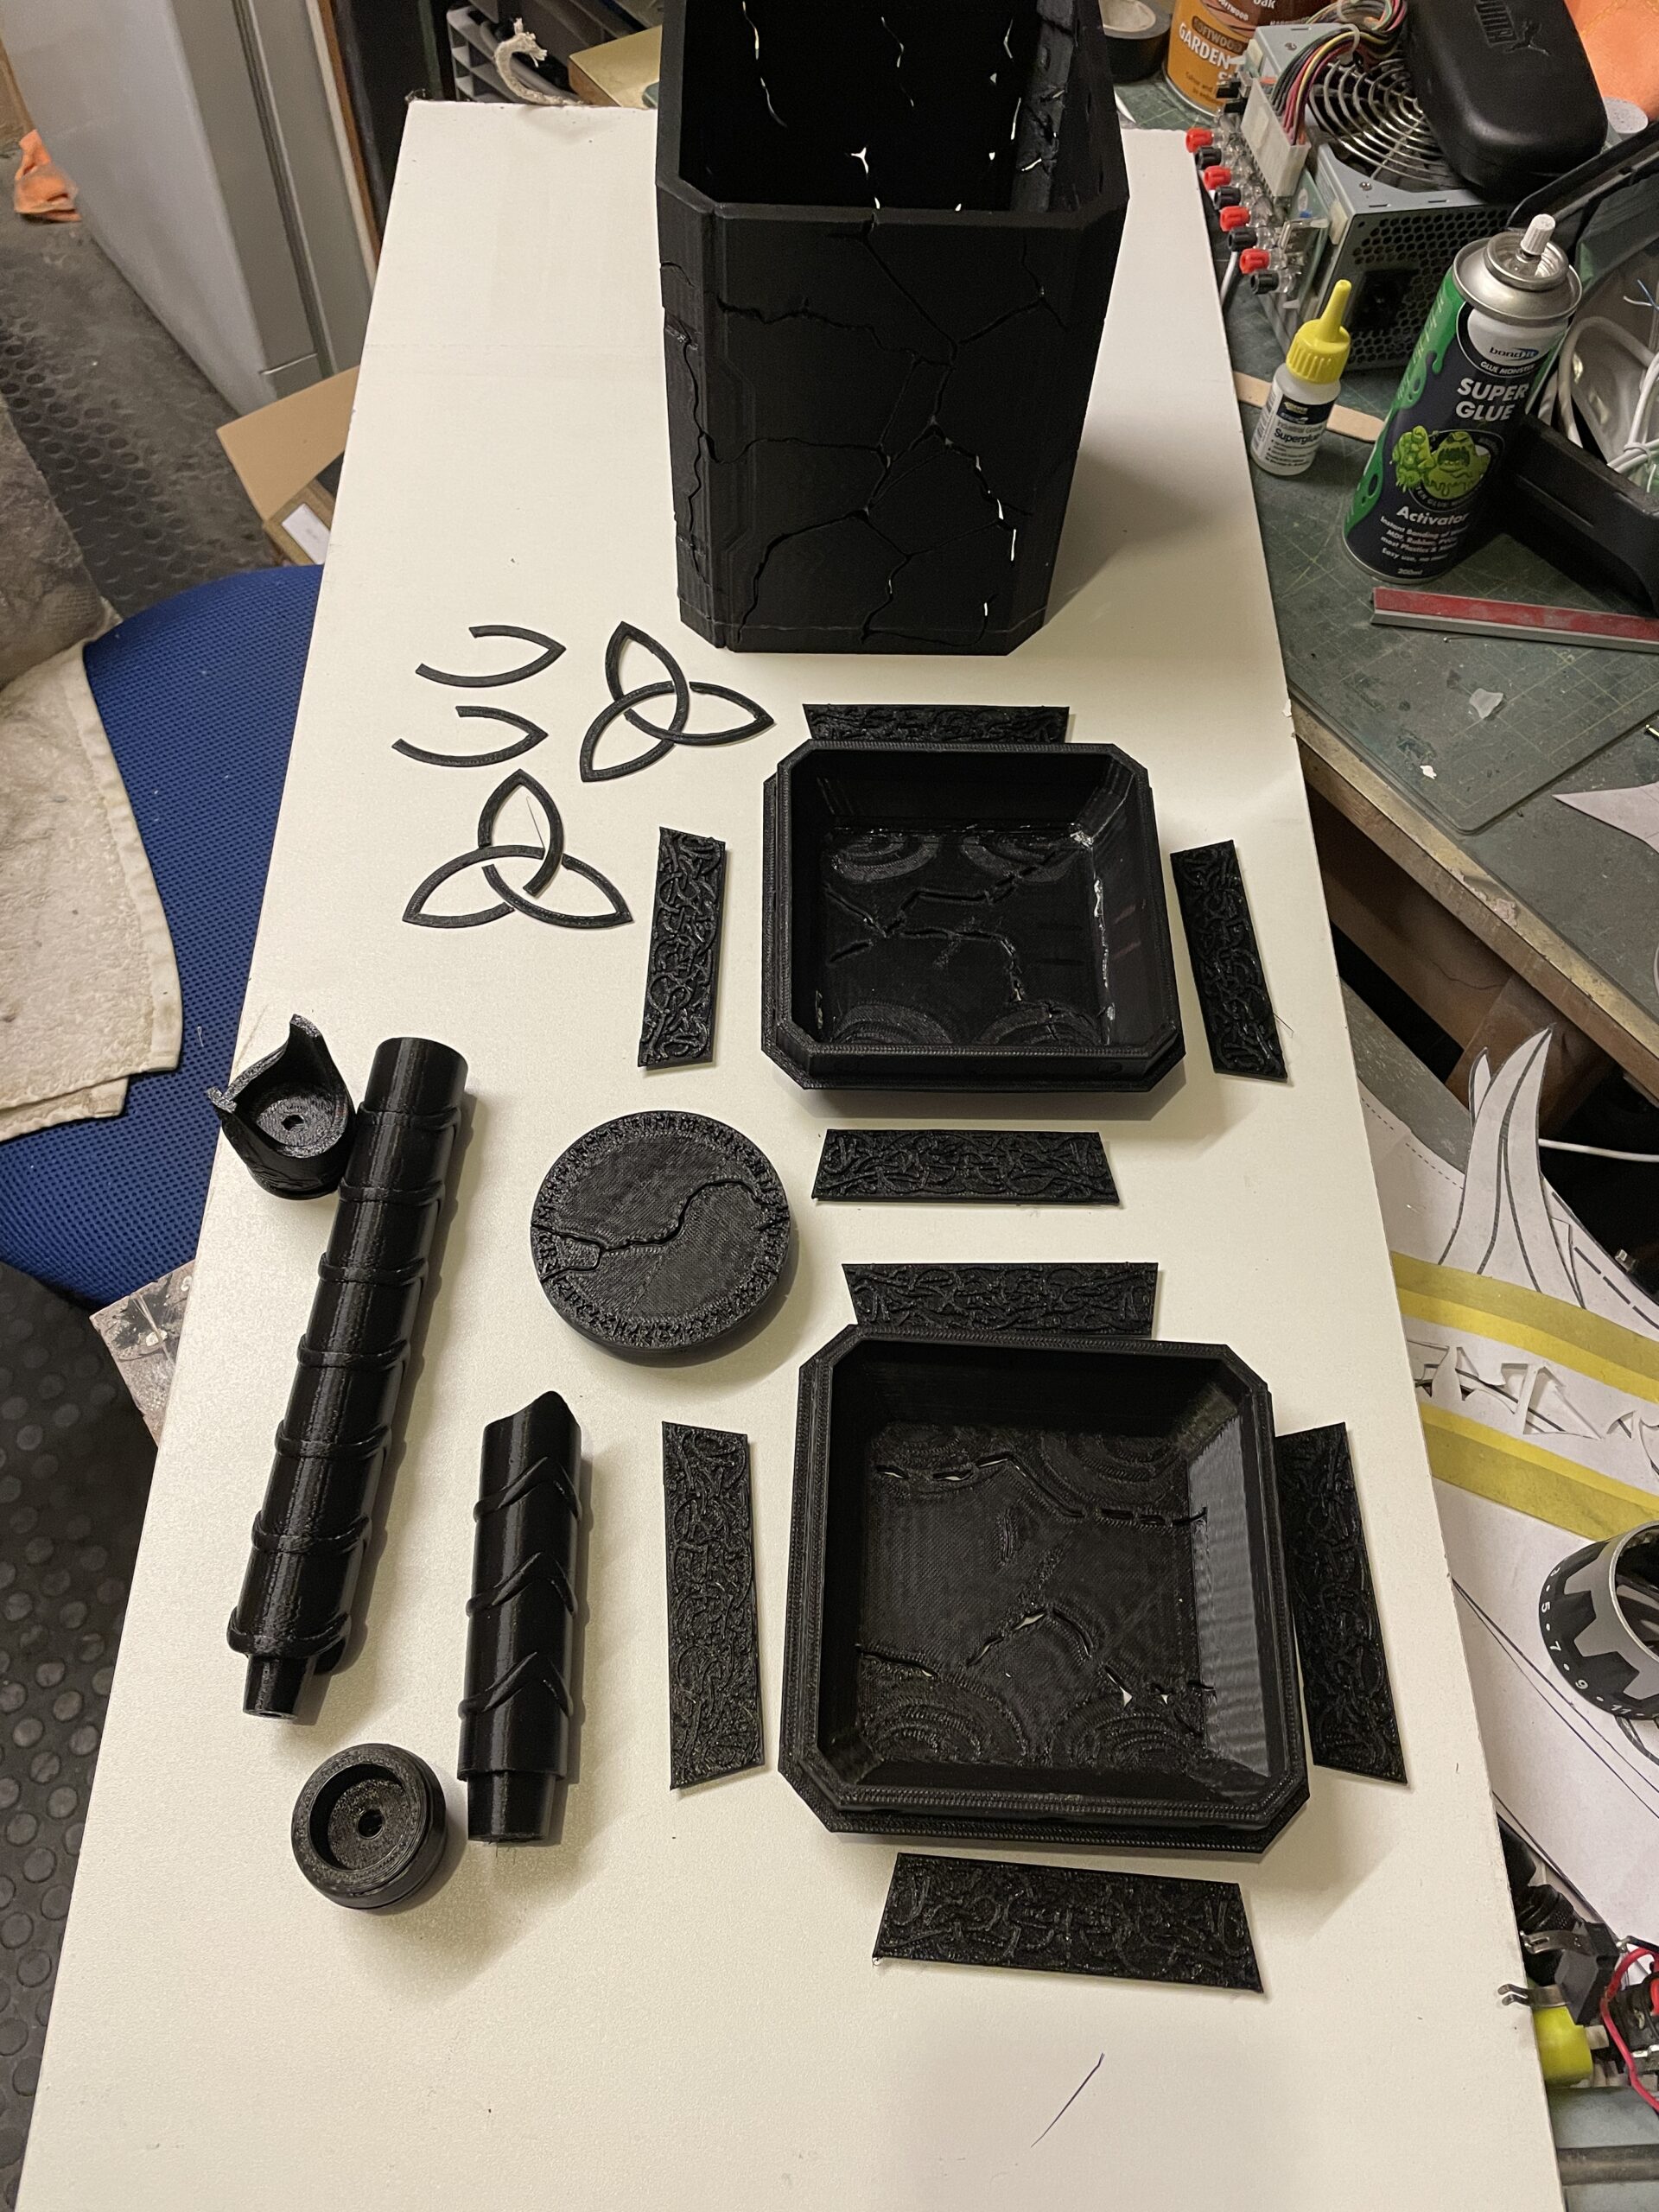
I did some investigation including trying to reverse engineer the STL I had for the body so I would emboss the symbol into it, but decided that the easiest way would be to print out the Triquetra 1mm thick, mount it to the sides and introduce the cracks through it where they needed to be to match the main body.
Build
Print was the usual process all done on the XForm-d. I’ve upgraded the extruder to a Creality Sprite (of course I had to swap to a 12v heater cartridge) and I’m really happy with the results. The old motor was dying and I had to do something so I decided to go all in.. no regrets!
I did have a couple of layer-slip issues, but that seems to have been down to a loose belt and was nothing I wasn’t able to fix with a sharp blade, some superglue, a bit of filler and some sanding!!
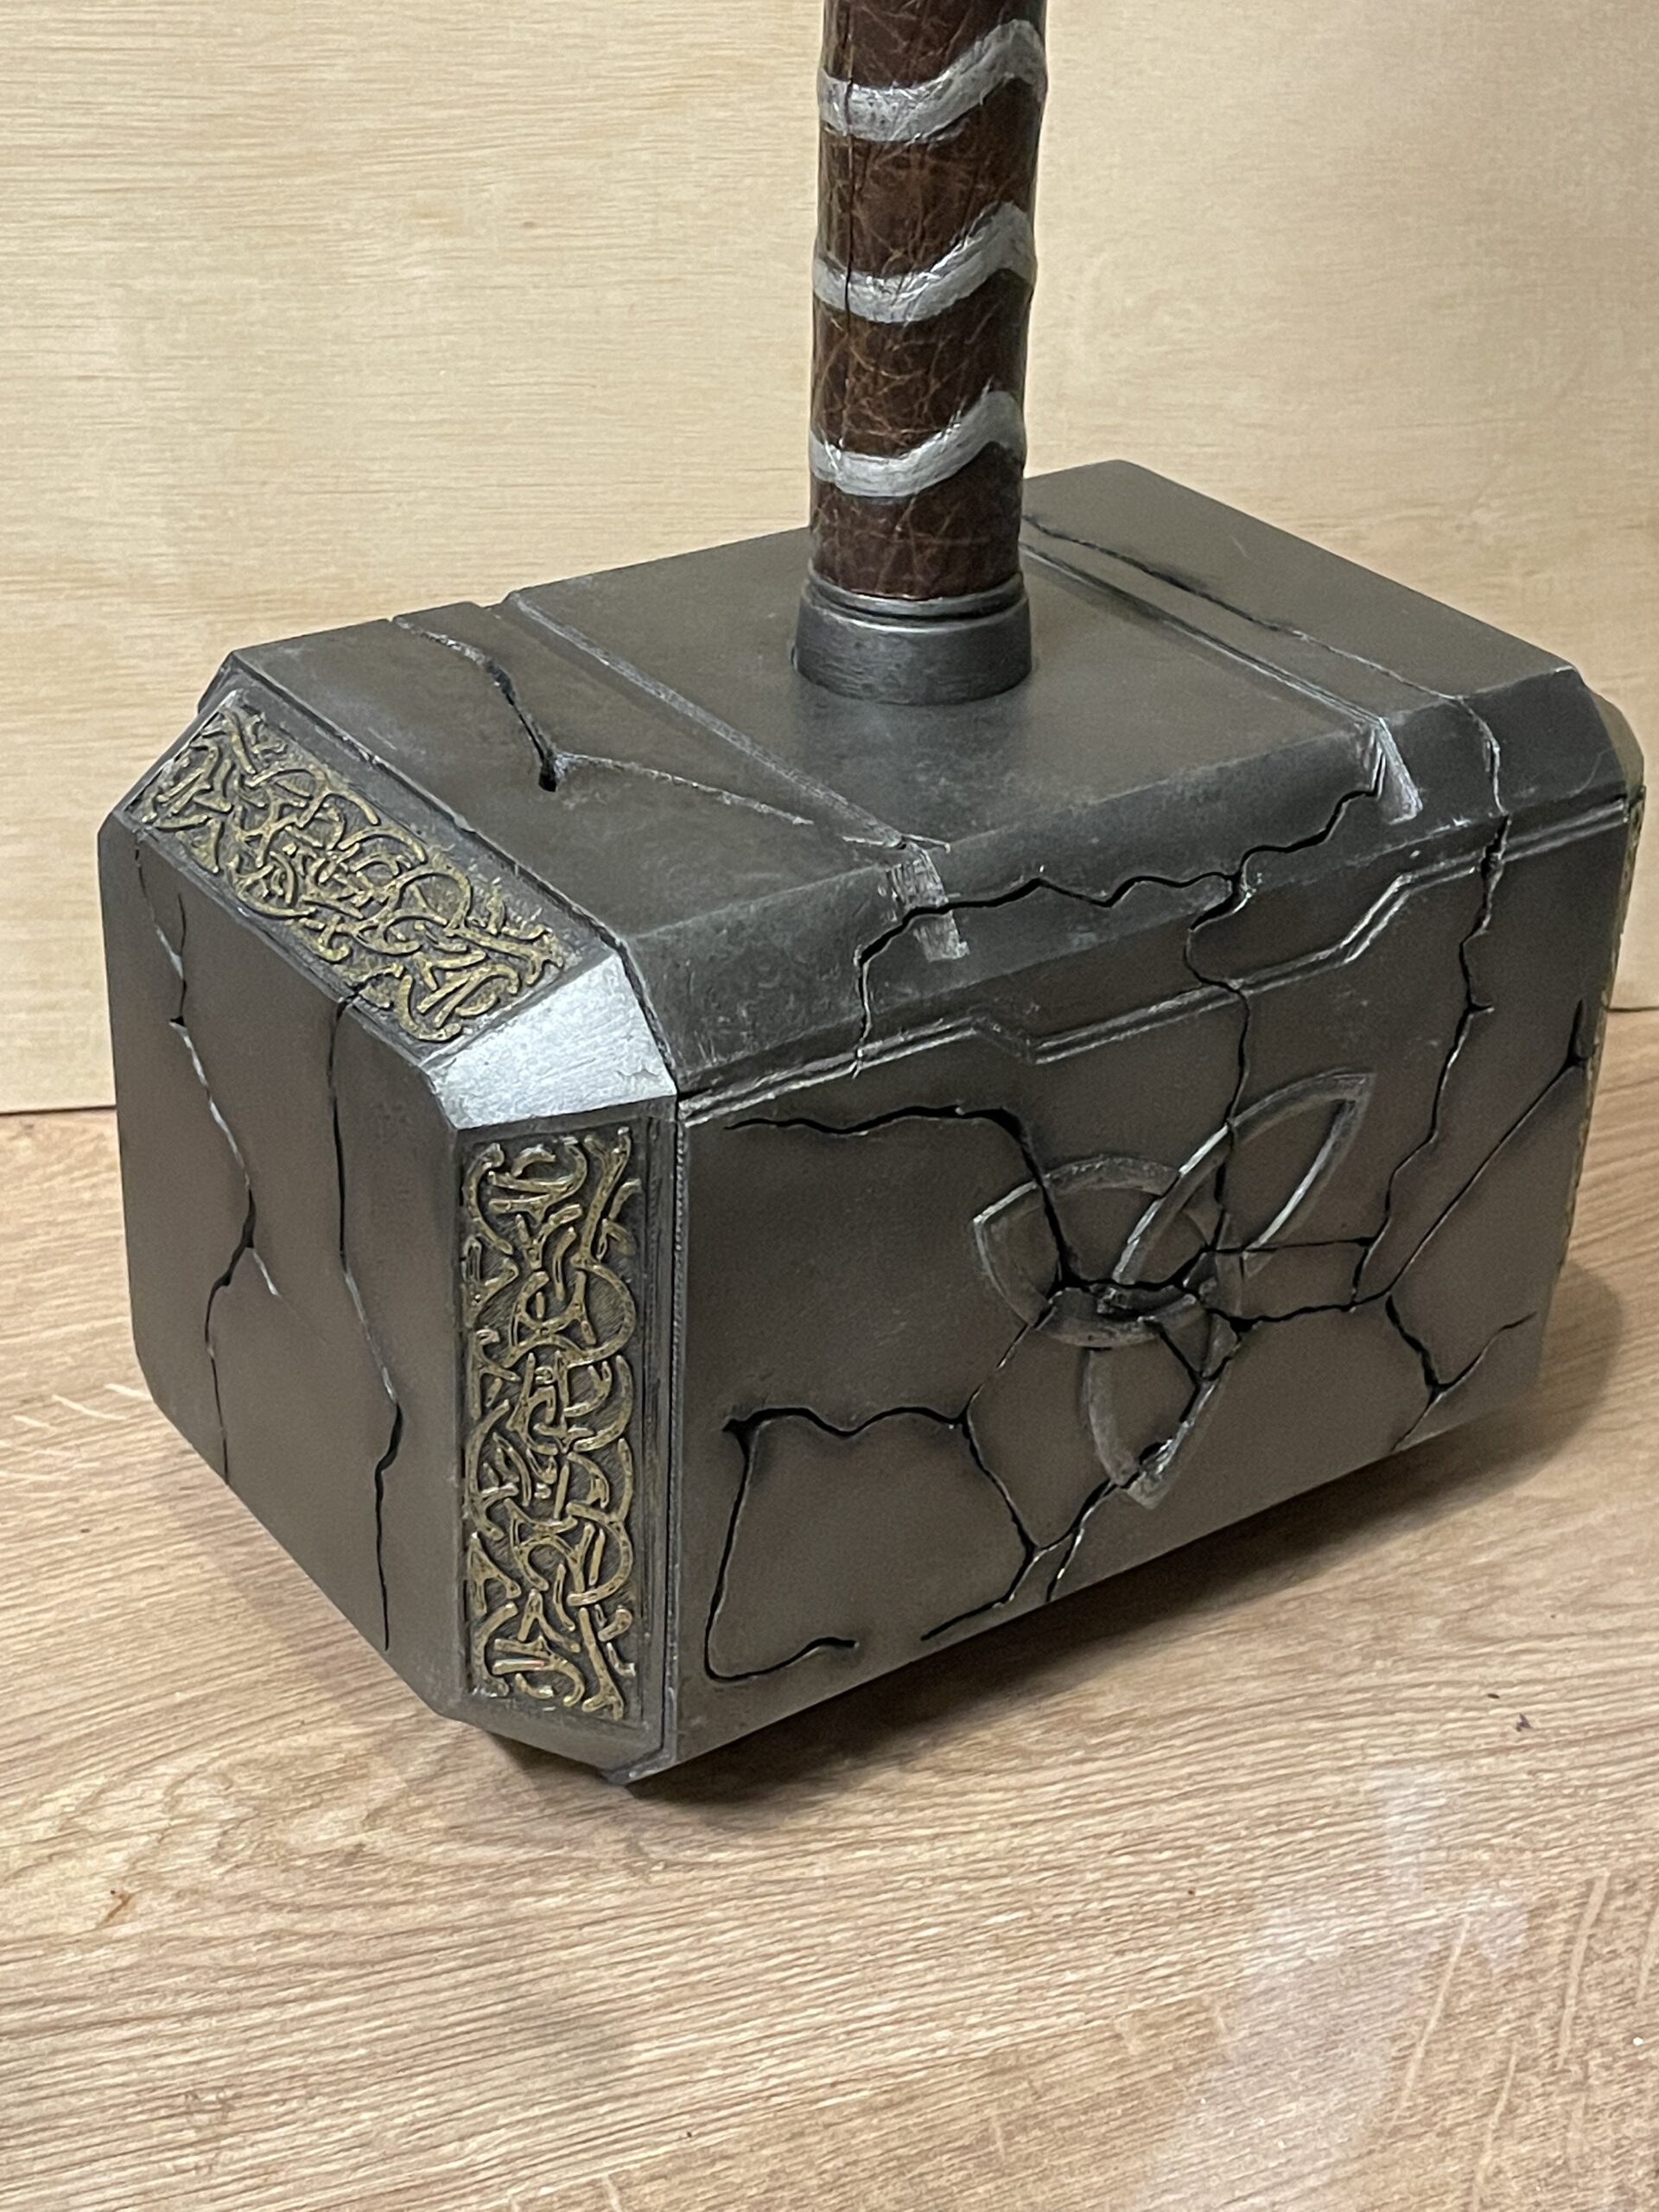
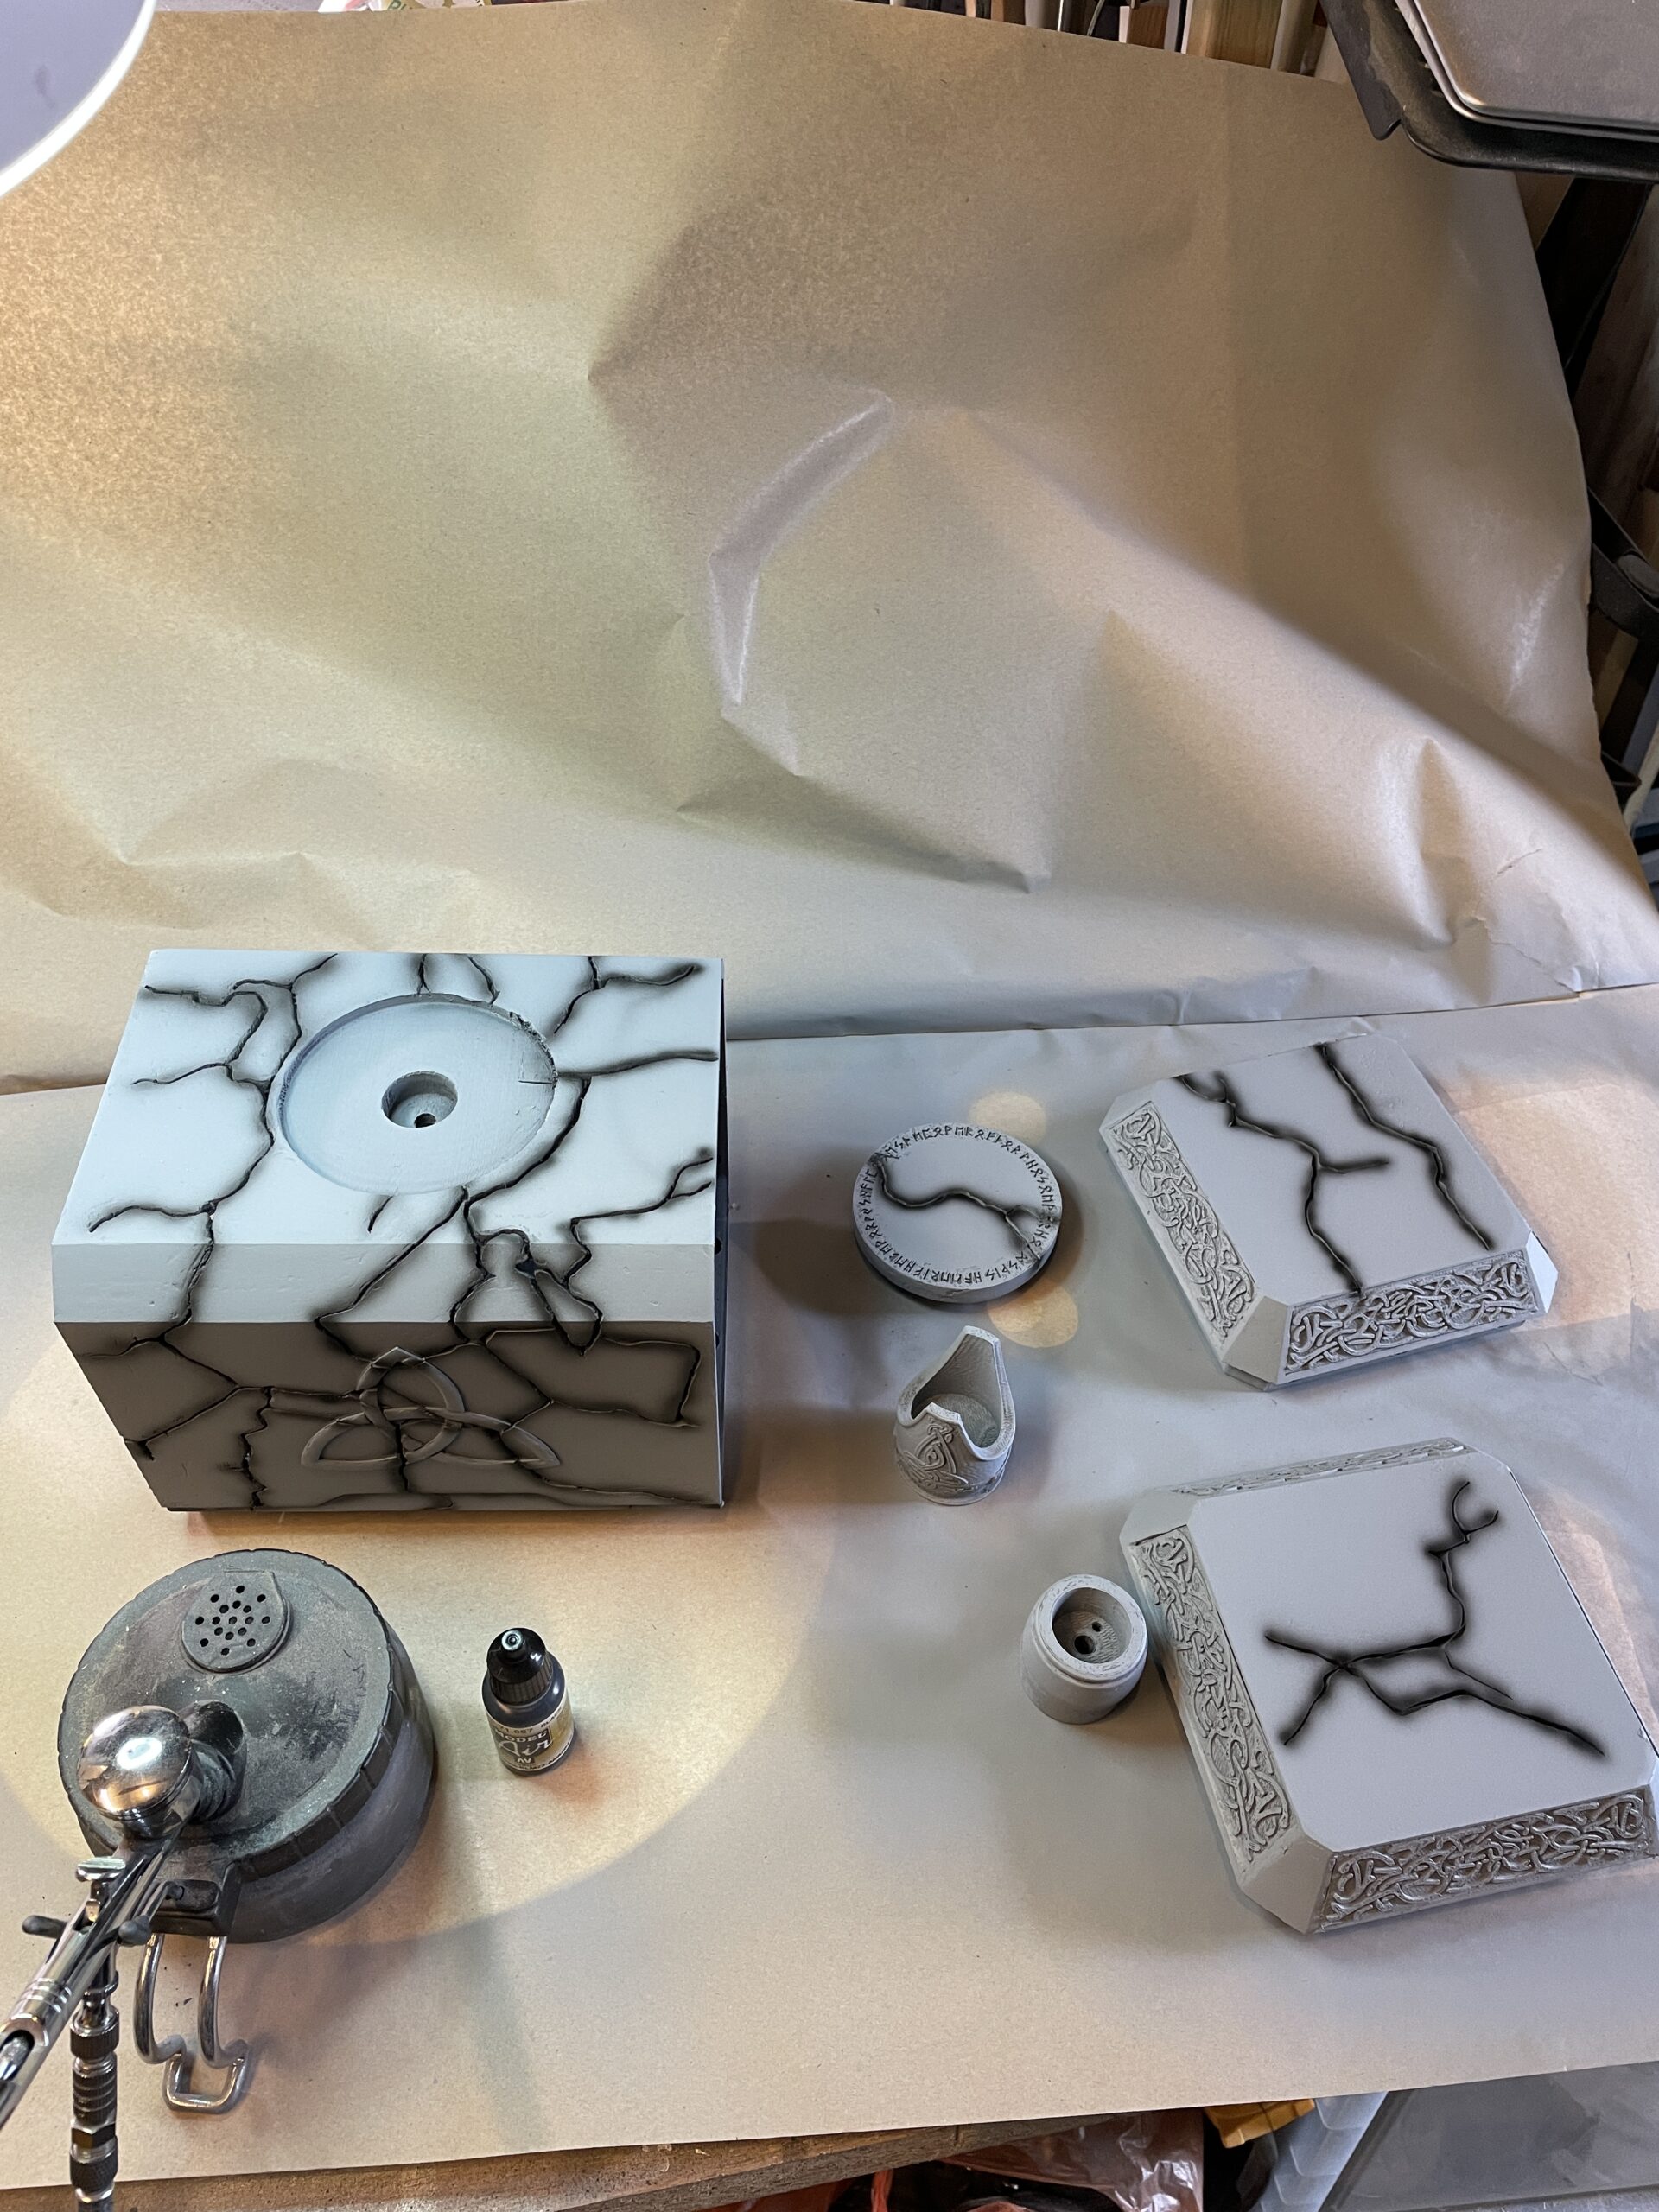
The Triquetra is formed from 3 identical pieces which intersect. I printed a couple of spares for Justin… Just in case that is! I’ve got history of being a bit heavy handed so through it would be best.
The initial surface prep followed the same process as the first build, picking out the print artefacts and support bits from the cracks, smoothing with a metal file, filling with knifing putty and sanding flat.
Then we’re ready for paint and assembly!
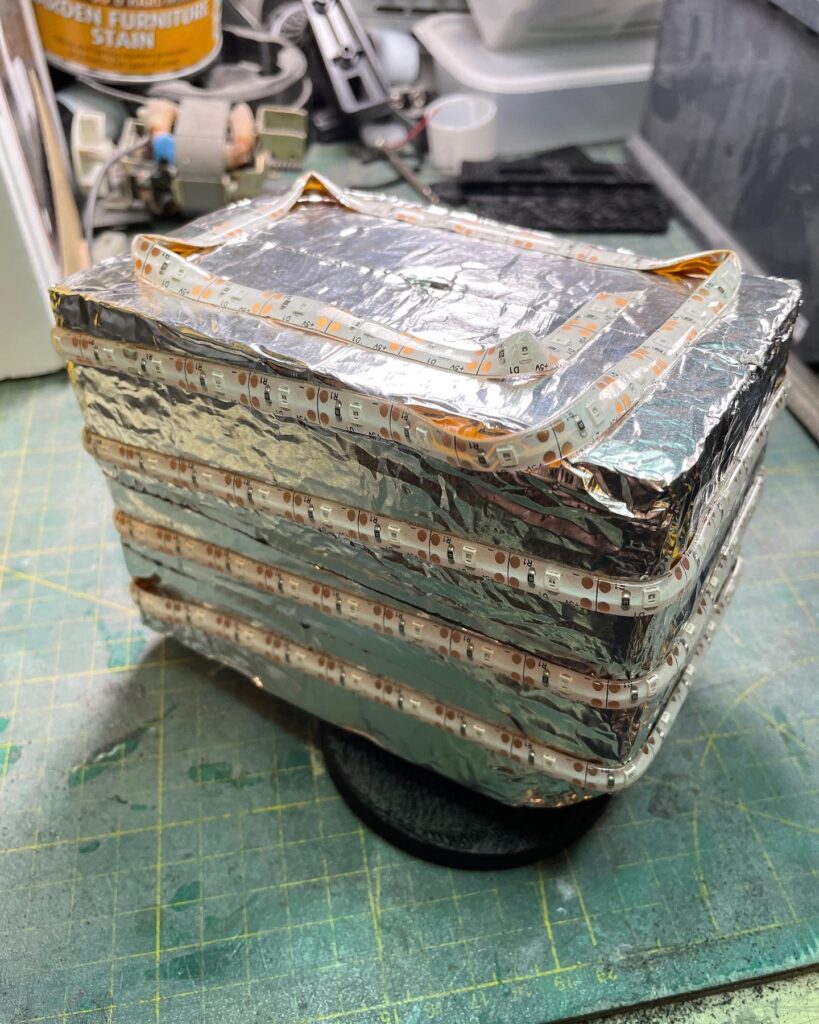
The LED block in the middle of the hammer is made of some packing foam cut and glued to size. The block is covered with aluminium tape with the LED strip wrapped around.
A LiPo battery powers the LEDs with a momentary switch in the handle. The addition for this build is a second circuit installed inside which will allow the LEDs to work without the momentary switch being depressed. The second circuit has a micro-switch which is triggered when the end plate is replaced at 180 degrees.
There’s also a special surprise in this model too. When the momentary button is pressed, a weighted motor spins up and gives the holder that feeling of power!!
Finish
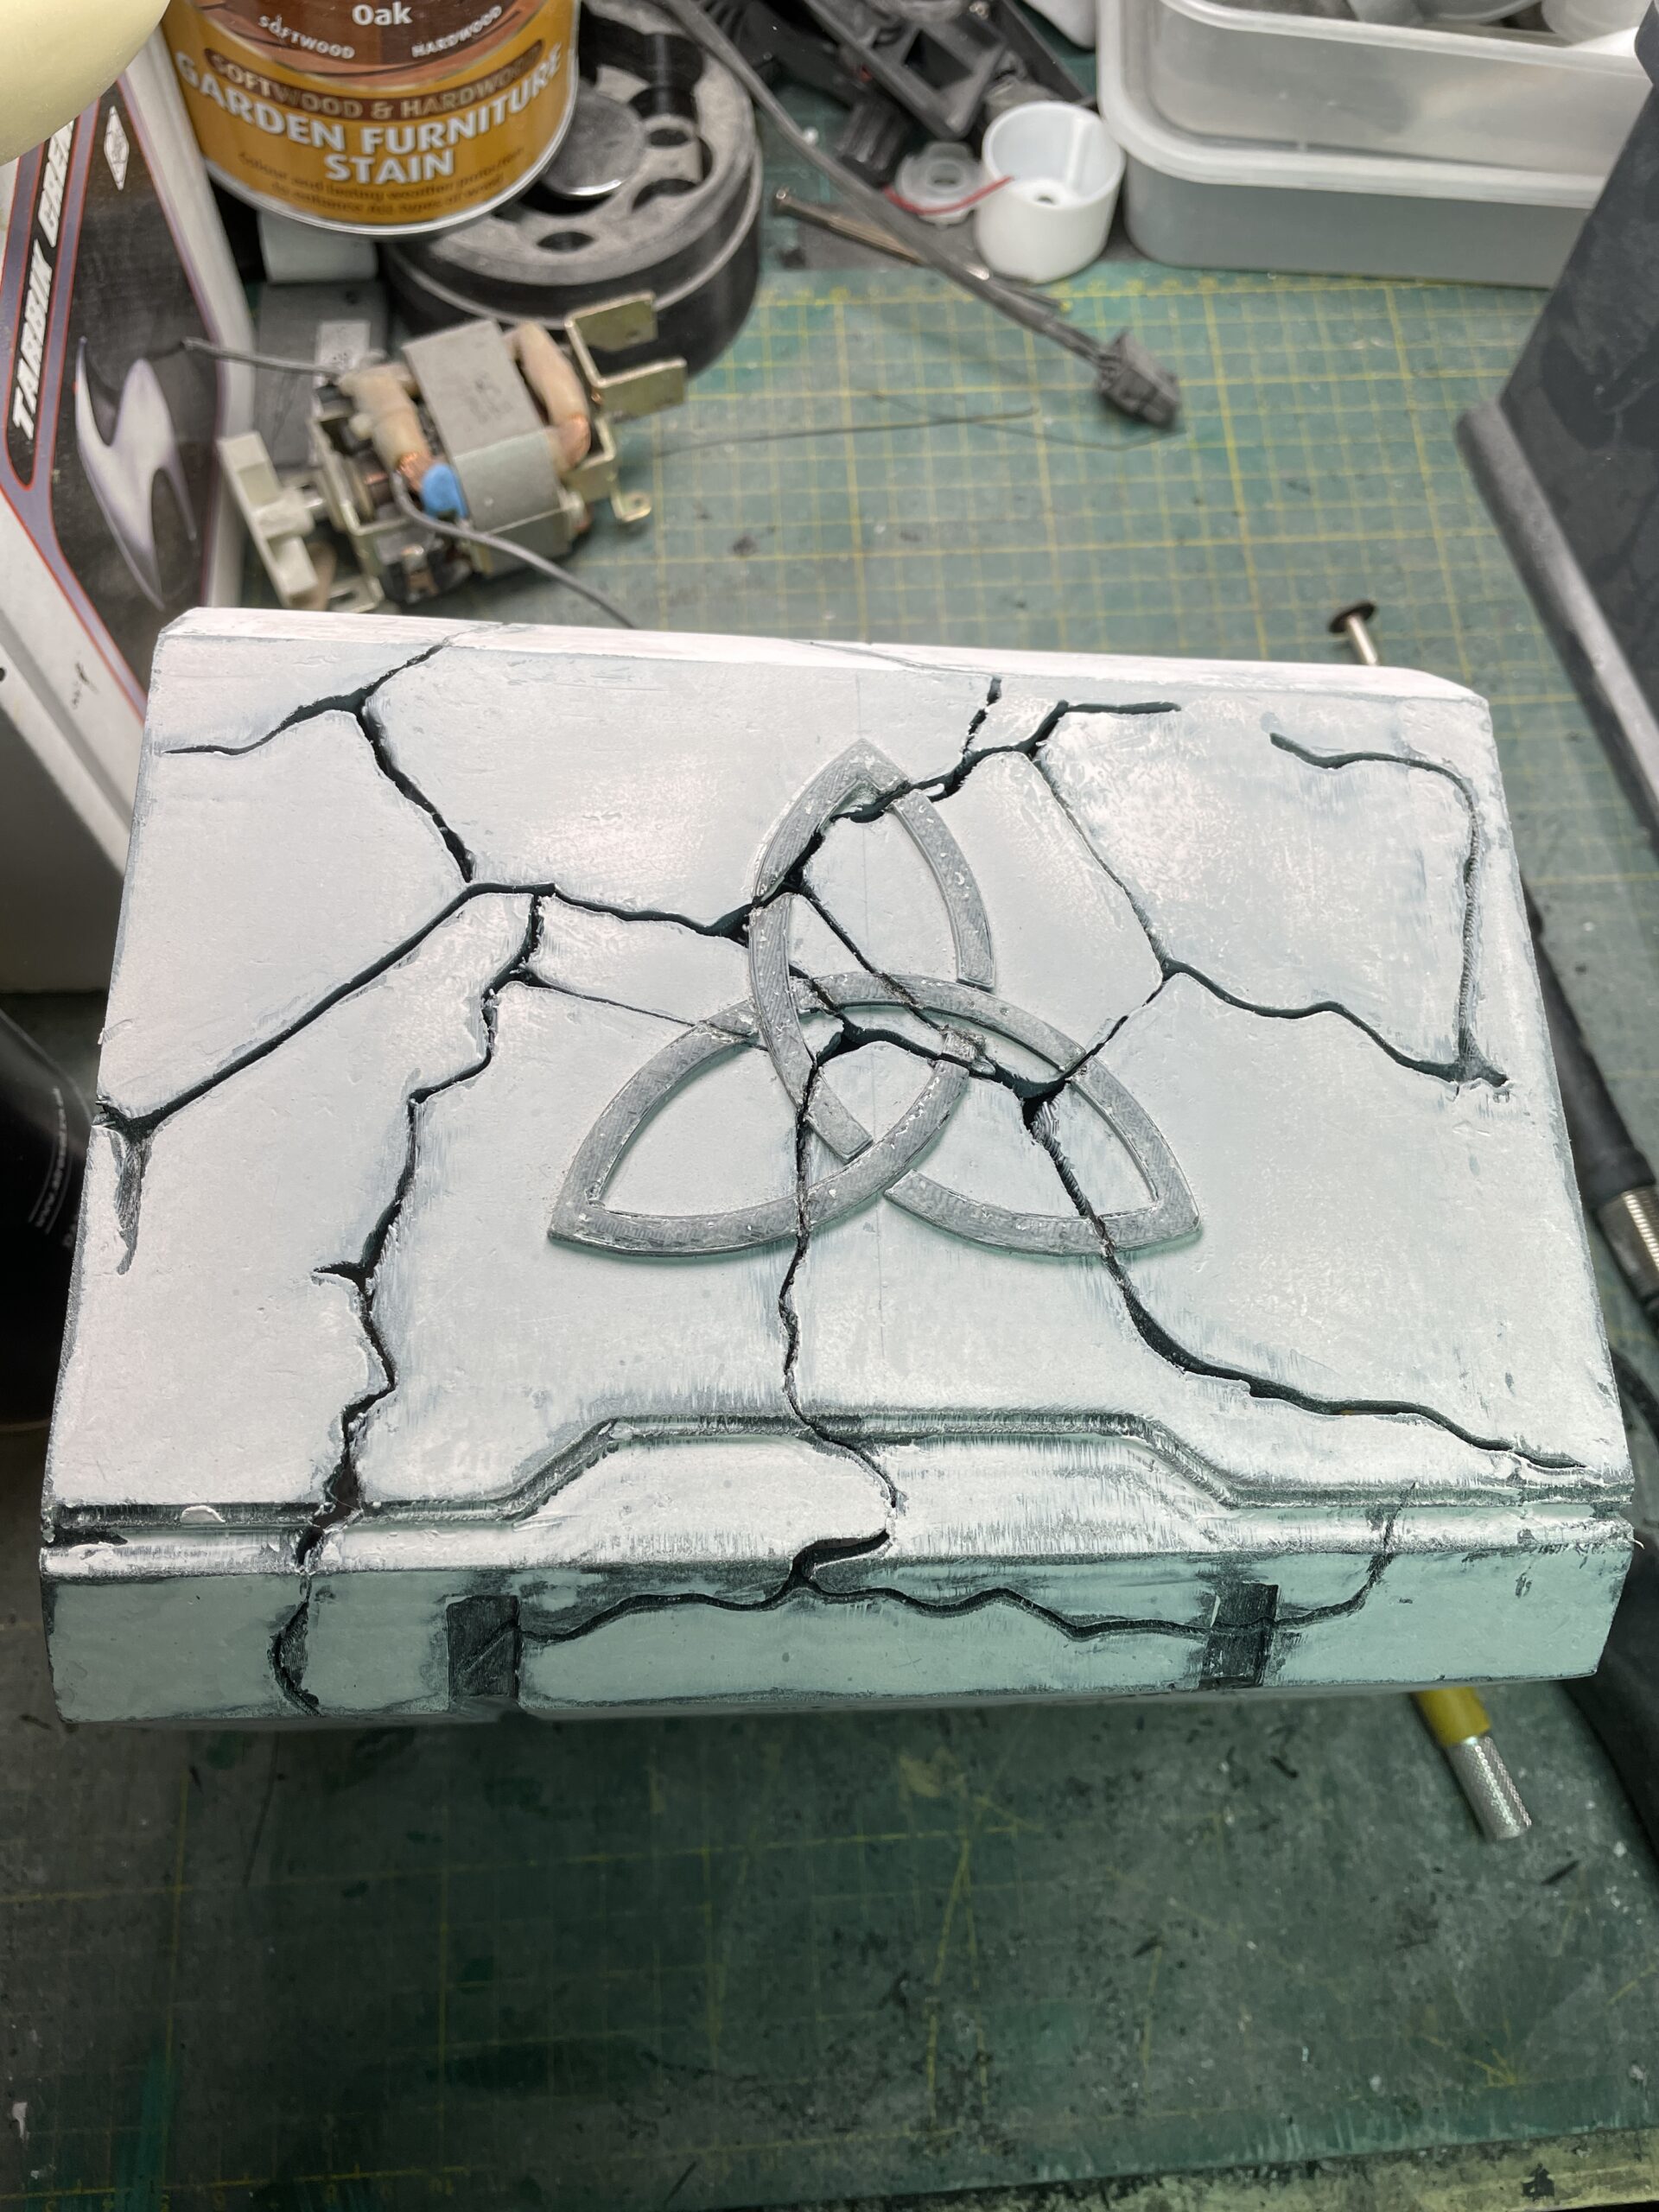

Everything gets the usual coat of primer and a quick wipe down with some 400grit paper. I airbrushed the cracks in over the top of the primer, although it’ll all be covered up with the gunmetal layer, I feel that the initial shading lends a little bit of depth and consistency to the cracks.
After the gunmetal is airbrushed on, I added some black and silver texturing with a sponge. This gives the hammer it’s used and worn look and provides more depth to the surface.
All of the pieces get finished separately to maintain the isolation when they’re assembled.