Build
This Mjolnir was 3D printed from an STL which I sourced from Do3D.com. Ok I paid for it, but I reckon it was worth it.
Printing was pretty straightforward using both of my printers using Amazon’s PLA filament and I oriented all of the parts so that the need for supports was minimised.
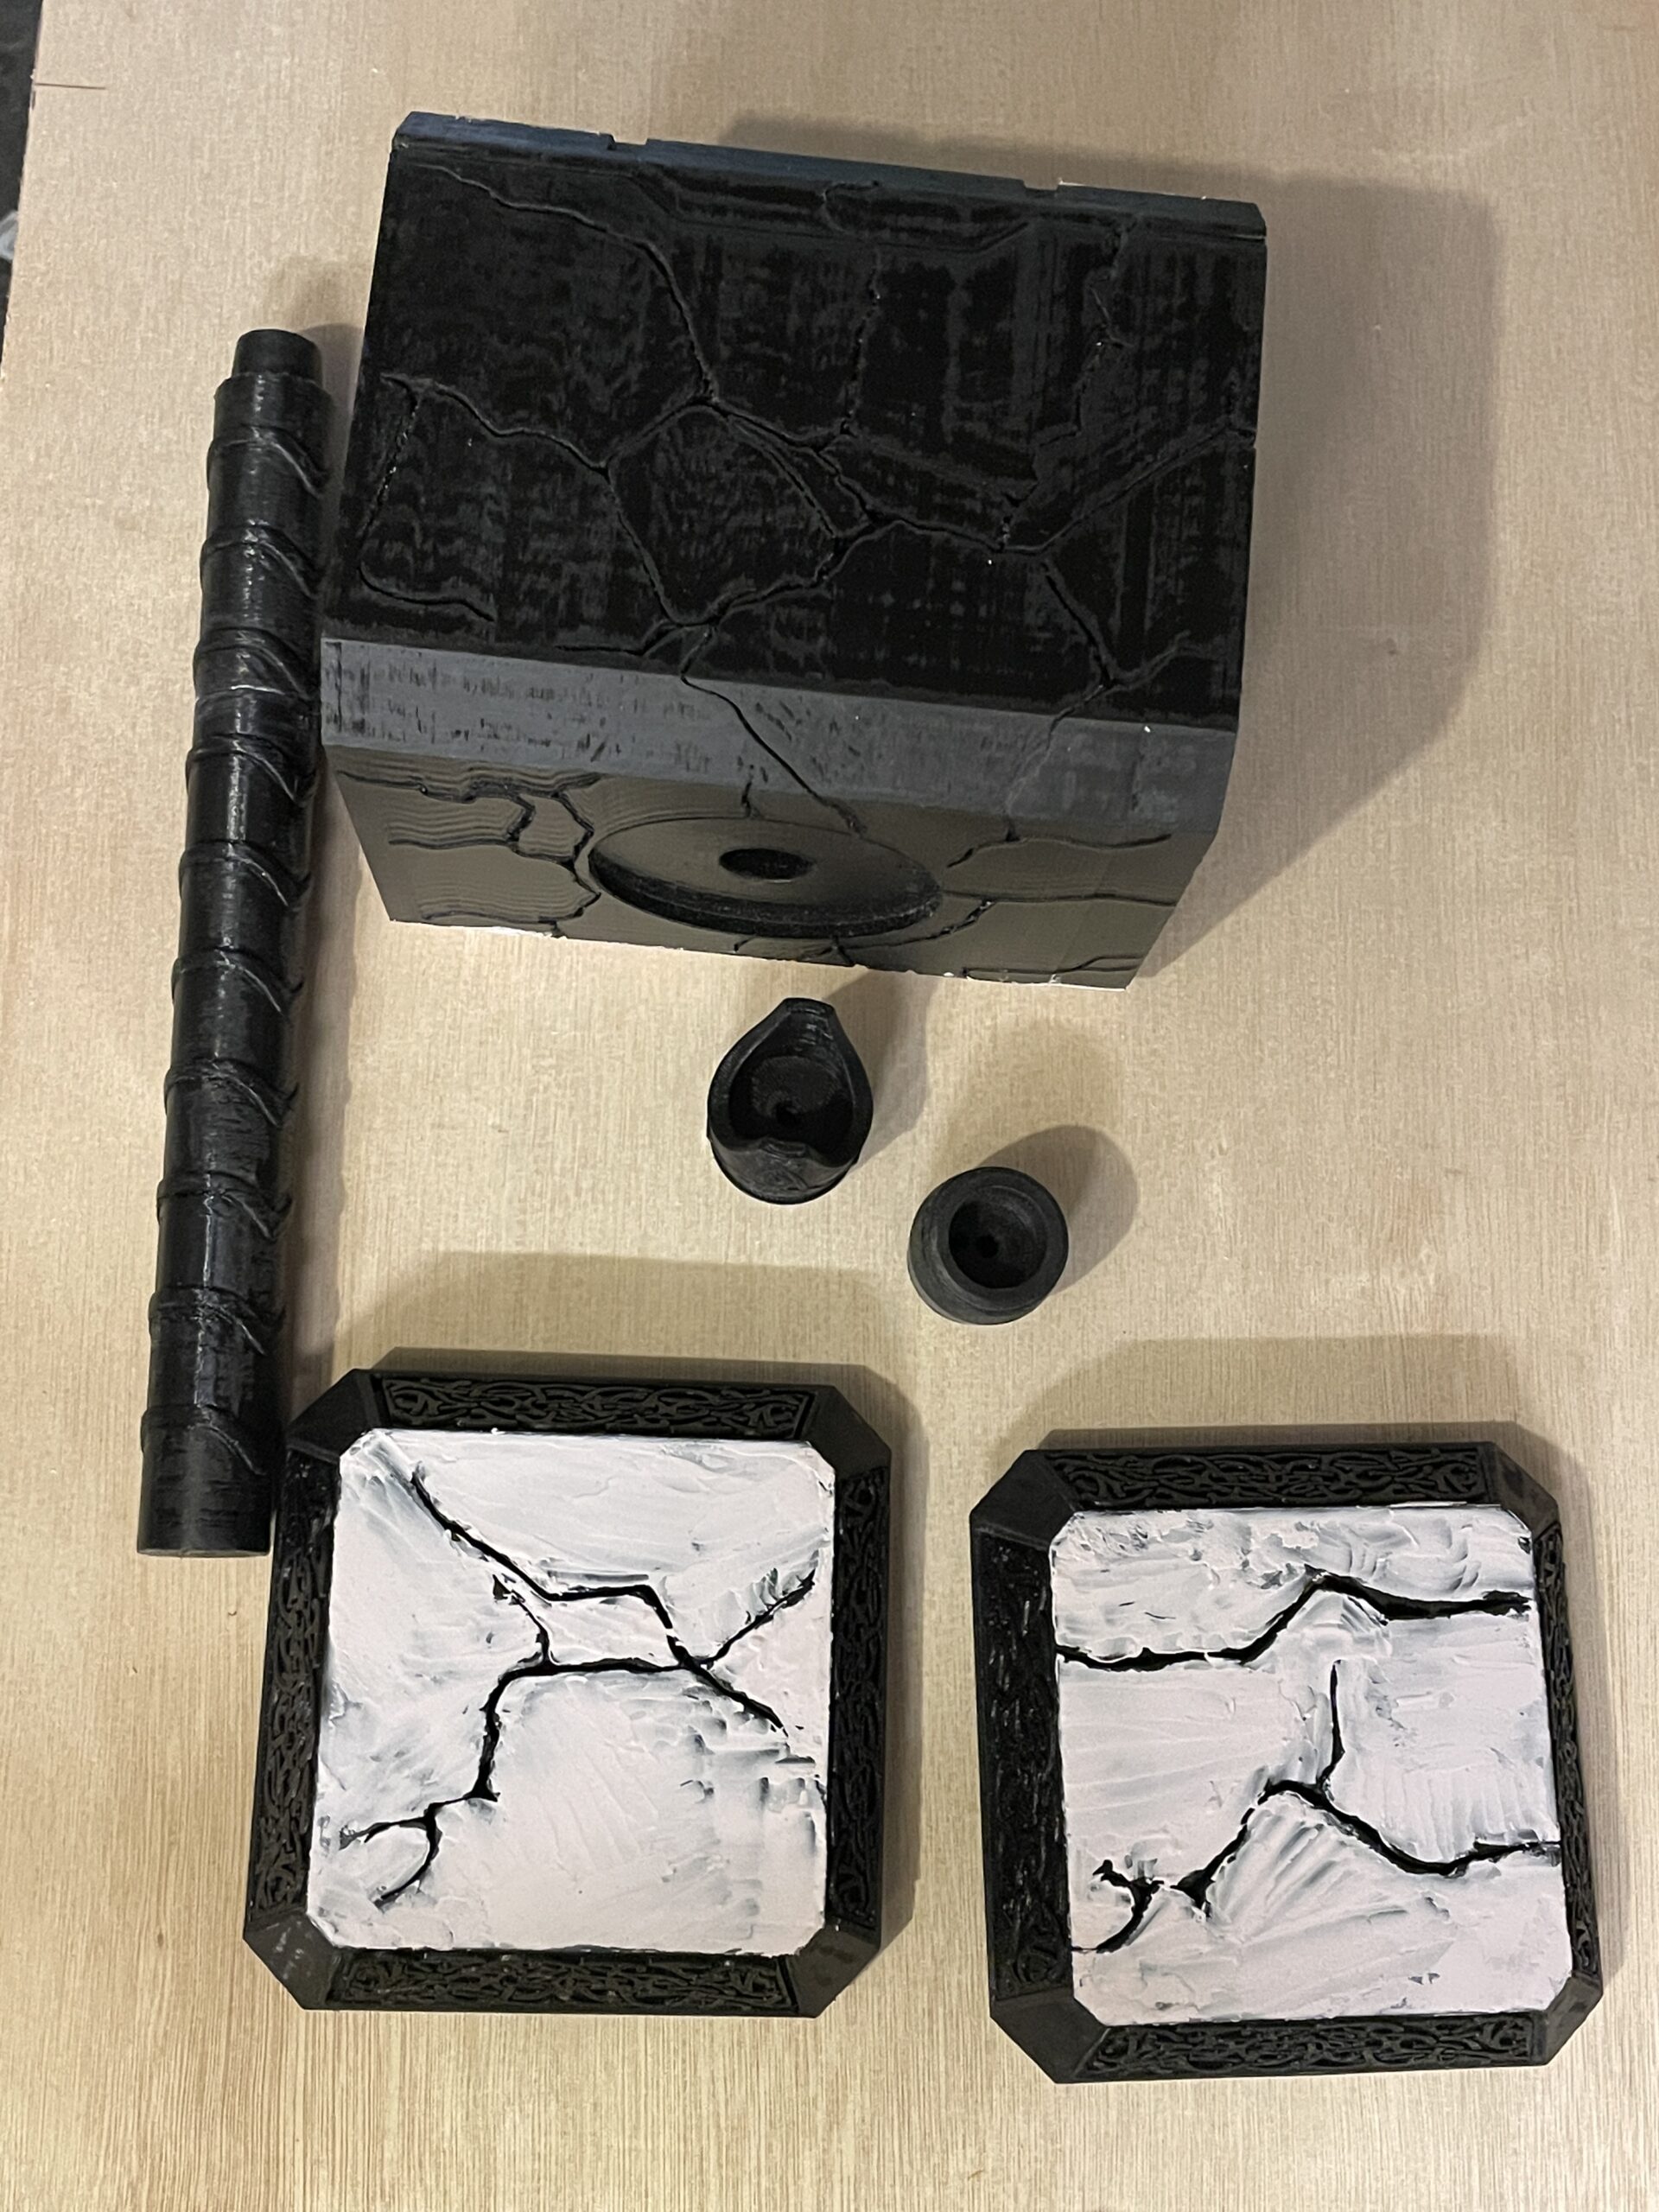
The handle is printed in two part which slot together pretty well after a quick clean-up.
I use a metal file to take the flat surfaces down and remove the printing artefacts, ridges and random bit of extrusion. When the surface is decently flat, I used automotive knifing putty over all of the surfaces and sanded this back with a palm sander. Although this is a tedious process, I find it easier that fighting with the layer lines on the PLA!
The cracks in the body needed to have the tiny bits of printing support removed which was a bit of a challenge and needed a fine knife and sculting tools to get everything cleared.
This picture shows the filed main body and the filled end caps ready to be sanded.
There is a hole through the centre of the handle and the top cap and main body for a 6mm rod to be inserted and I used some all-thread to give the structure some strength.

The engraved panels were stuck into the endcaps and after the surfaces were filled and sanded, everything got a coat of primer and I gave the cracks another once-over as the remaining bits of support were easier to spot.
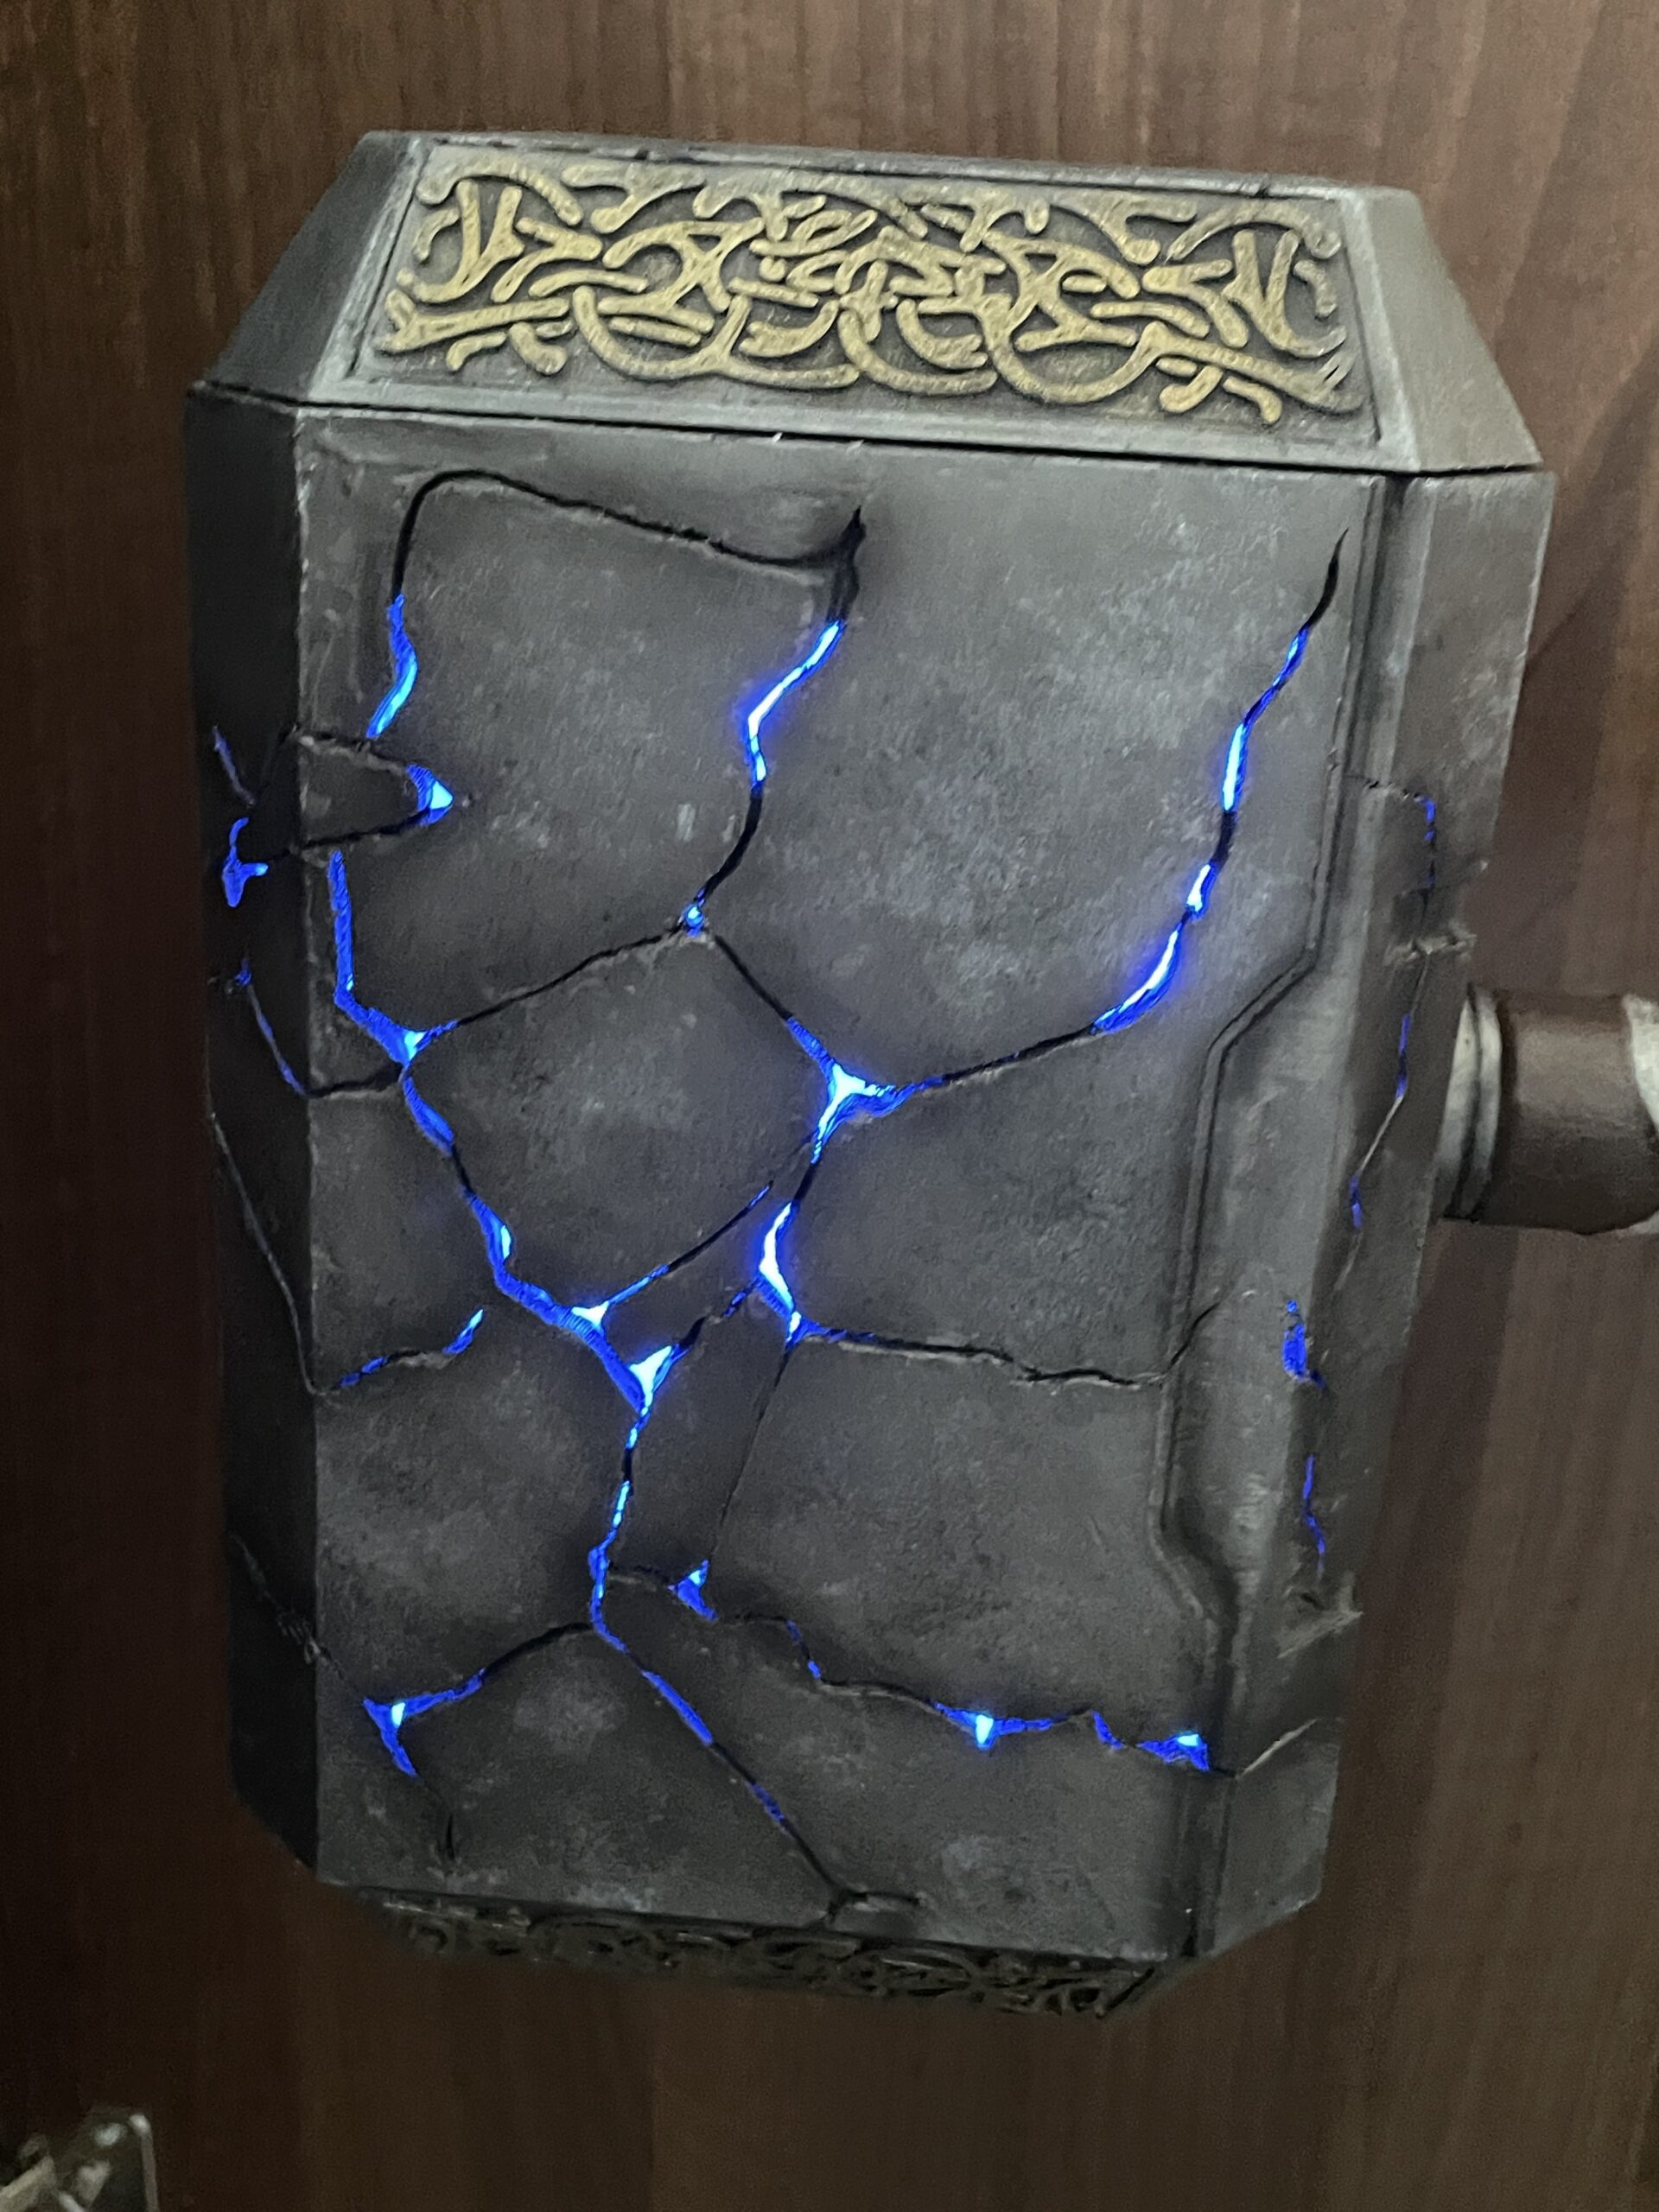
The lighting is a simple blue 5v LED strip which I wrapped around a packing foam block. To maximise the output I first wrapped the block in aluminium tape and the LEDs were stuck onto that. Finally a wrapping of translucent foam was wrapped over the top of that. I used a LiPo battery and a USB charging circuit to both charge the battery and also to provide a 5v output for the LEDs.
To add a little but of theatre I used a small momentary switch embedded into the handle to provide my with direct control of the lighting.
I added some more aluminium tape to the inside of the main body – avoiding the cracks – to give a bit more light bounce and everything was ready for final assembly.
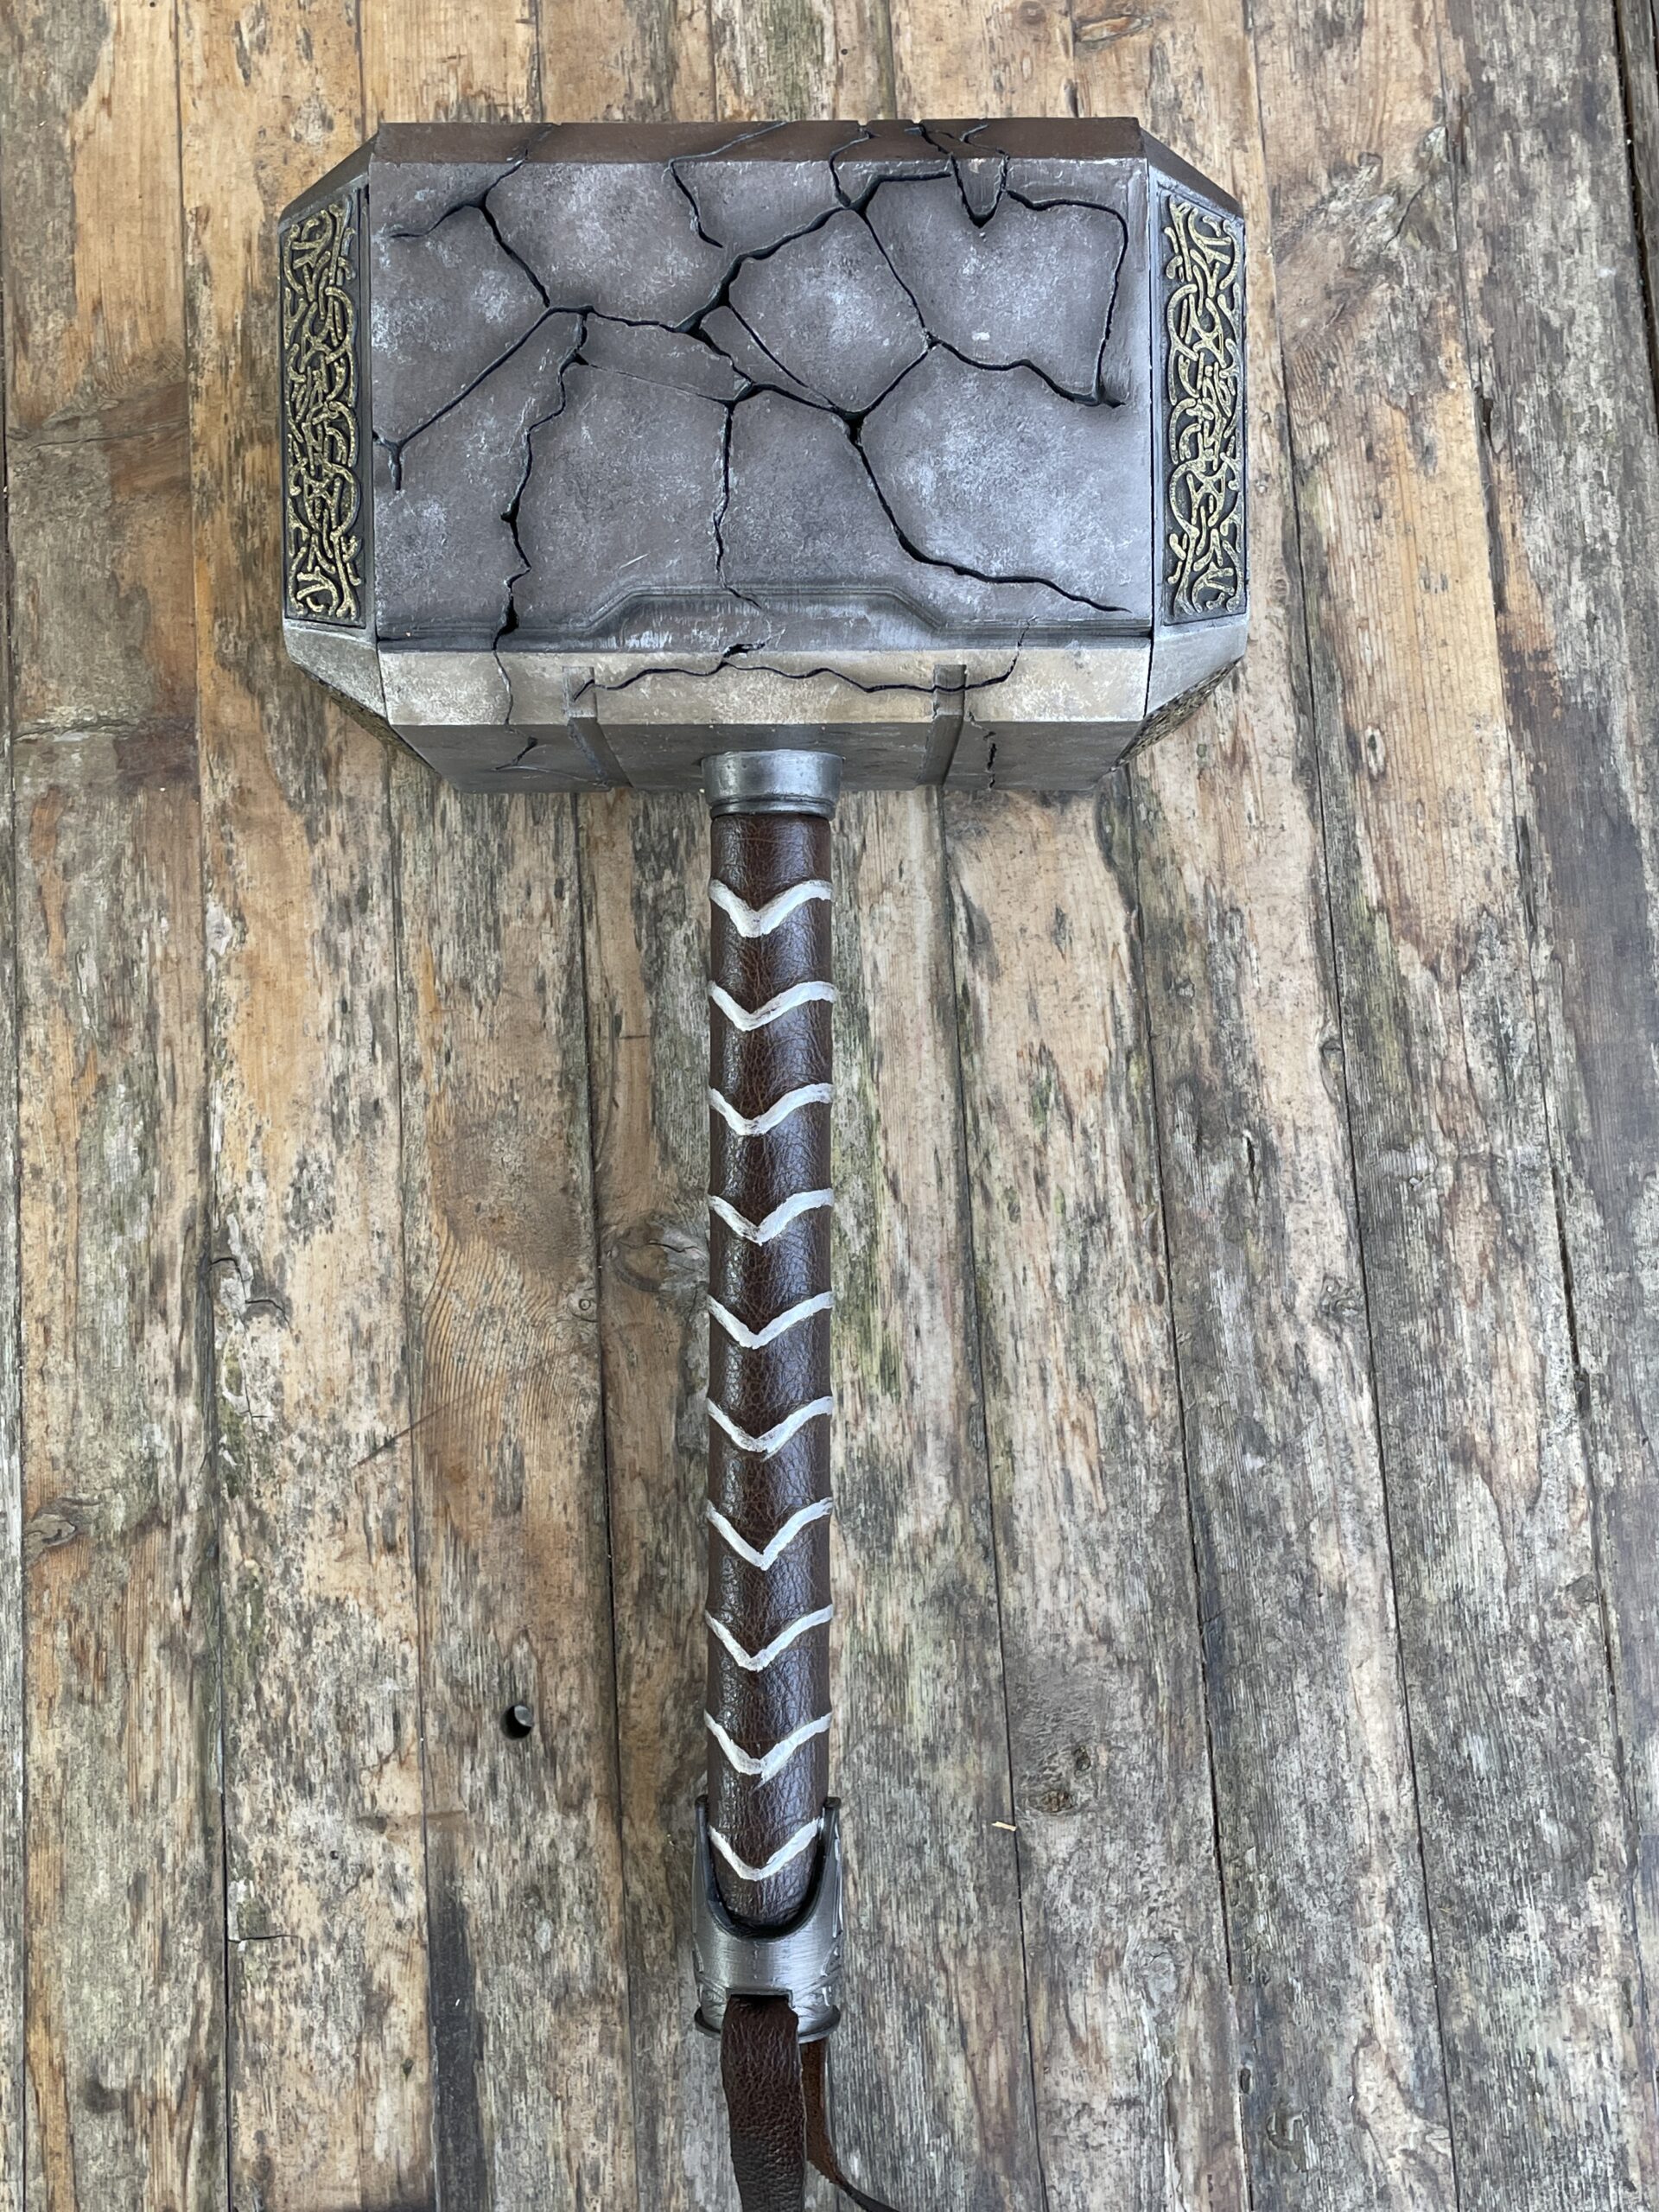
I used my airbrush and some Vallejo Black to give the cracks some depth and went over the whole main structure and the handle top and bottom caps with Vallejo Steel.
I then grabbed a bit of old sponge and some Silver and Process Black acrylic paint and started adding some depth and texture across the surfaces.
While the paint was all drying I sorted out the handle which I knew I wanted to wrap in leather. The printed handle had the metal grips formed into it but I felt that if I formed the leather over and around them, Id be able to pick the grip shapes out with meatlic paint.
This worked really well and I used some chrome lacquer and a fine brush to bring the shapes out.
I also cut a strip of leather for the handle loop.
Then it was just getting everything together, inserting the LED block, connecting the wires the ones I ran from the switch under the leather in the handle and gluing everything together.
The final touch was to sponge some bright brass over the engraving panels which really made them pop.
Materials
- Amazon PLA 3D filament
- Leather offcuts
- Holts knifing putty
- Vallejo Black, Steel and Bright Brass paints
- Silver and Process Black acrylic paints
- Molotow Liquid Chrome
- Car washing sponge
- 6mm all-thread rod
- Packing foam stuck into a block
- Translucent white packing foam / Plastizote
- 5v blue LED strip
- 3.7v LiPo battery
- USB LiPo charging circuit with 5v output
- Aluminium foil tape
- Contact cement
- hot glue
- CA glue
Tools
- Custom i3 and X-Formd 3d printers
- Side cutters
- Craft knives
- Craft sheers
- Sculpting tools
- Airbrush