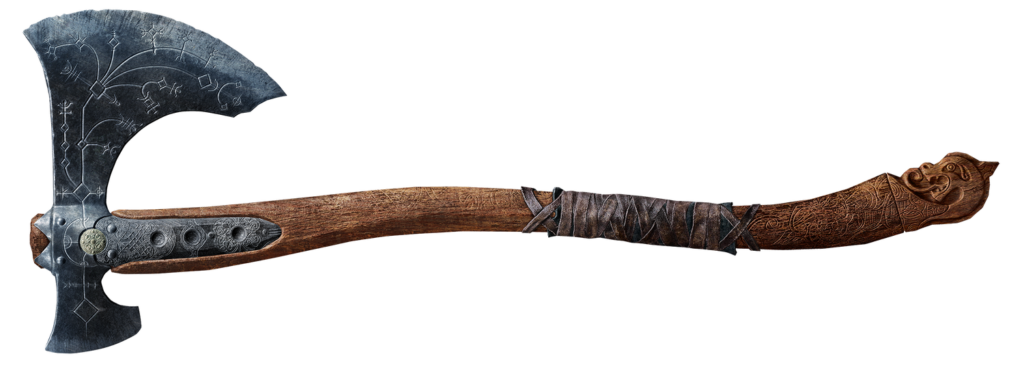
Time for another challenge.. I’ve just started God of War: Ragnarok and thought I’d give Kratos’ big chopper a go!
Like many weapons this one goes through a lot of visual iterations as you progress through the game, but I like the ‘used and abused’ look when I’m making things, so we’re going for the basic model(ish).
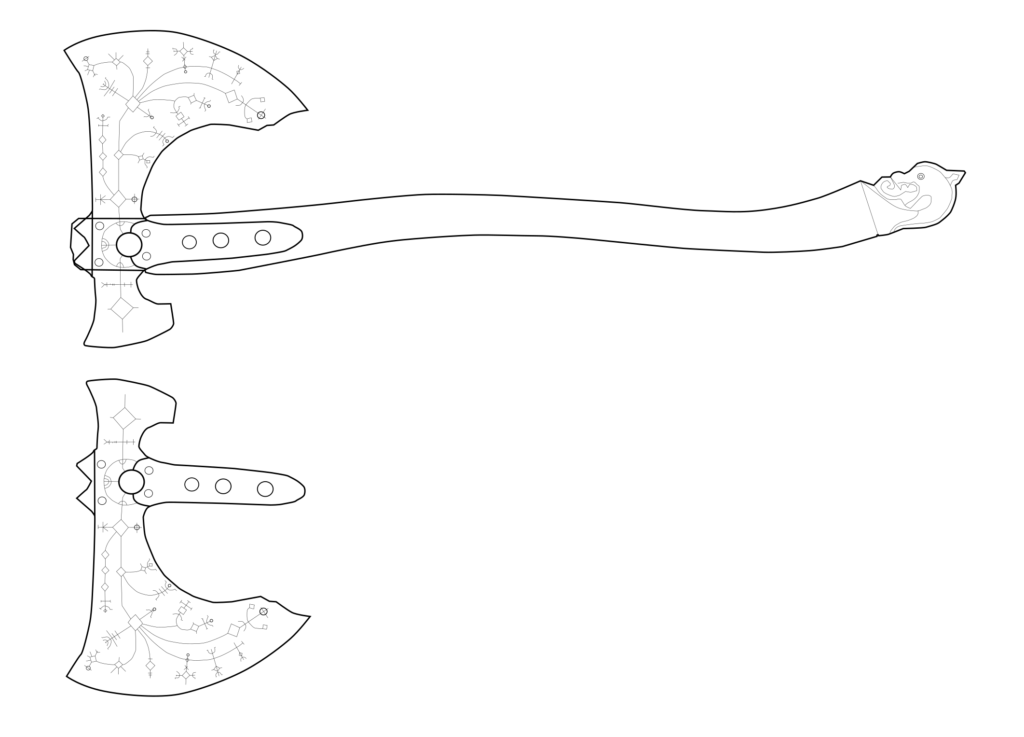
I made the design I’m going to use from the reference above and split the handle and the head into a couple of layers, then duplicated and mirrored the head so I can use that as a reference for the engraving.
I decided that I wanted to build the axe as if it were a real one, which mans making the head and shaft separately and marrying the two together.
Everything started out as 3 x 10mm HD EVA foam sheets. For the handle 2 sheets were glued and then a channel cut out for a piece of PVC pipe to help the handle retain its shape and form. Other wise it could just bend. I decided that I’d add a piece of aluminium bar inside the pipe for more stiffness and a bit of weight.
When the stiffening elements were shaped with a bit of heat gun and some brute force, I glued it in place with a good dose of hot glue. Then I roughed the top layer and glued in place.
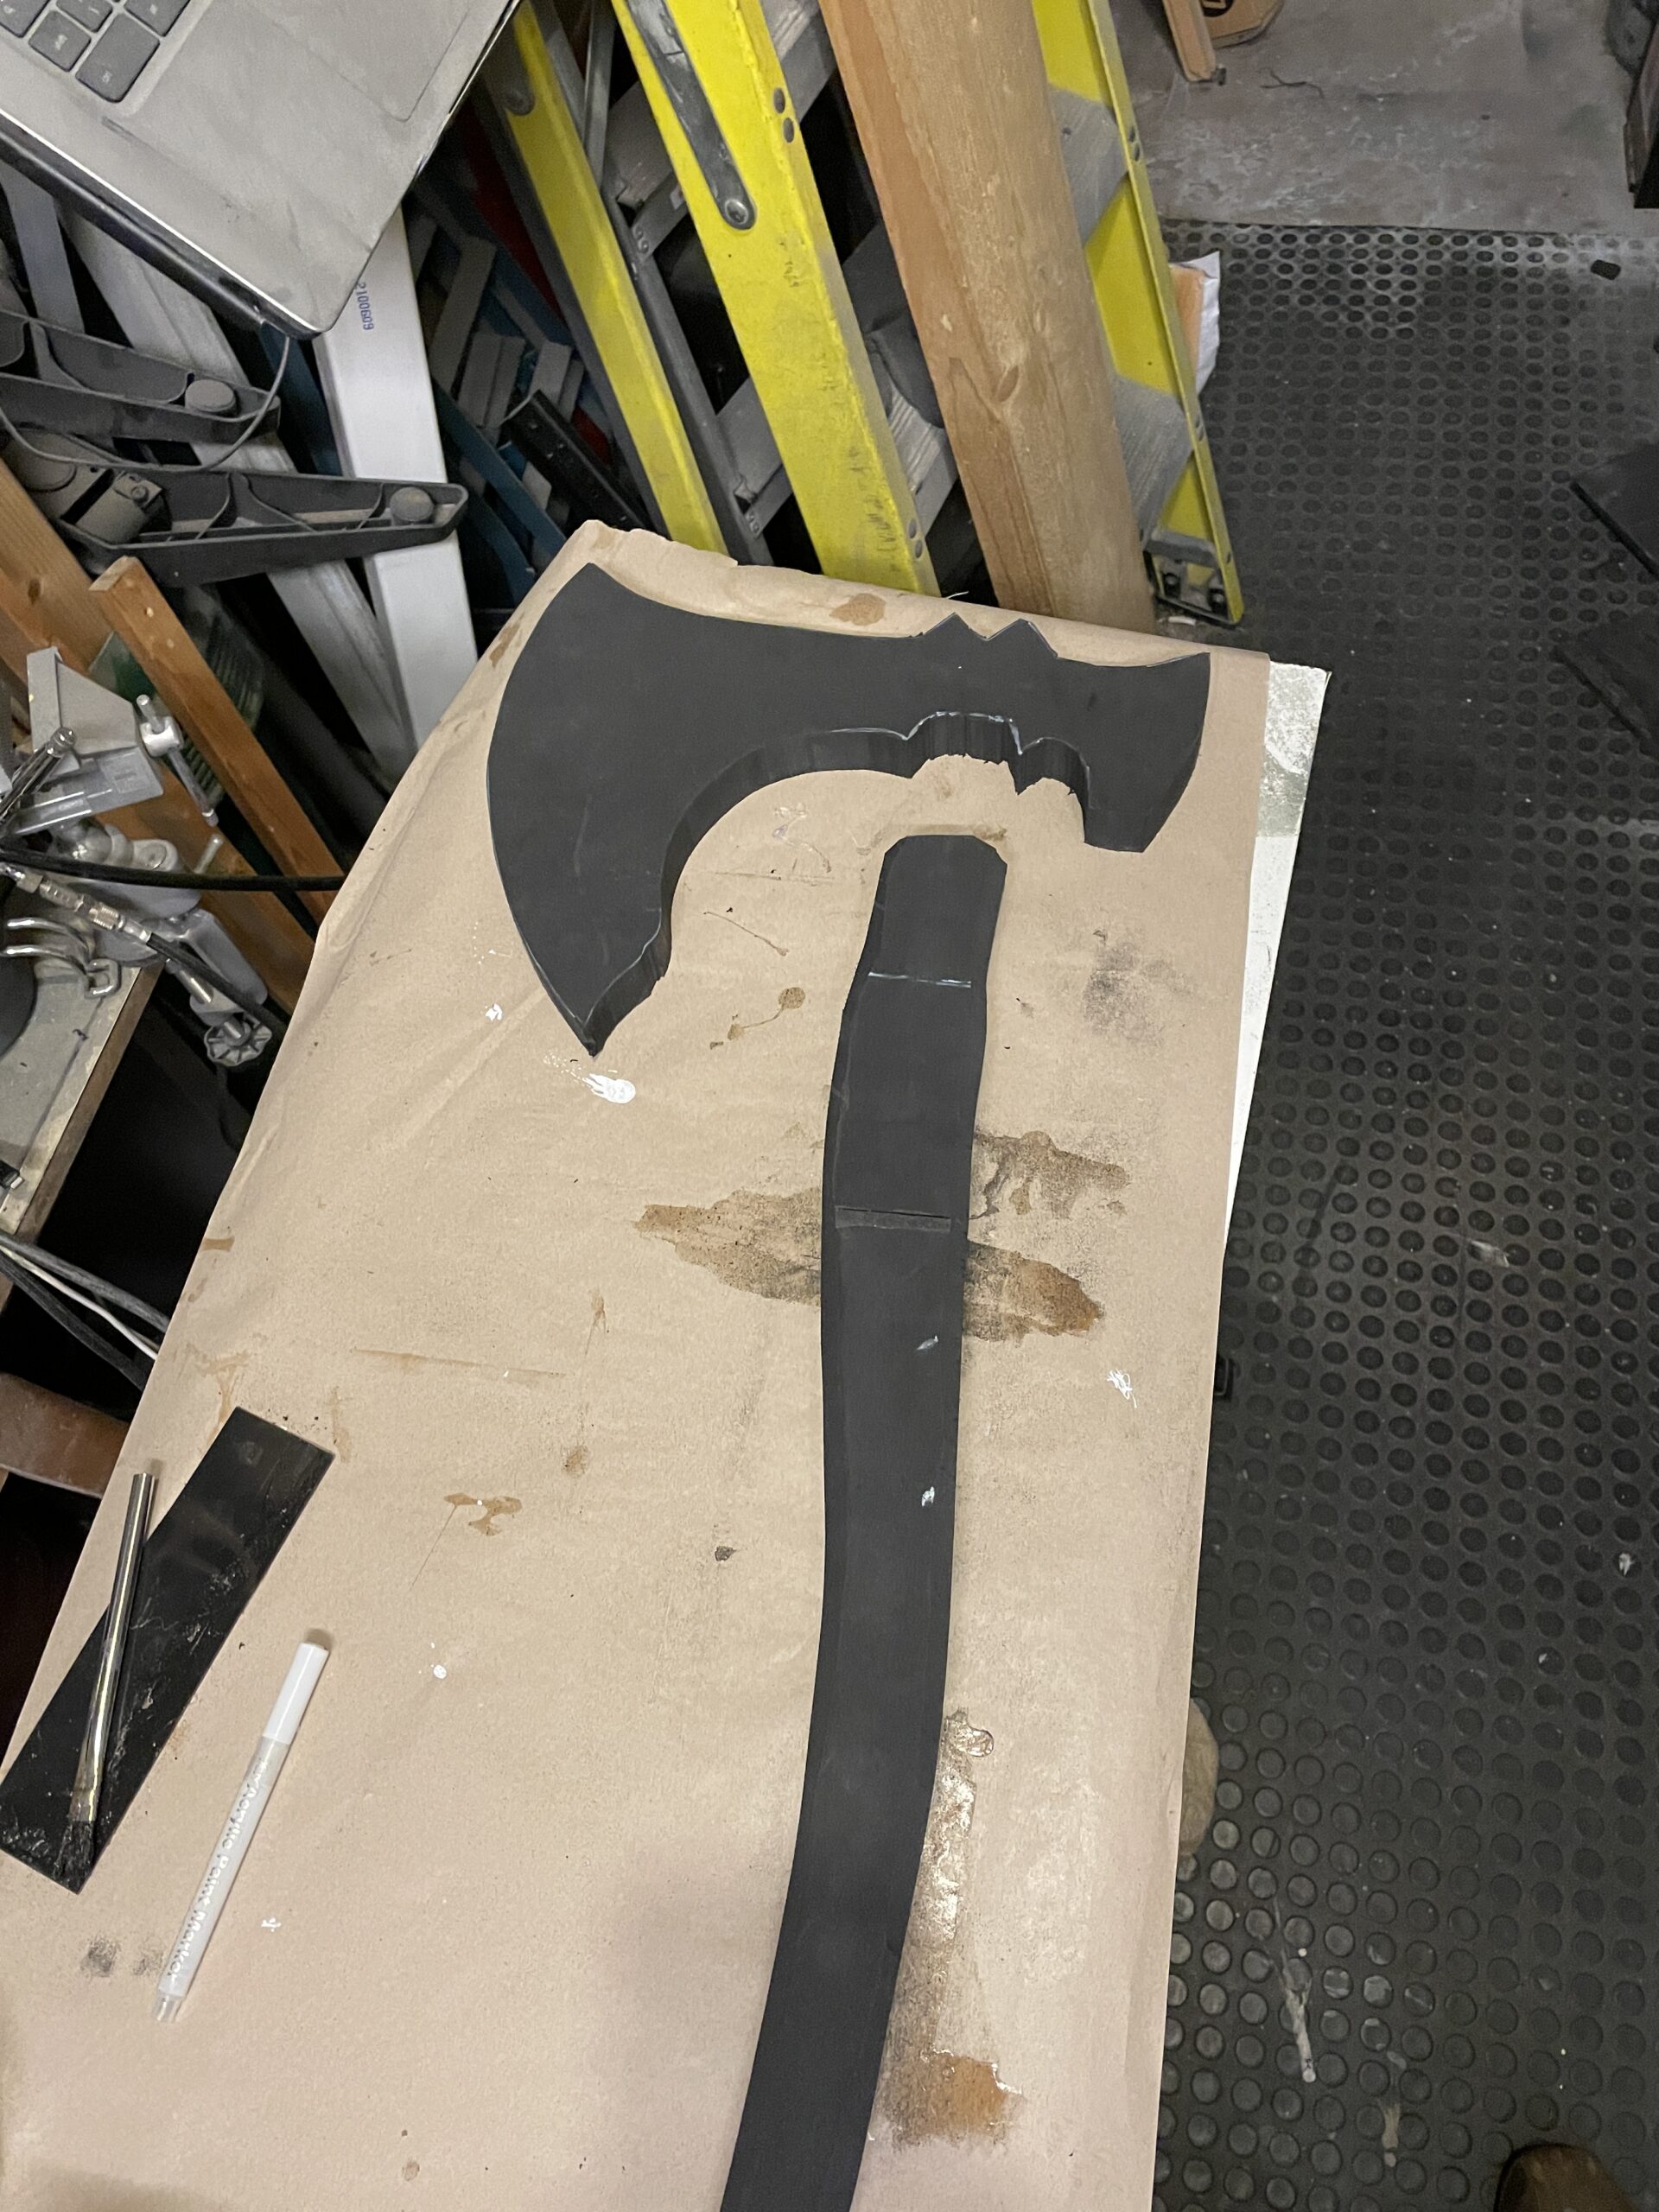
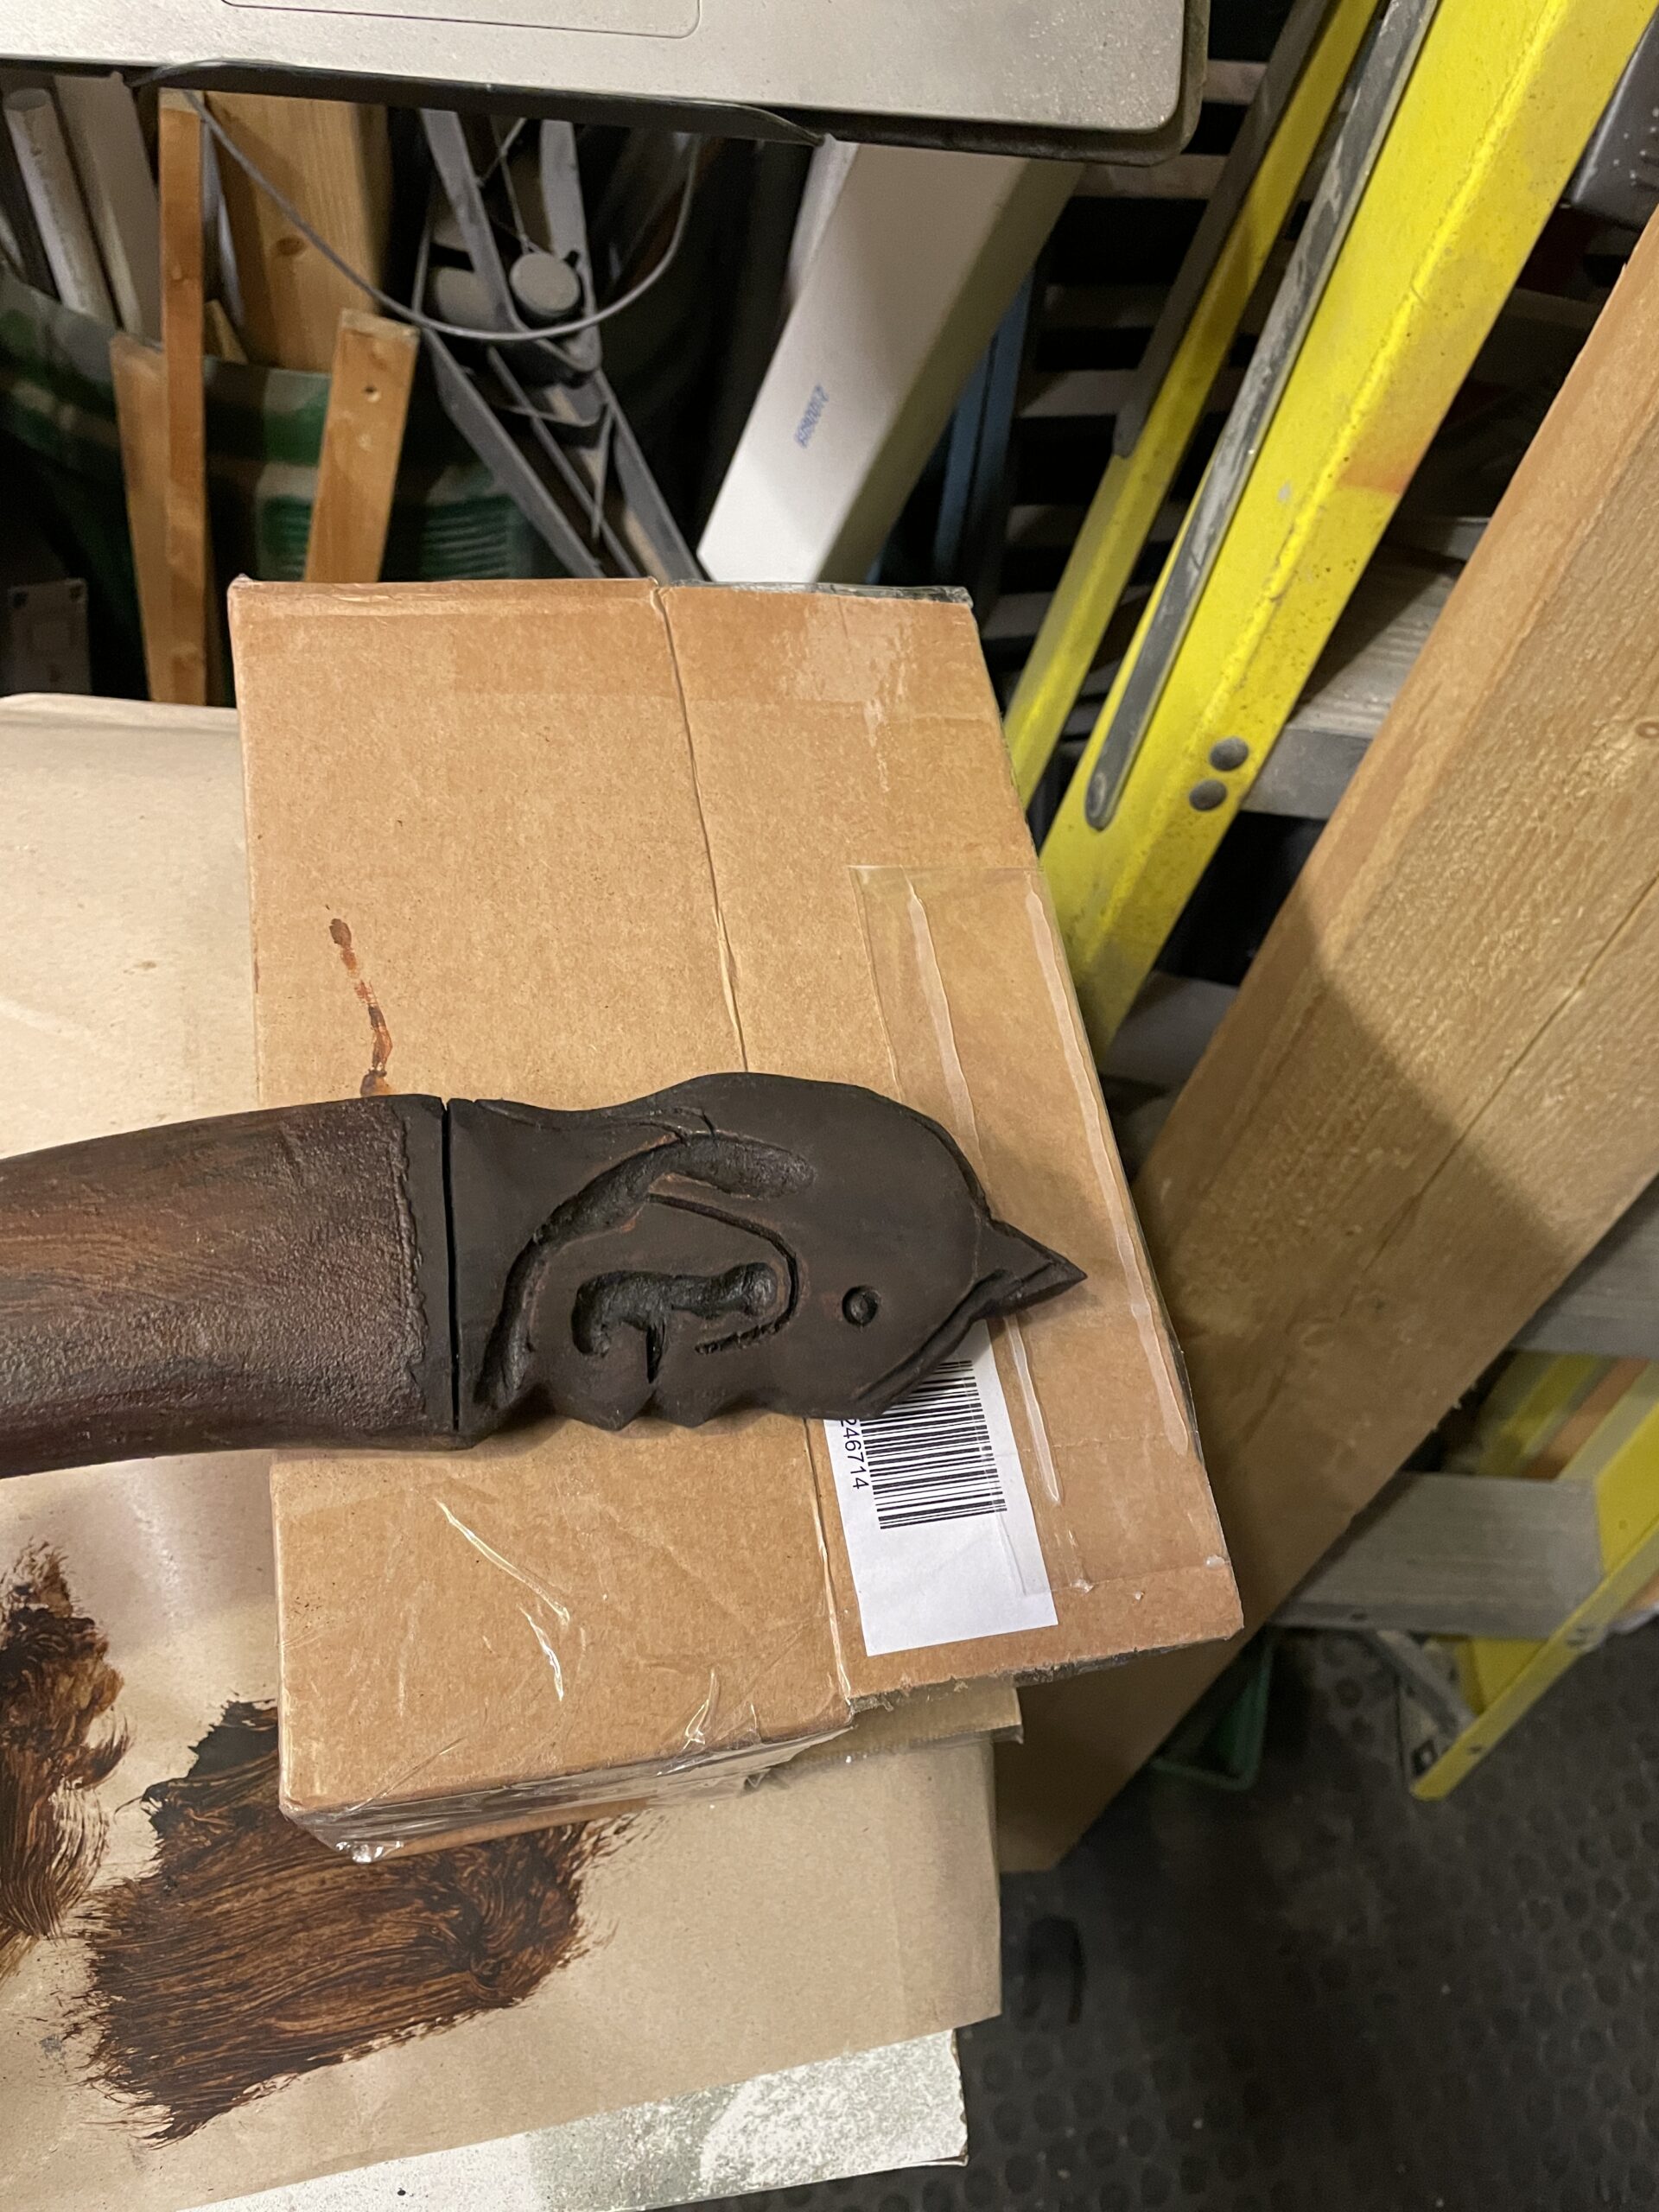
The blade was 3 layers of 10mm all glued together and then cut to shape.
Then it was all about the shaping.. lots of dust generated with the rotary tool and the mini belt sander.
For the knob at the end I left the shape in rough. Partially because I wanted to be able to focus on it in isolation but mostly because I didn’t have a clue how to carve it!!
The shaft was painted up to look wood-like using a varied blend of Burnt Umber, Black and Unbleached Titanium acrylics. On top of the Burnt Uber base I used the splodge and wipe technique until I had the variation and texture I thought looked OK
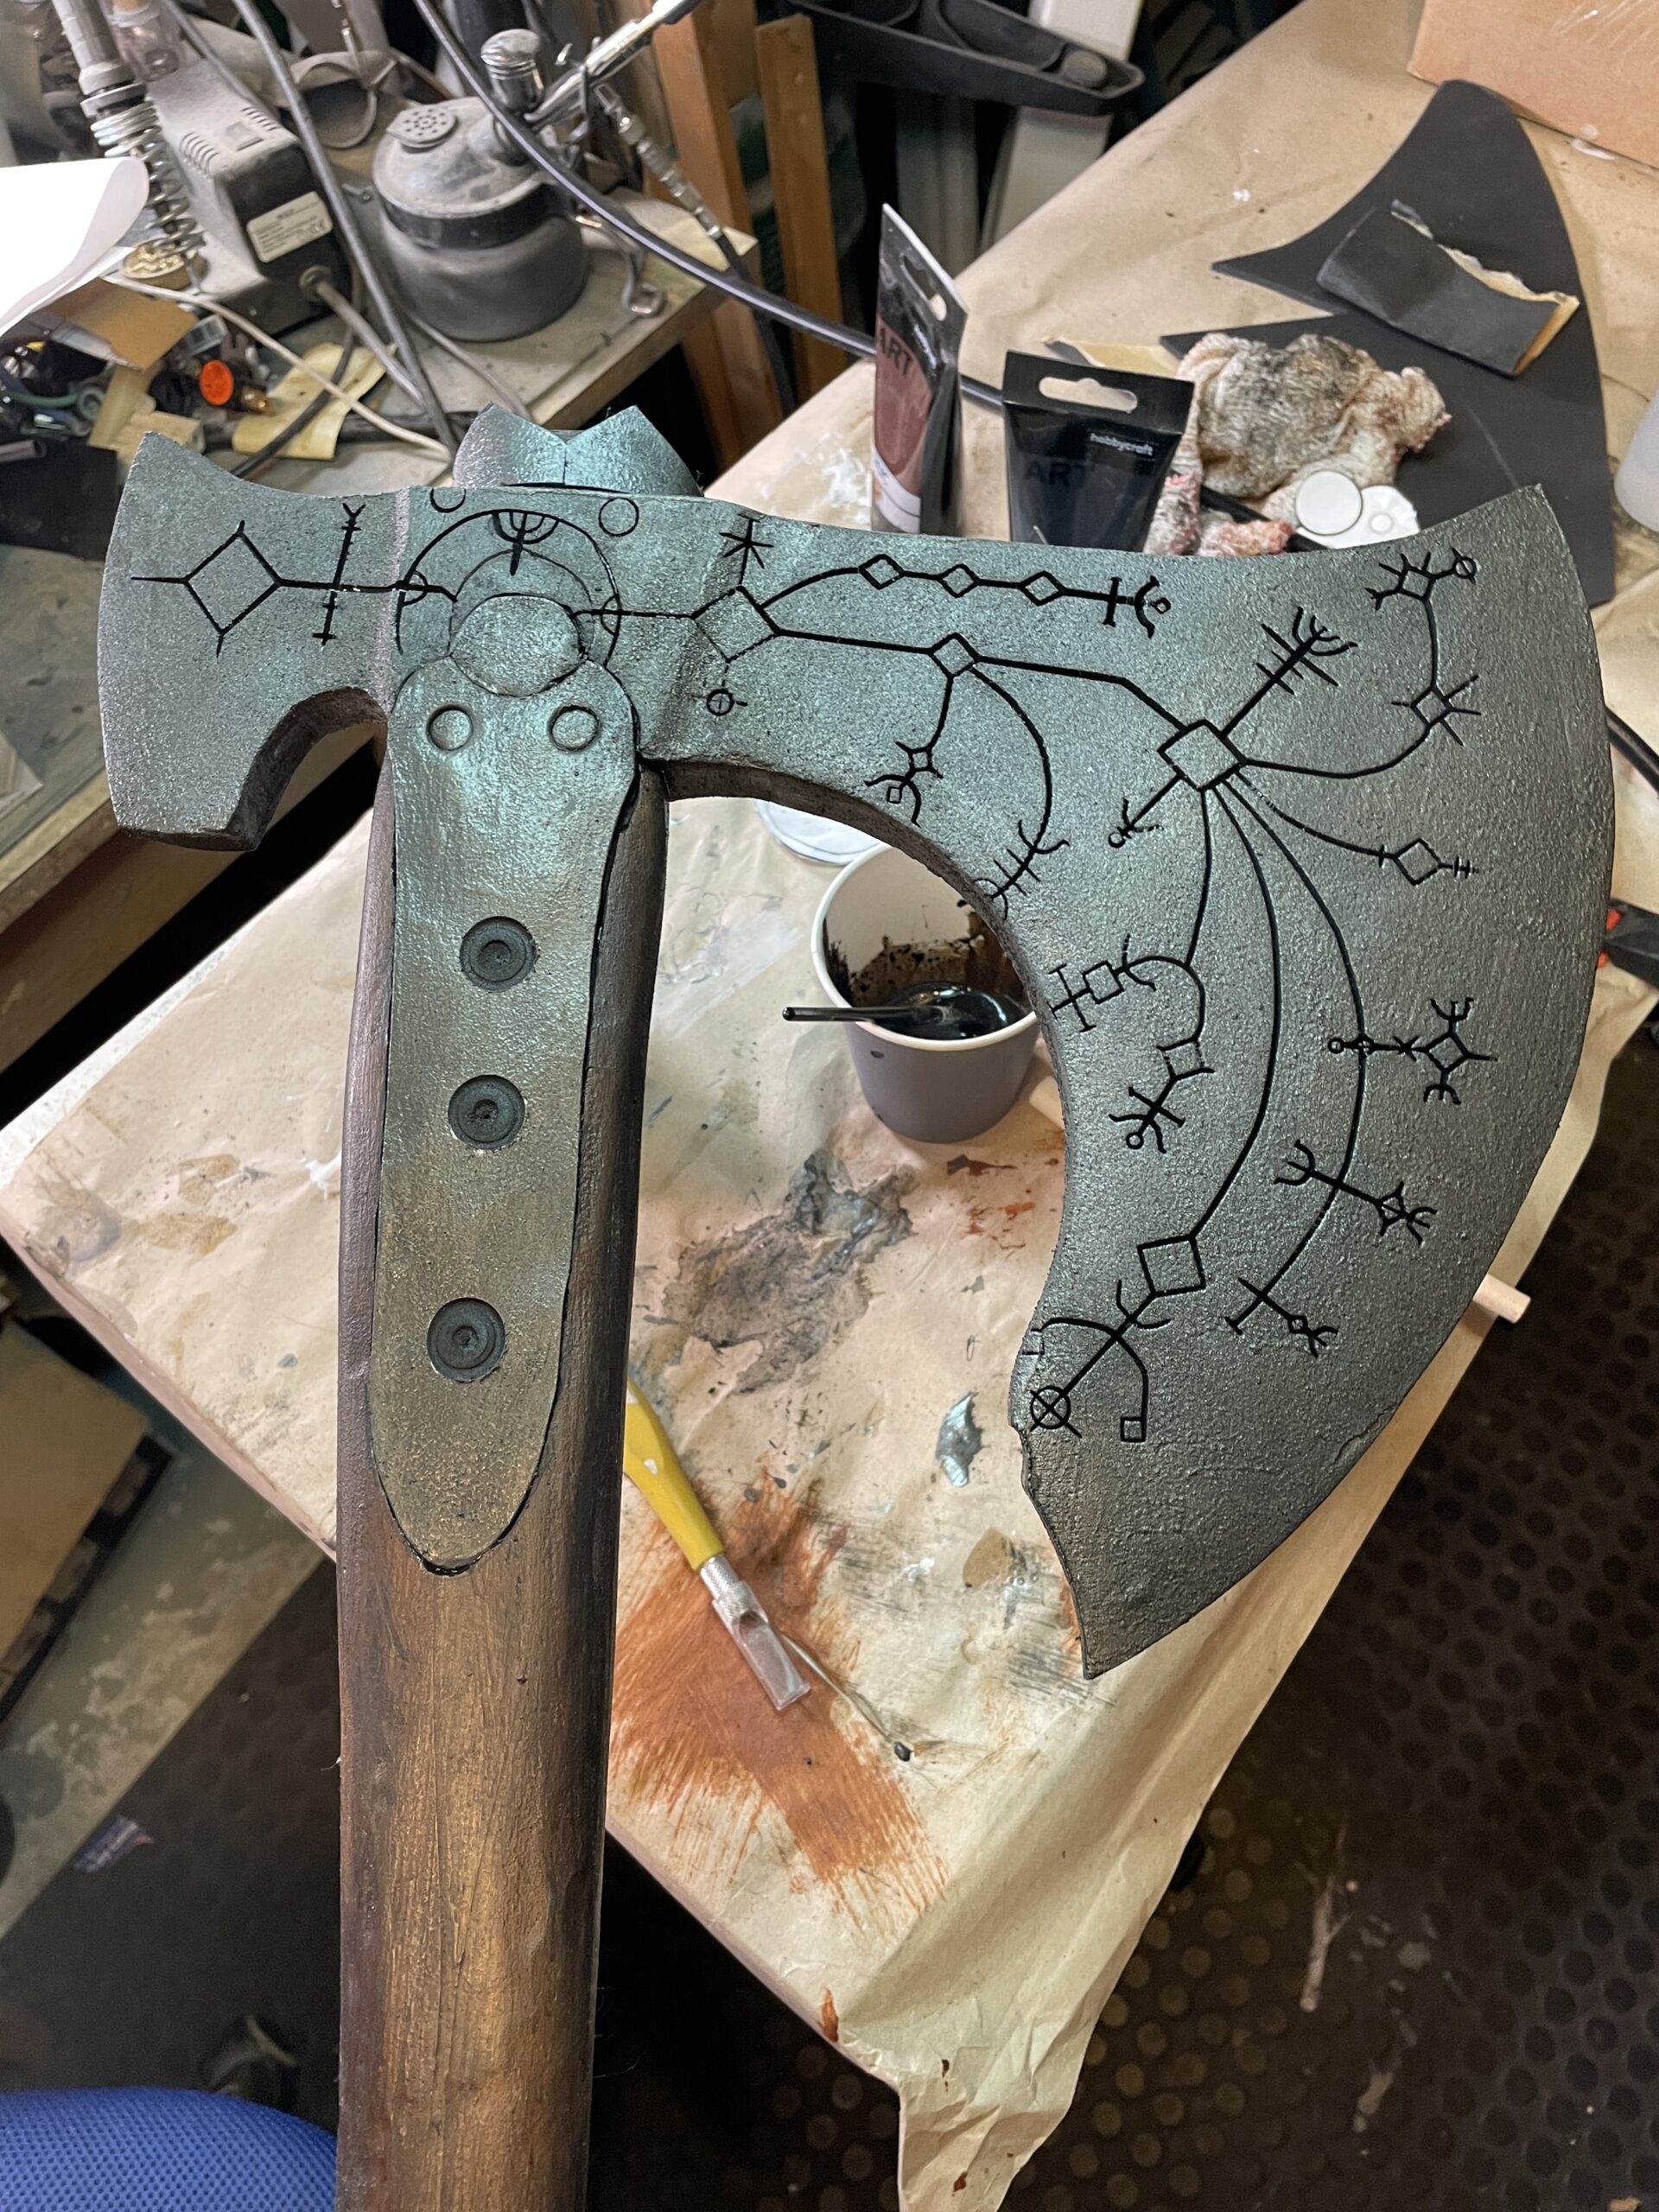
The head of the axe was painted with a couple of coats of gunmetal FlexiPaint which I’ve had in my paint box for a couple of years. TBH It was a bit of a gamble and I was half expecting to have to strip it off and start again, but the result was actually pretty good and combined with the texture of the EVA gave a really nice (IMHO) iron-like finish.
I drilled a slot through the head and whittled down the top of the handle so it was a slightly-too tight fit. This gave the axe head that slight bulge around the shaft – like what the real ones do!
Before fixing the two parts together I loaded up the engraving design into LightBurn and burned it into the axe head with the Sculpfun S9. Now then.. a lesson learned here is to spend as much time as you can lining things up. With hindsight I’d have put a bit of scrap (perhaps even just some card) in the laser and burned the outer shape into that then lined up the head, but you live and learn and my two sides were not as aligned as I’d have liked.
After the laser cutting, I got the heat gun out and opened up the laser cuts. The FlexiPaint got quite sticky and I needed to tease open the cuts with the back of a knife in places, but the result is pleasing!
I then slotted the handle into place and two became one!

The final bits to add were the bracing from the head down the handle and the spiky, point bit at the top.
I’m going to add some runic gems to the empty slots at some point, but the final finish was a black and burnt umber wash over everything to tie things together.
Oh and the knob carving..
Photo is before the final wood effect went on.
Materials
- 10mm EVA foam
- 15mm PVC pipe
- Aluminium bar
- CA glue
- Contact adhesive
- FlexiPaint
- Burnt Umber Acrylic
- Black Acrylic
- Unbleached Titanium heavy body acrylic
Tools
- Band saw
- Craft knife
- Rotary tool
- Sanding drums
- sanding stones
- mini router bits
- Mini belt sander
- Sculpfun S9 laser envgraver
- Lightburn laser software
- Inkscape