The tool of choice of Ratchets alter-ego Rivet in the video game Ratchet and Clank: Rift Apart, Rivet’s Hammer Crank is an iconic piece of hardware which I really wanted to make!

Build
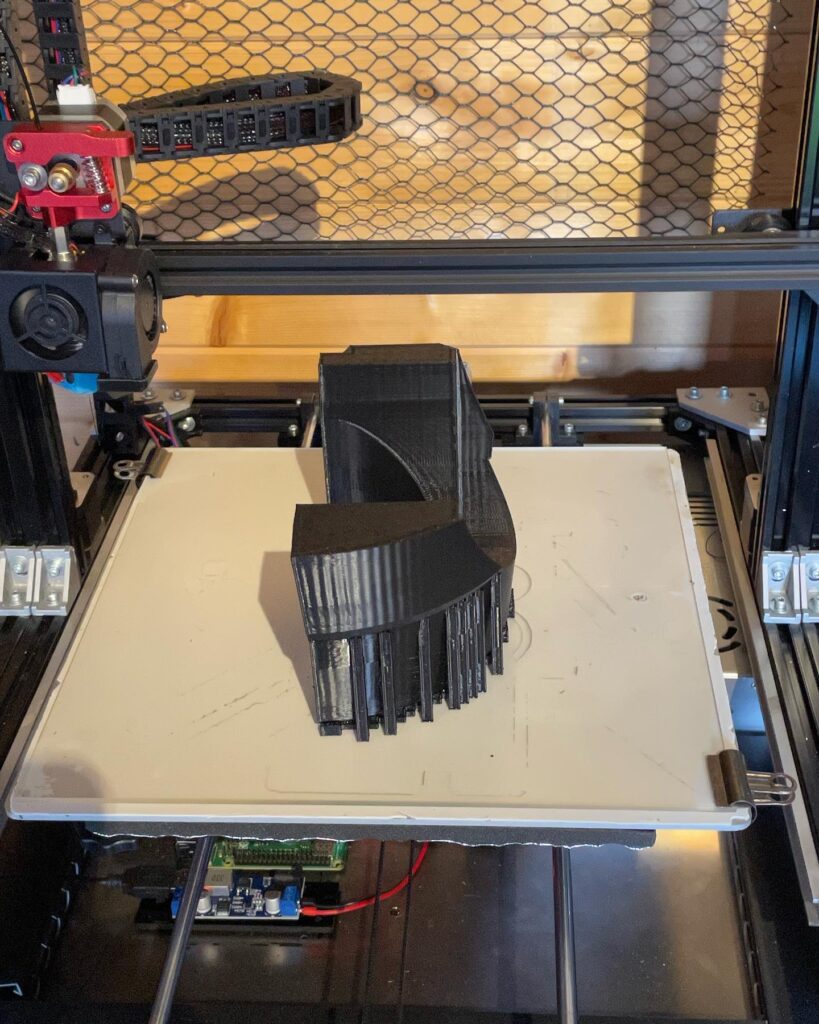
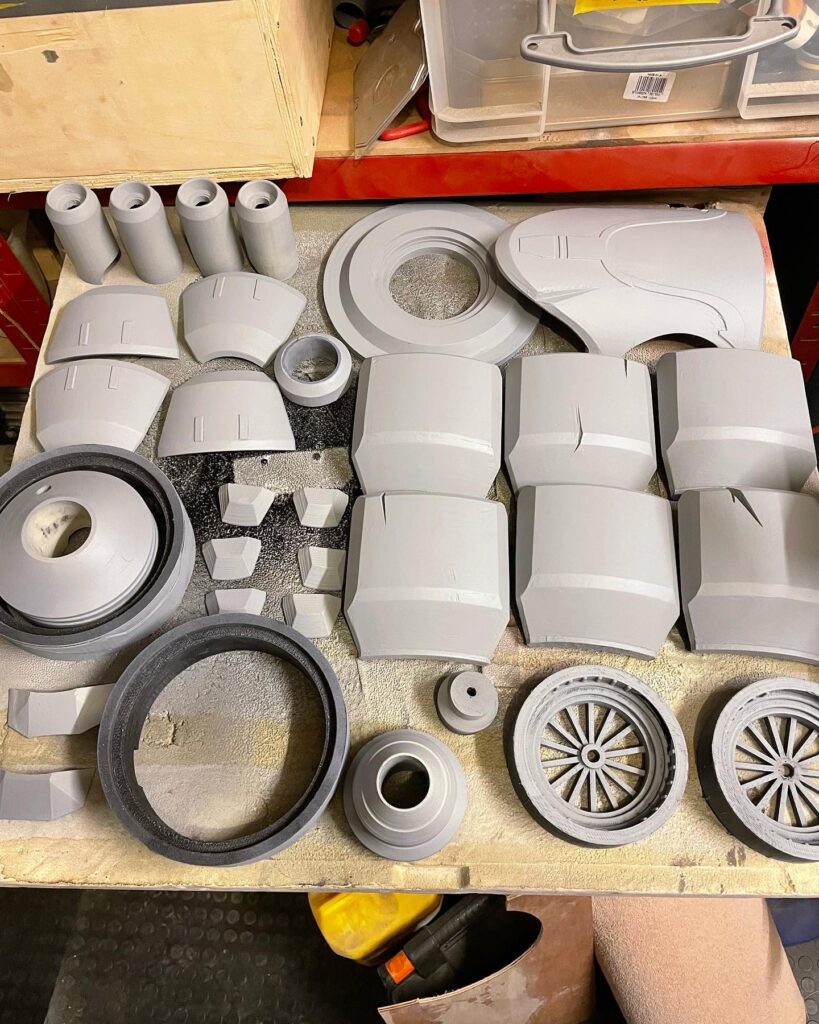
The majority of the model is 3D printed with close to 3 Kilos of PLA used. The model was printed out at 75% of the original scale (at 100% it wold have been massively oversized!). The handle is a 45mm OD aluminium pipe rather than the 3D printed model at I felt this was needed to support the structure safely.
After printing each pieces was sanded to remove the layer lines and ensure that they fit together correctly, filled, sanded, filled and sanded before 3 coats of spray putty were used with a final 400 grit sanding to provide a smooth base for painting.
A couple of the 3D models had some structural issues which meant I had to re-cut them before printing. This left a couple of gaps which I filled with automotive body filler, shaped, sanded and blended in with the printed forms.
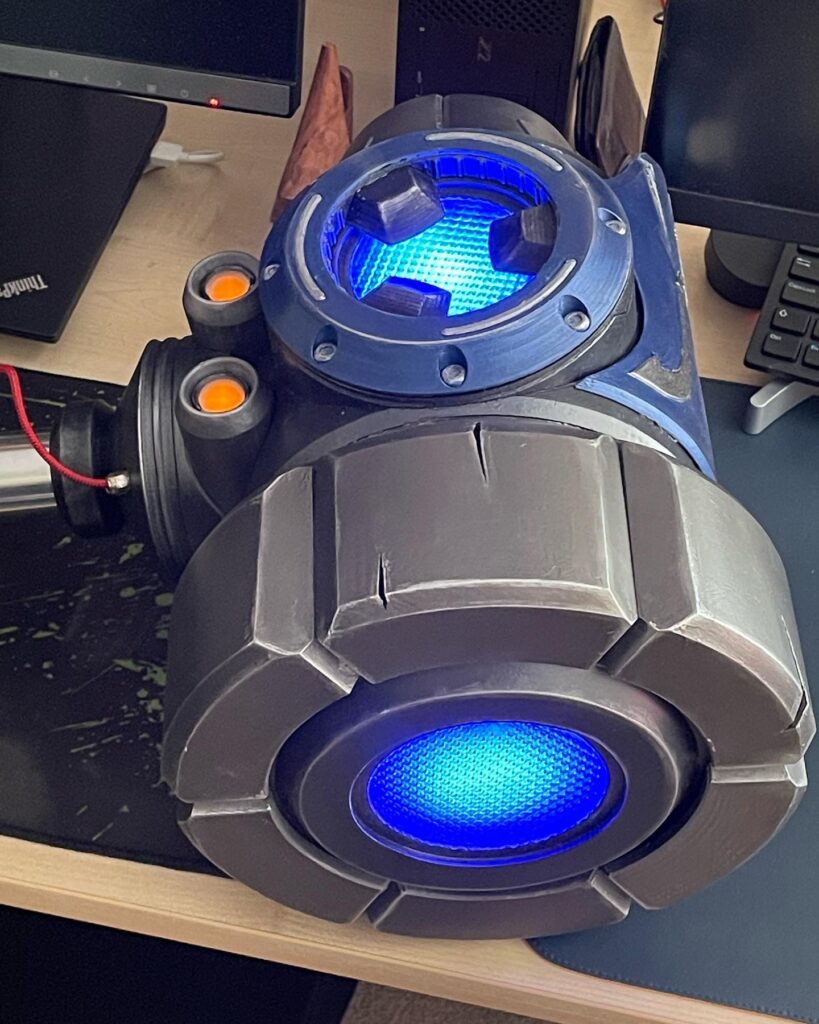
The lenses on the front large side rotors and rear were made from textured acrylic sheet cut to shape. The smaller side and bottom lenses were layered up using plastizote for diffusion, a frosted polyprop sheet and a glass cabochon which gave the depth and spread of light I wanted and looked pretty good too!
Finish
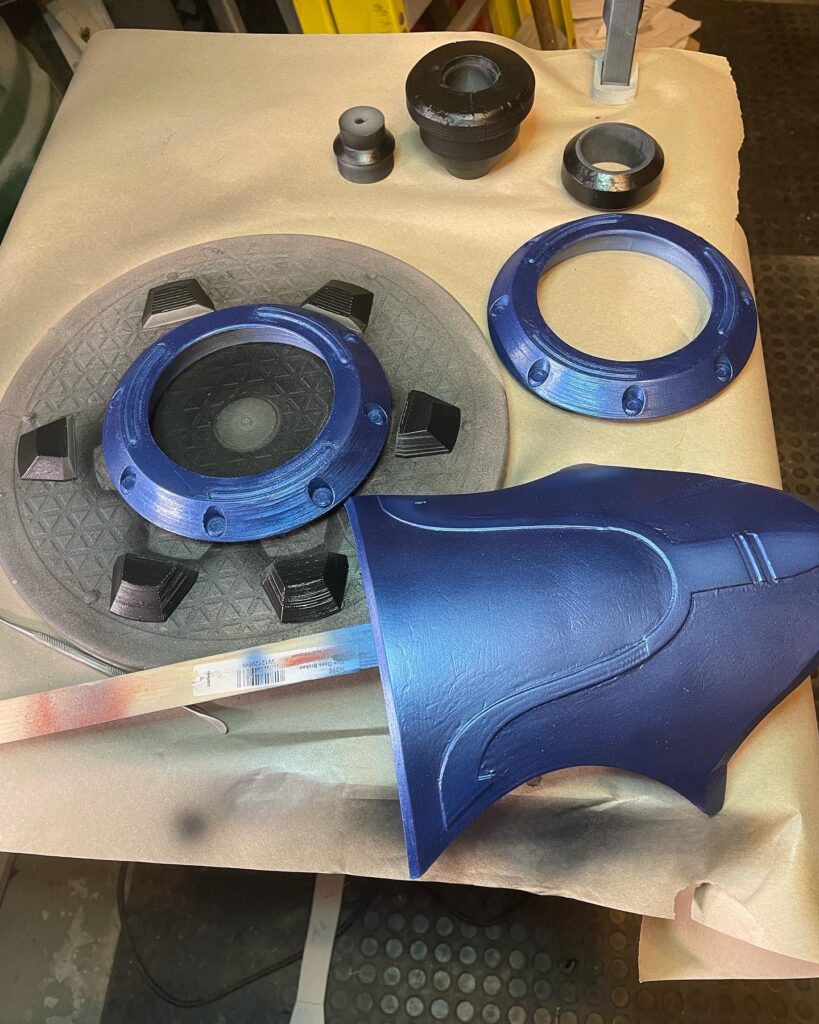
All paint was airbrushed on. A combination of metallics across everything – blue, steel, gunmetal and silver – with gloss black for the handle bits. Final weathering touches by hand using black in the cuts with silver Rub’n’Buff on the exposed edges.
At first I was going to stick a battery inside this and run the LEDs from that, but I decided to take the easy route and went for an all 12v supply with a socket on the base. The front and rear LEDs were mounted in a couple of old reflectors that I salvaged from some lights to give extra bounce and spread and the whole thing was tested to death before I installed, as the side LEDs needed to be in place before I glued the structures together.
Materiels
- Amazon PLA Filament
- 4mm Textured clear acrylic sheet
- 0.5mm translucent polypropylene sheet
- 5mm plastizote foam
- 25mm glass cabochons (sides)
- 35mm glass cabochon bottom of handle
- 12v pre-wired LEDS Blue and Yellow
- 12v panel-mount barrel socket
- 45mm OD aluminium tube
- Braided red USB charger cable
- Pneumatic connectors from my 3D printer spares stash
- 2 parabolic light reflectors salvaged and which I had lying around
- Vallejo metallic airbrush paints
- Silver Bub’n’Buff
- Black craft acrylic paint
- CA glue for the small bits
- Alien Glue for the bigger bits
- 2-part epoxy for the big bits!
- 120, 180, 400 grit sandpaper
- Motip fast drying Spray Putty
- Simoniz high build primer
- uPol body filler
Tools
- X-FORMD 3D printer (my build)
- Rotary tool with sanding drums and mini router bits
- Mini-belt sander
- No-brand airbrush (eBay special)
- Fine paintbrushes for silver details