Build

I was inspired to do this by Derek of VanOaks Props but decided to take a different route to him for the helmet. Derek used a 3D printed helmet base but I decided I wanted to make min out of EVA foam and do a lot of ‘from scratch’ patterning and building as a sort of challenge to myself.
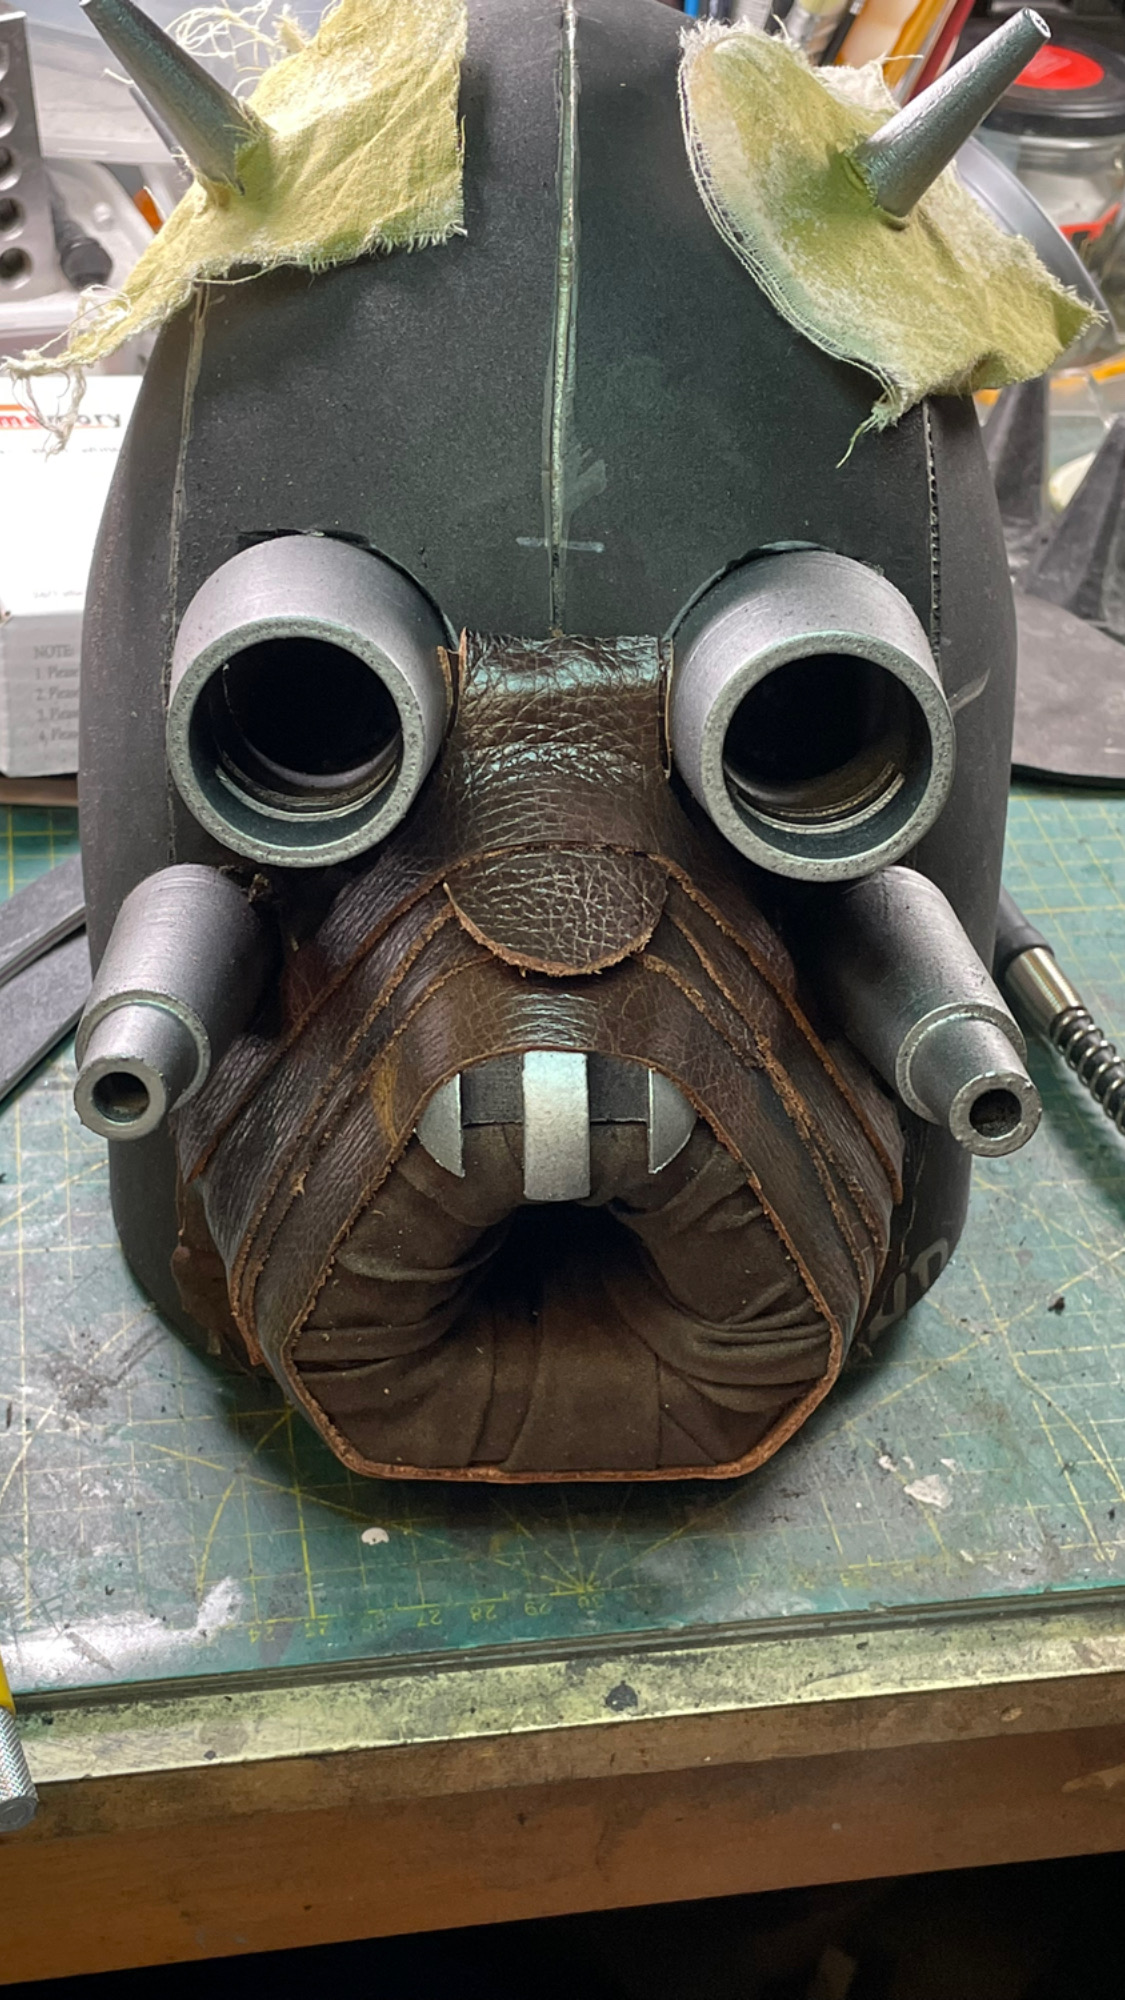
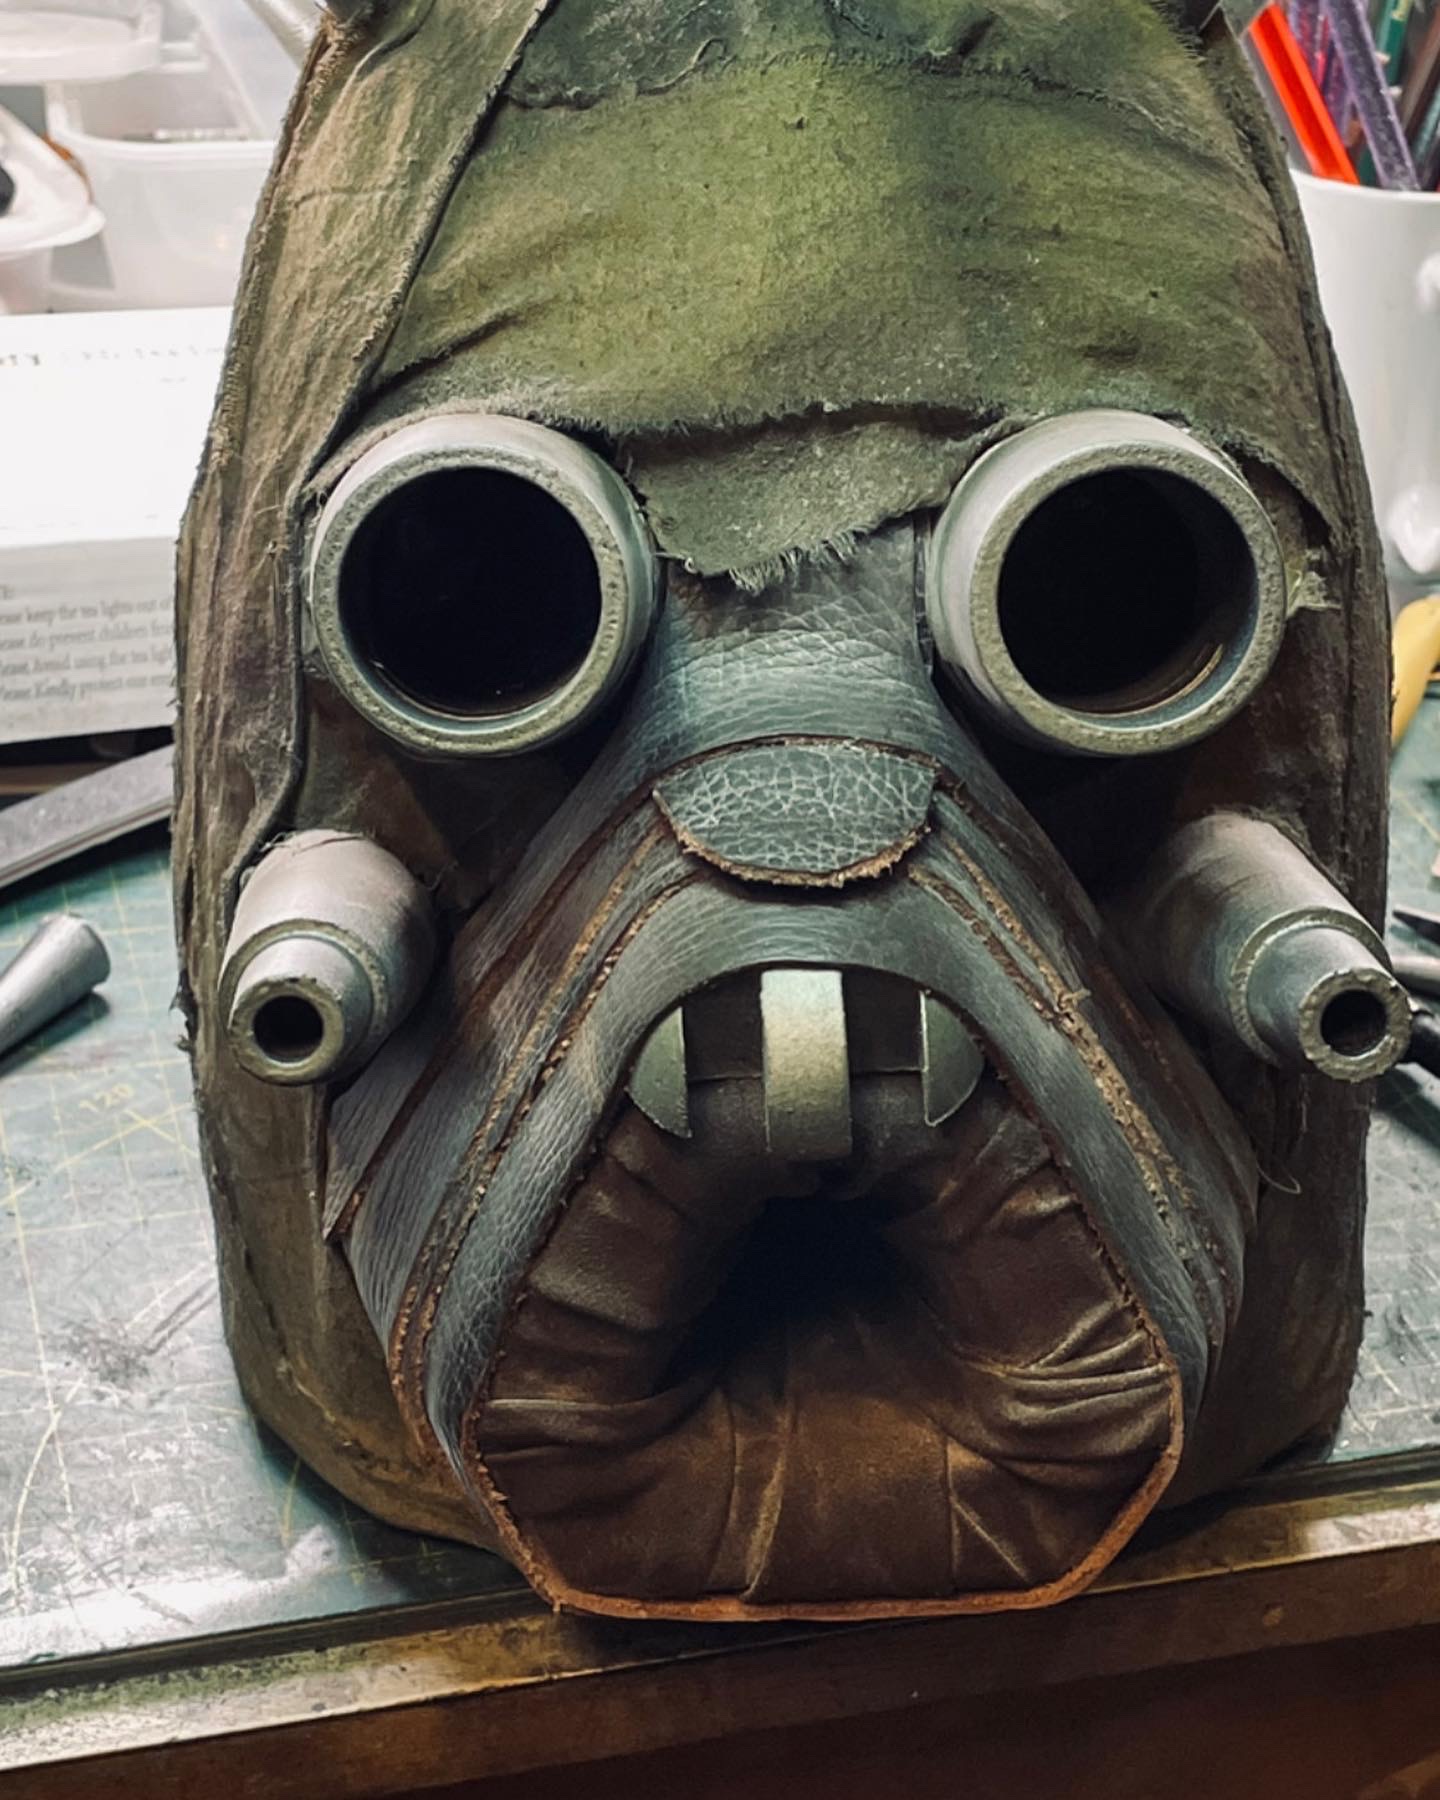
The horns, spikes and eye pieces I 3D printed for ease and uniformity but everything else was built.
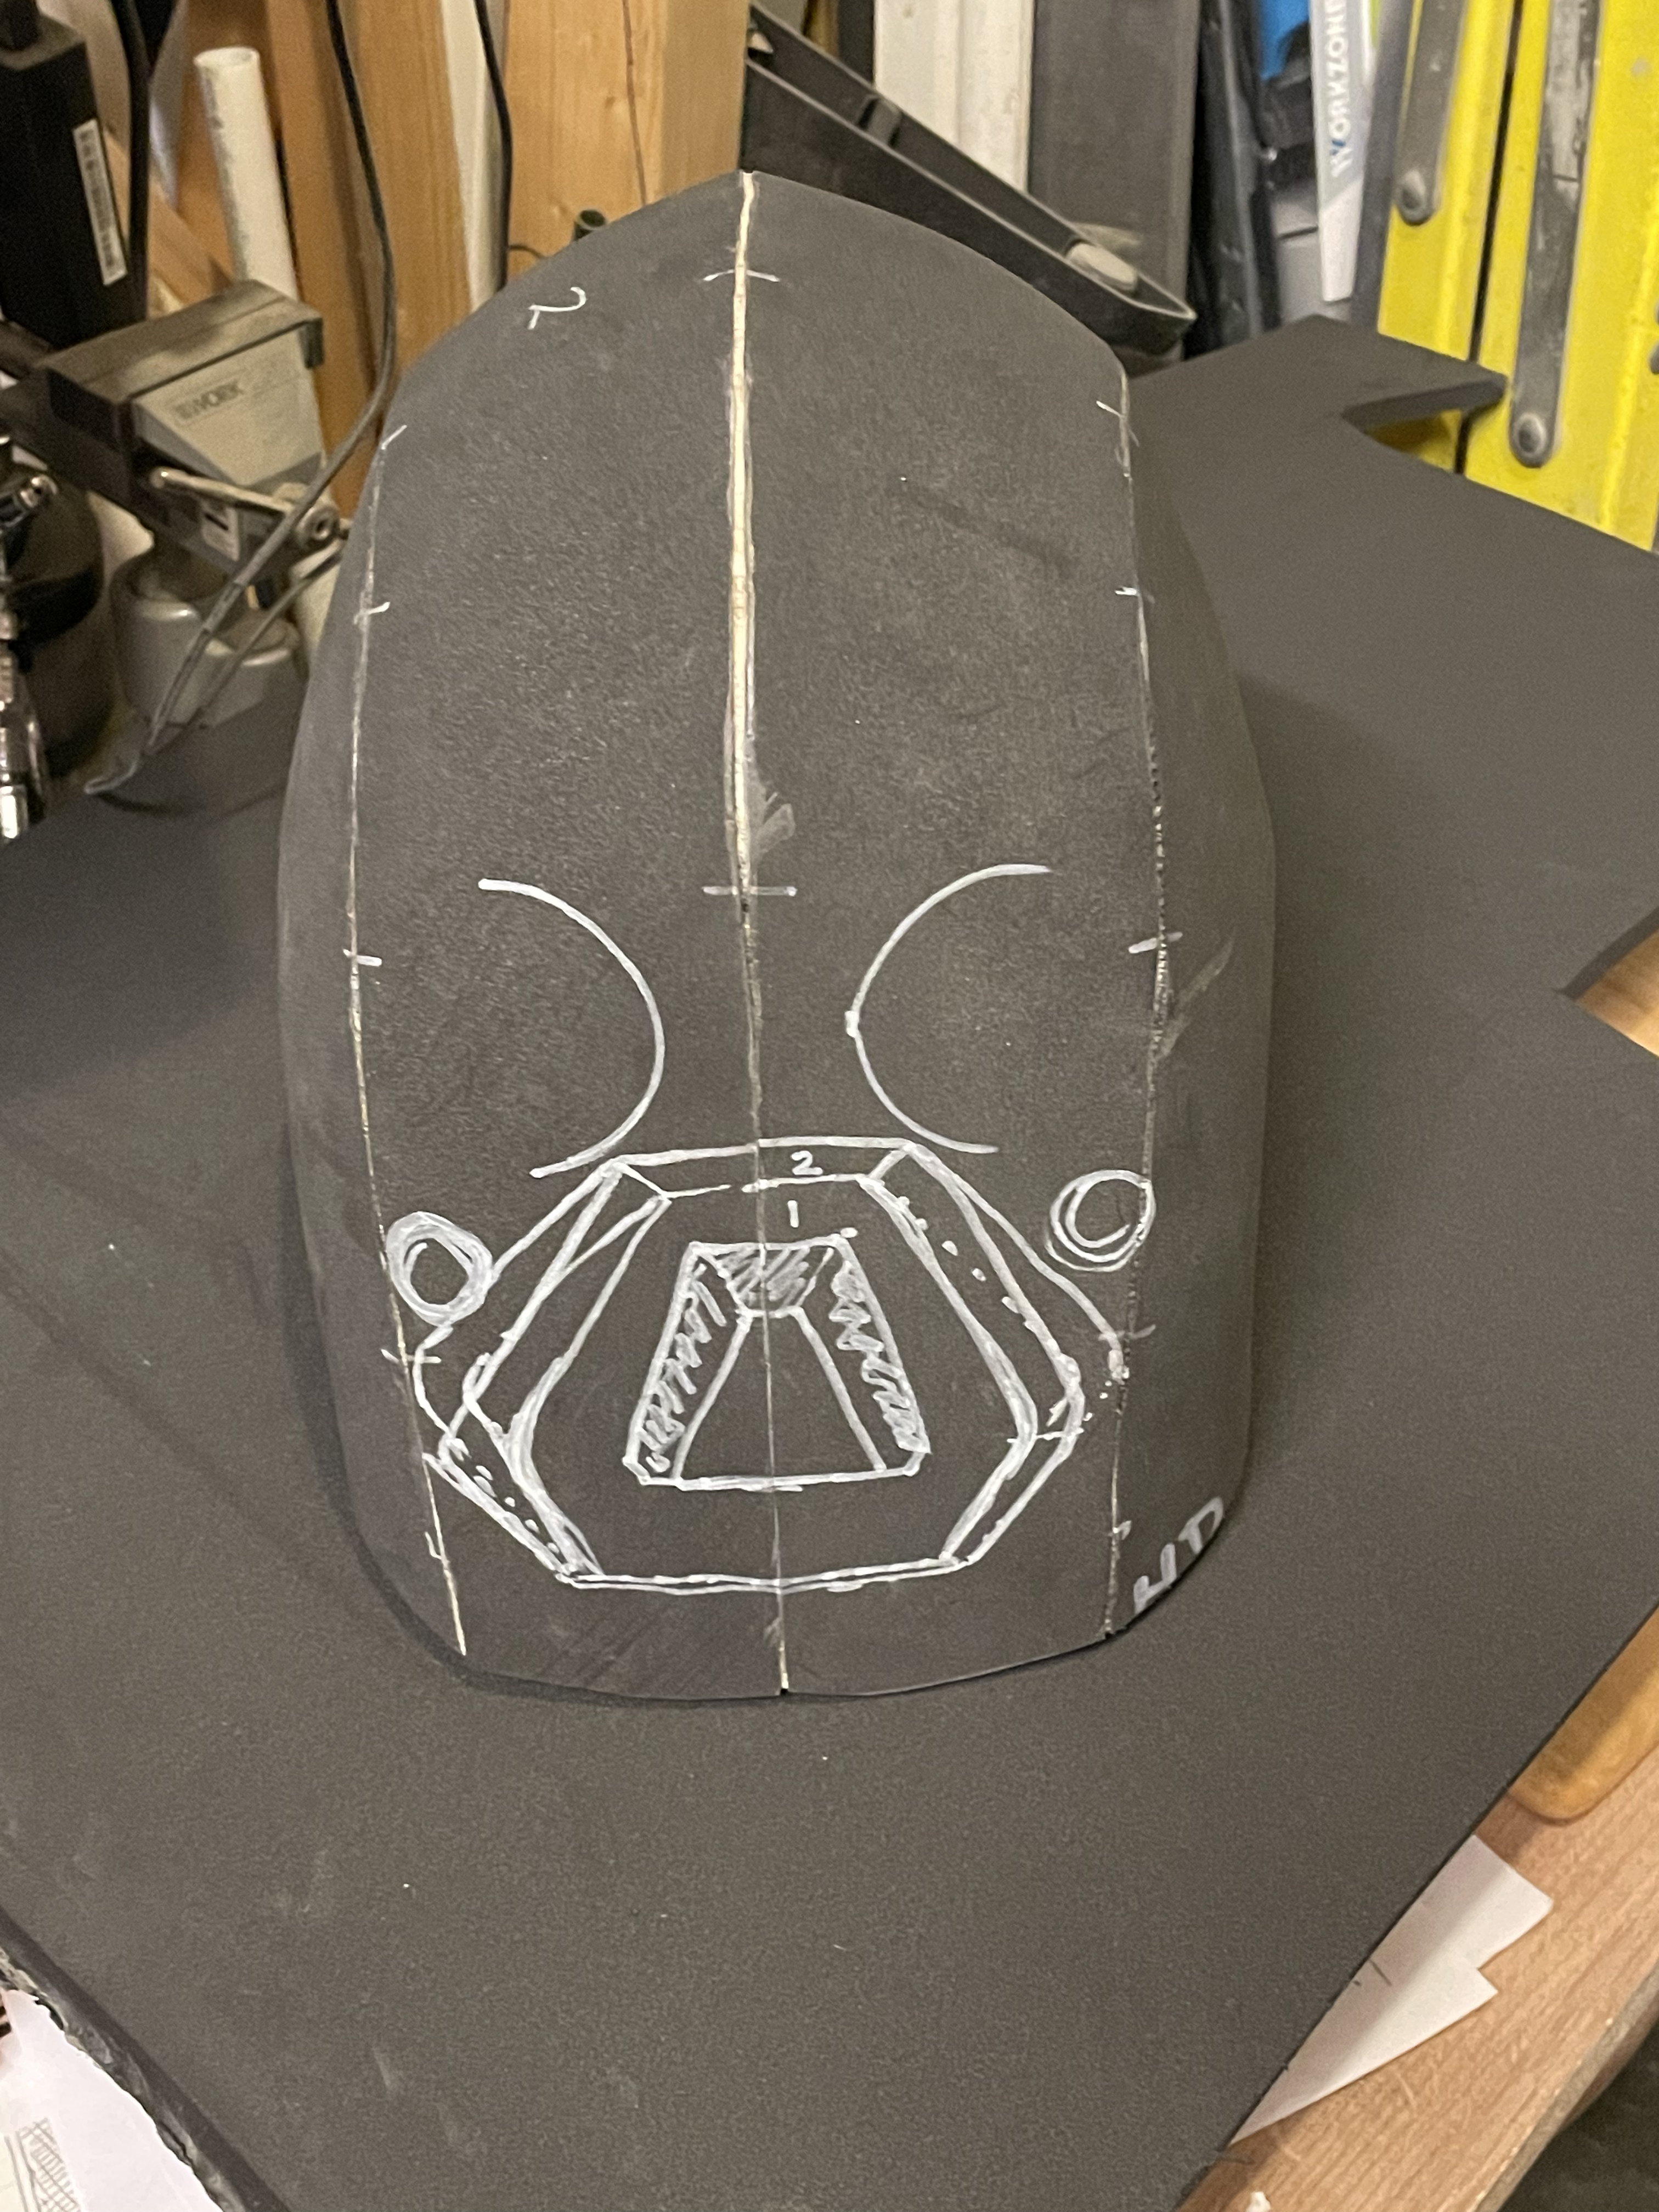
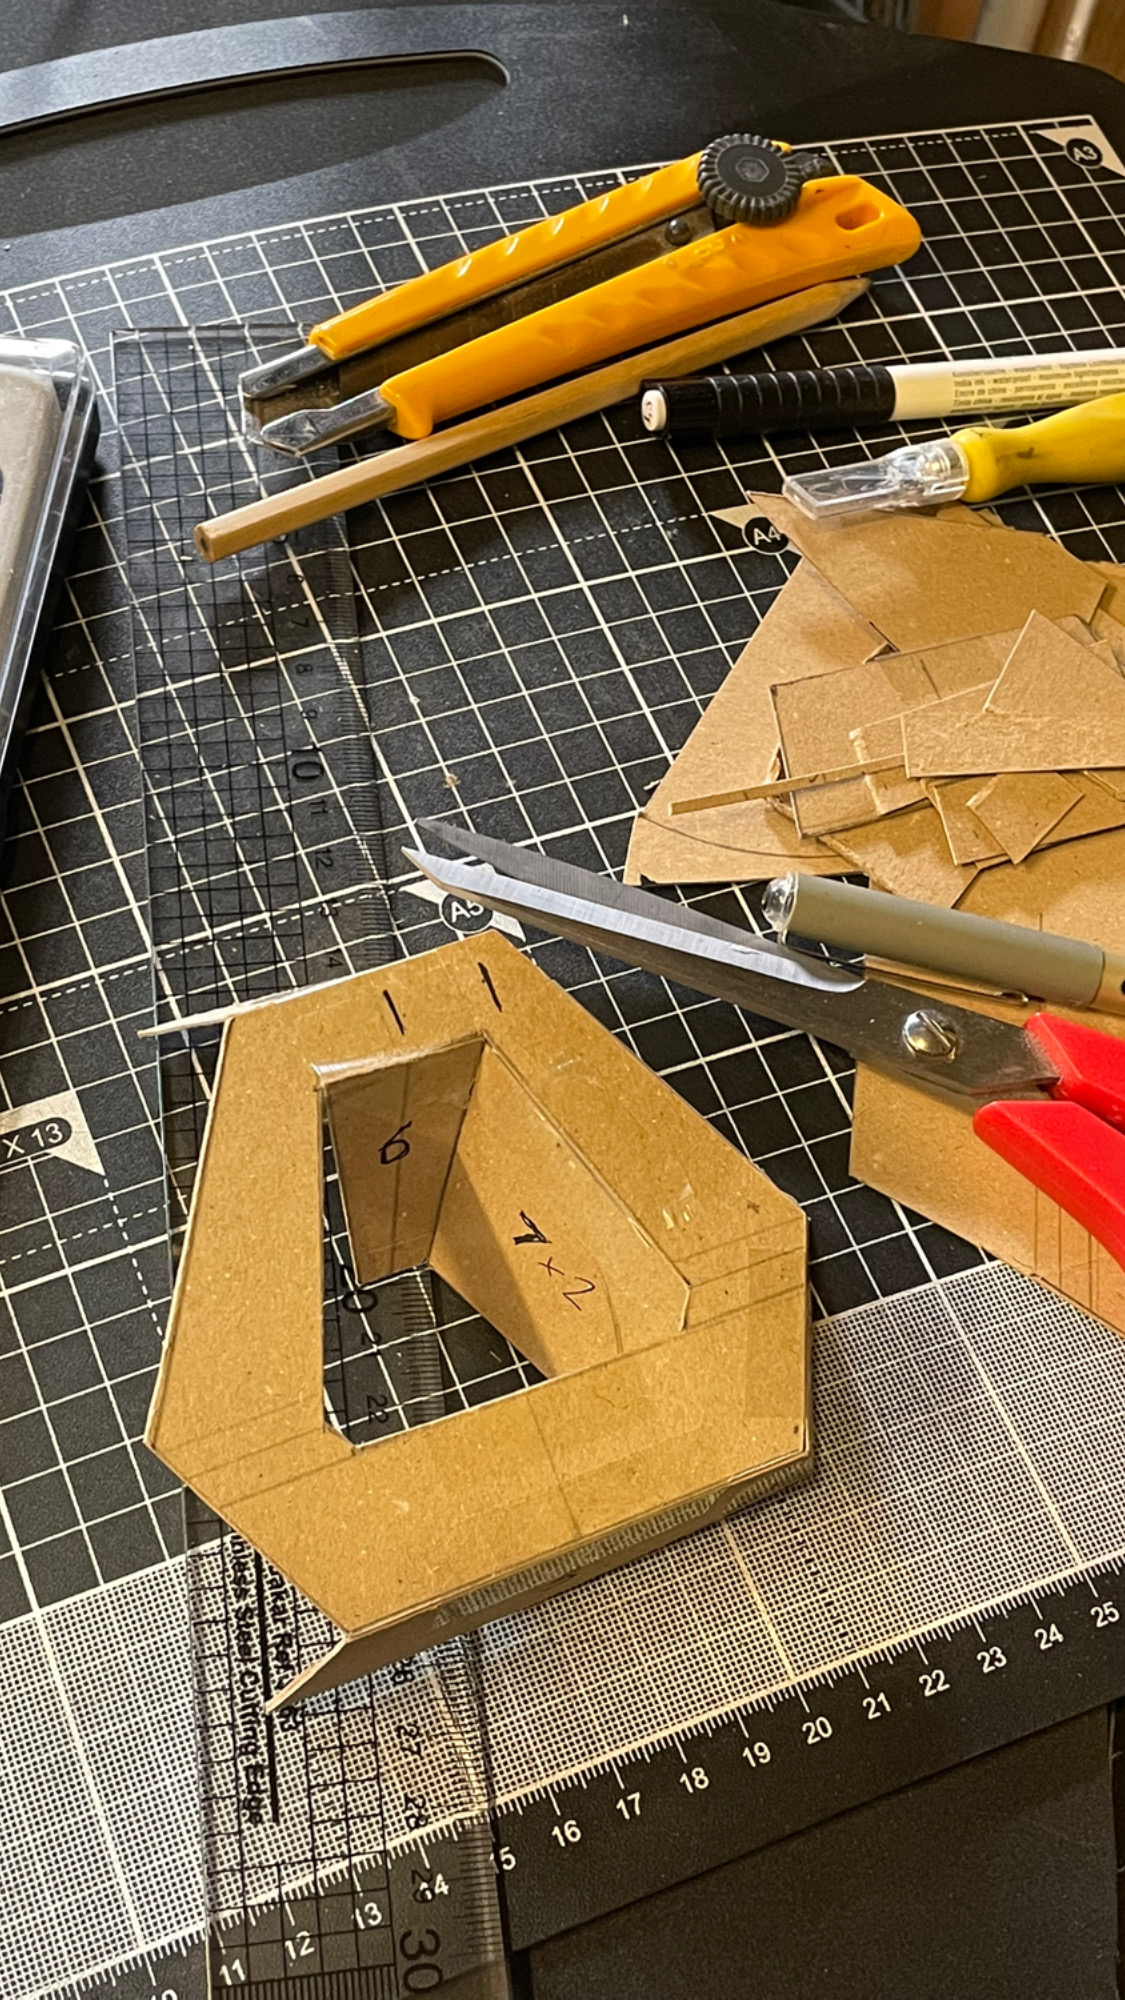
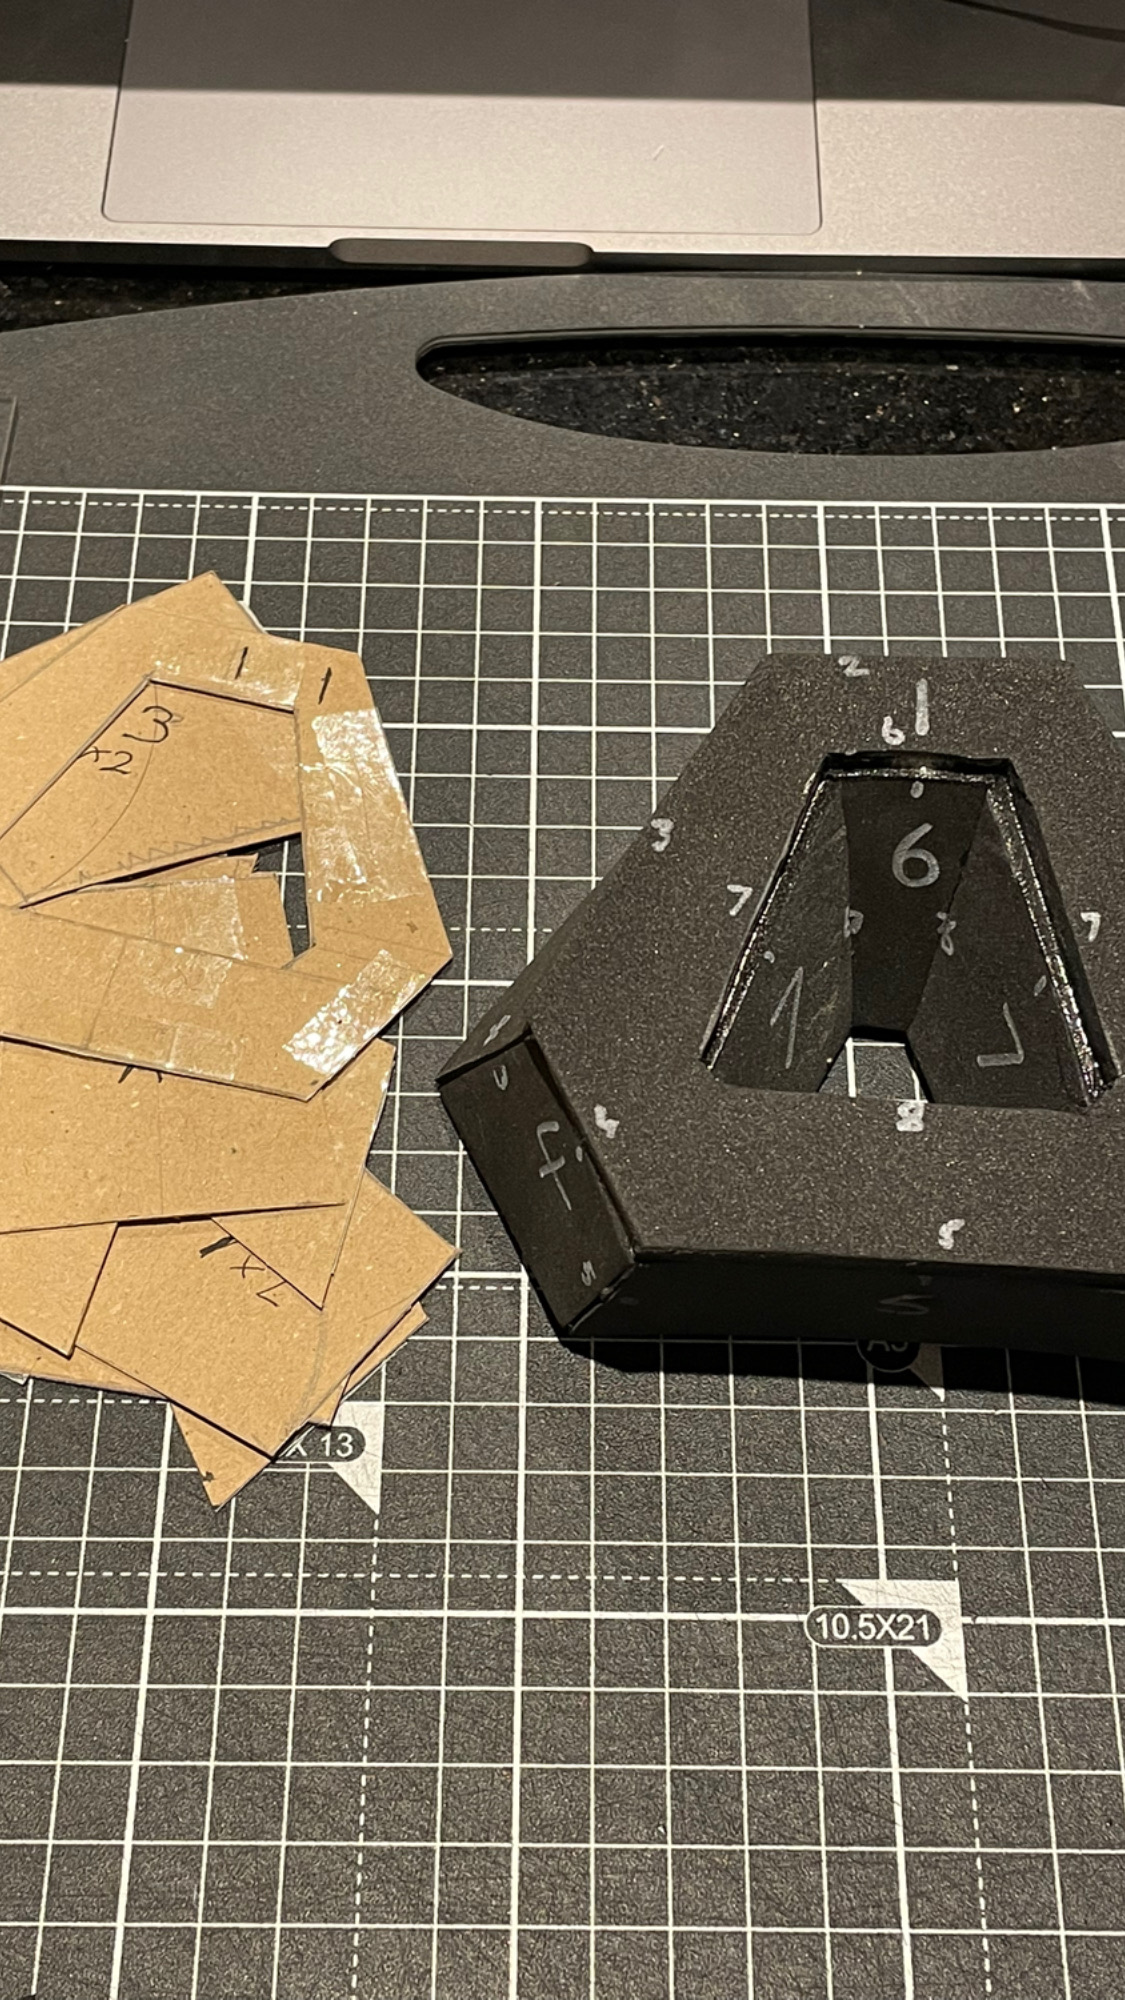
I used a basic helmet pattern from Kamui Cosplay as the base of the build and used that as my canvas for placing the printed parts but also for mapping out where the ‘snout’ of the Raider helmet would be. Once I had the basic dimensions in place I roughed out a cardboard template and transferred that to 5mm HD EVA foam which I then roughed into shape with a rotary tool and stuck in place.
The snout is wrapped in leather and has a cloth wrap to the interior. The leather was a pretty simple wrap and tuck, glued in place with CA, but the cloth element was more of a challenge. The cloth is pushed into the centre and then spread out around the outer edge, this is challenging in a number of ways as the centre get stuffed very quickly and the edges want to pull the centre out but with a little persuasion and a decent amount of CA it worked with the leather wrap covering the crimes!
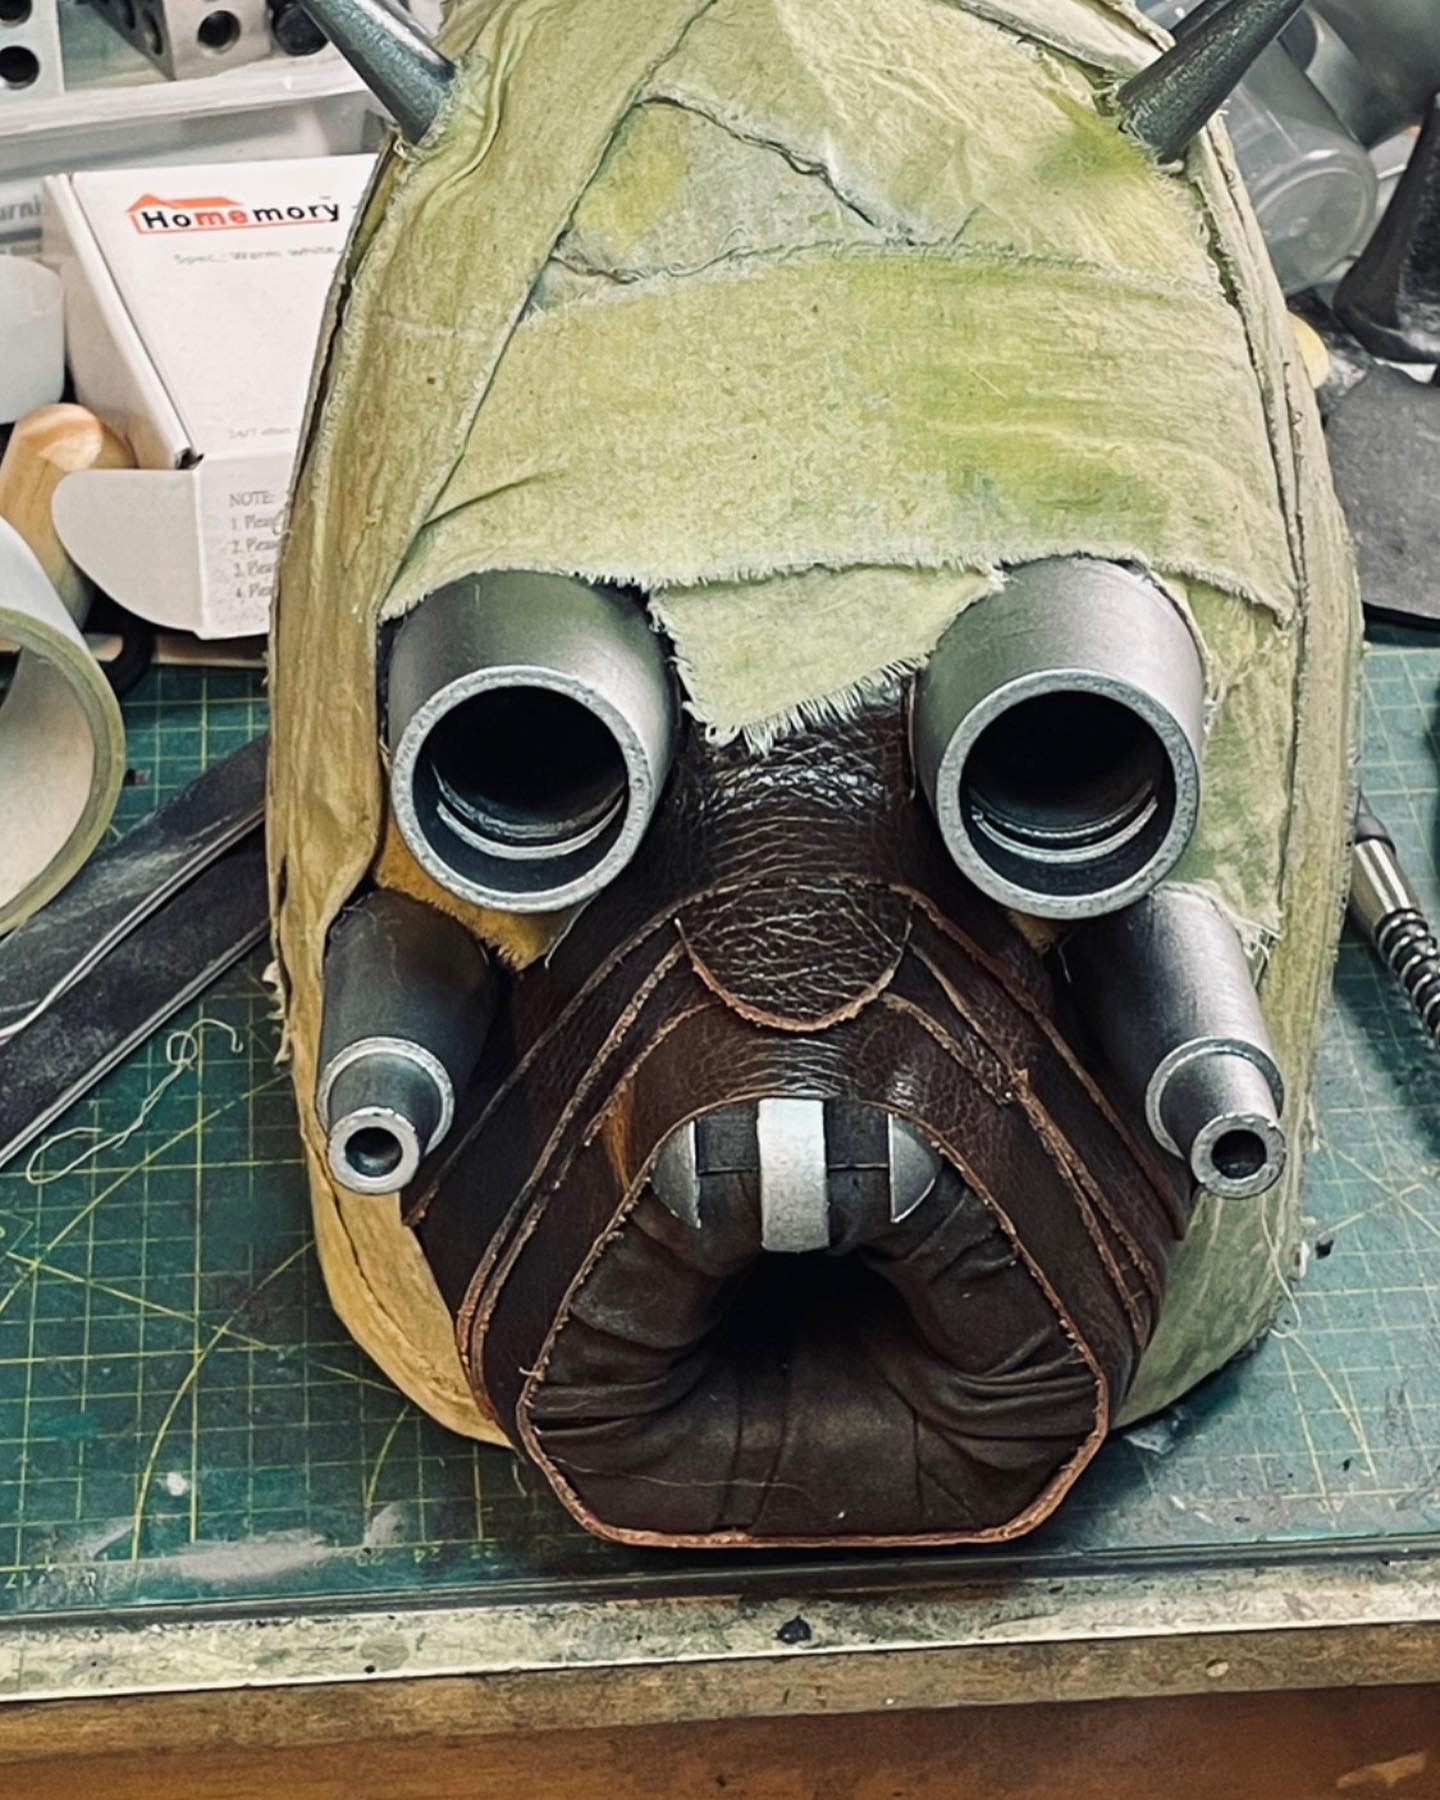
The 3d printed elements were given a flat base on the helmet with a rotary tool and then CA-glued in place, then cam the cloth covering. Getting that wrap in place without looking like it was just wound around and without having the ends of the pieces showing was an exercise in frustration and at times made me question my sanity, but when the last piece was in place and I unstuck my finger it looked pretty good!
The internal structures I put in place to give the helmet the right shape means I can’t actually put it on, but if I was going to make another, I’d certainly scale it up a little so it was wearable!
Finish
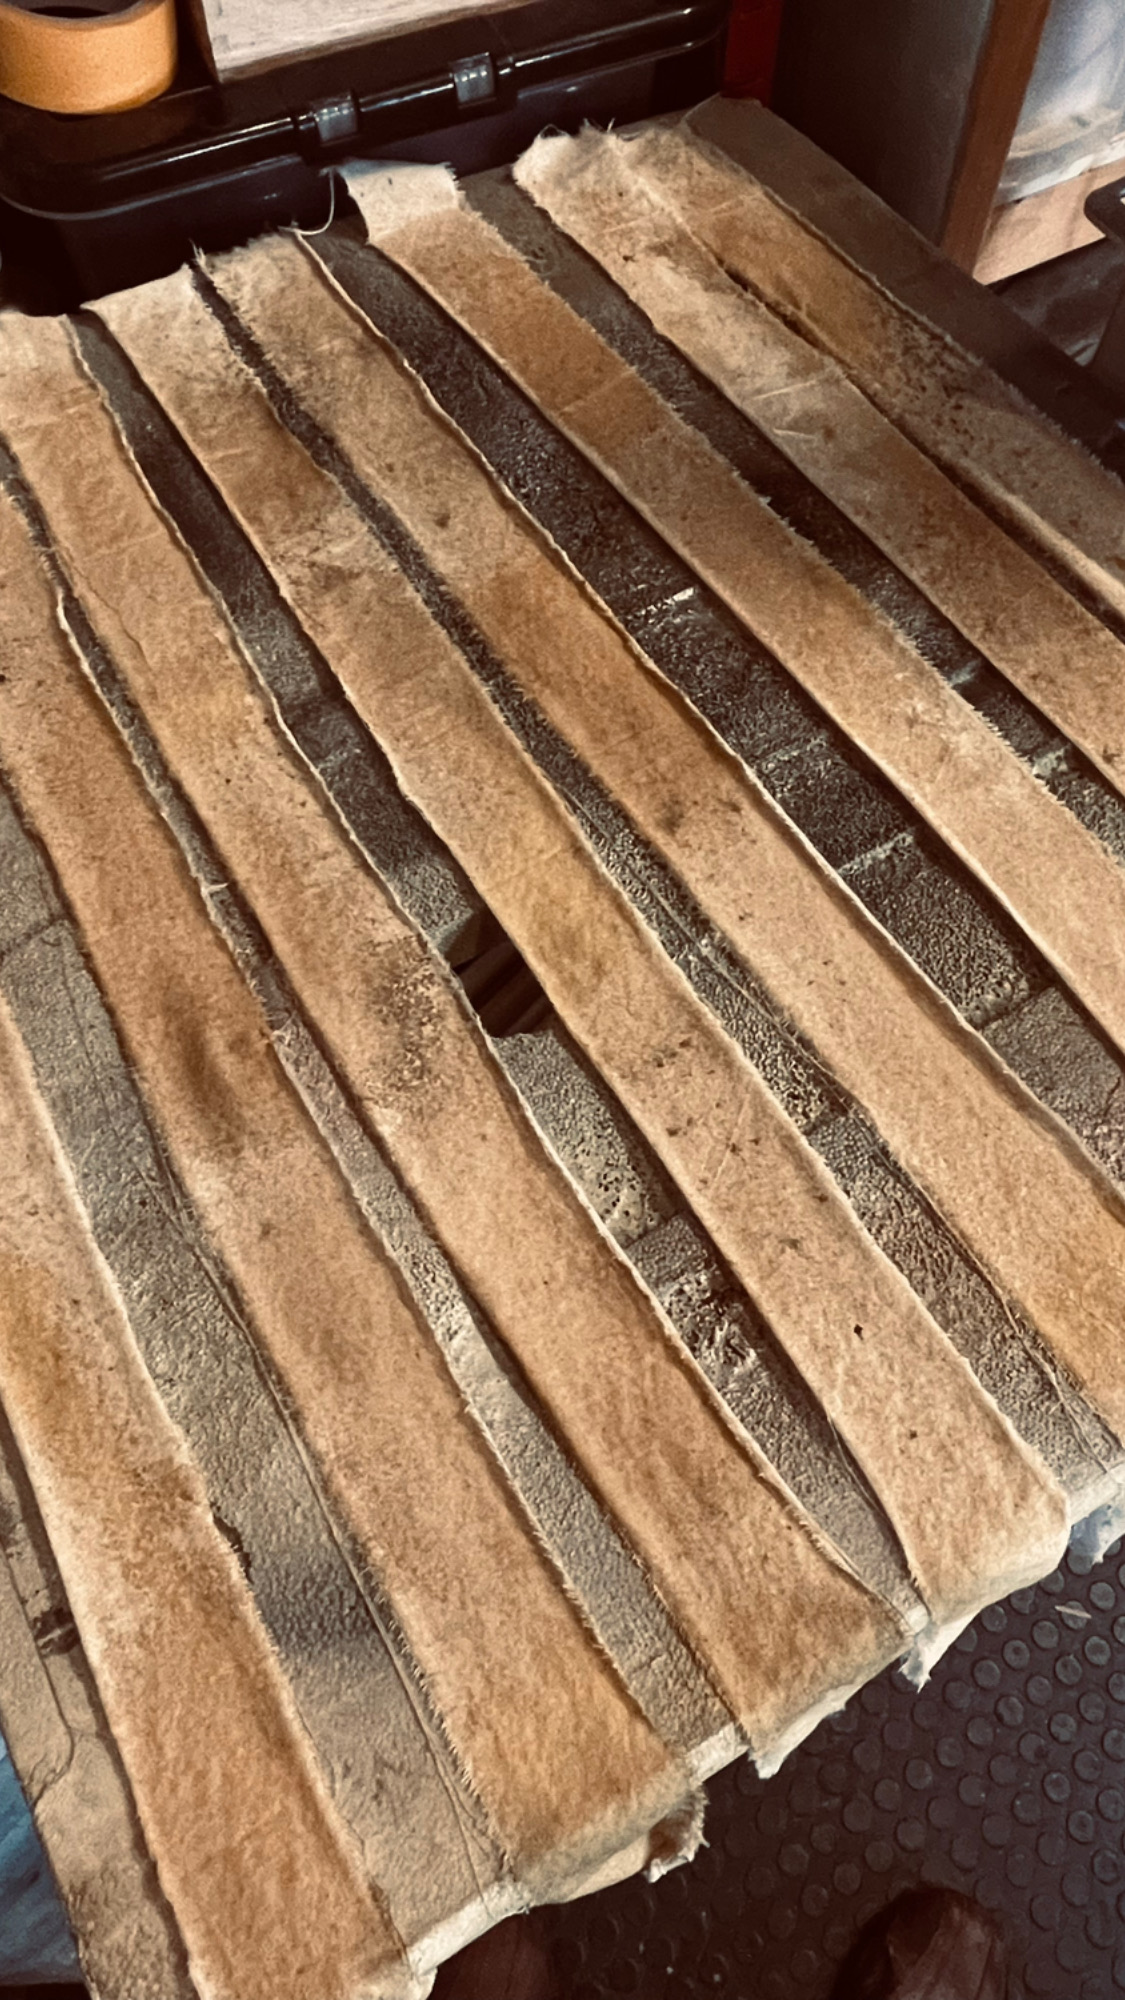
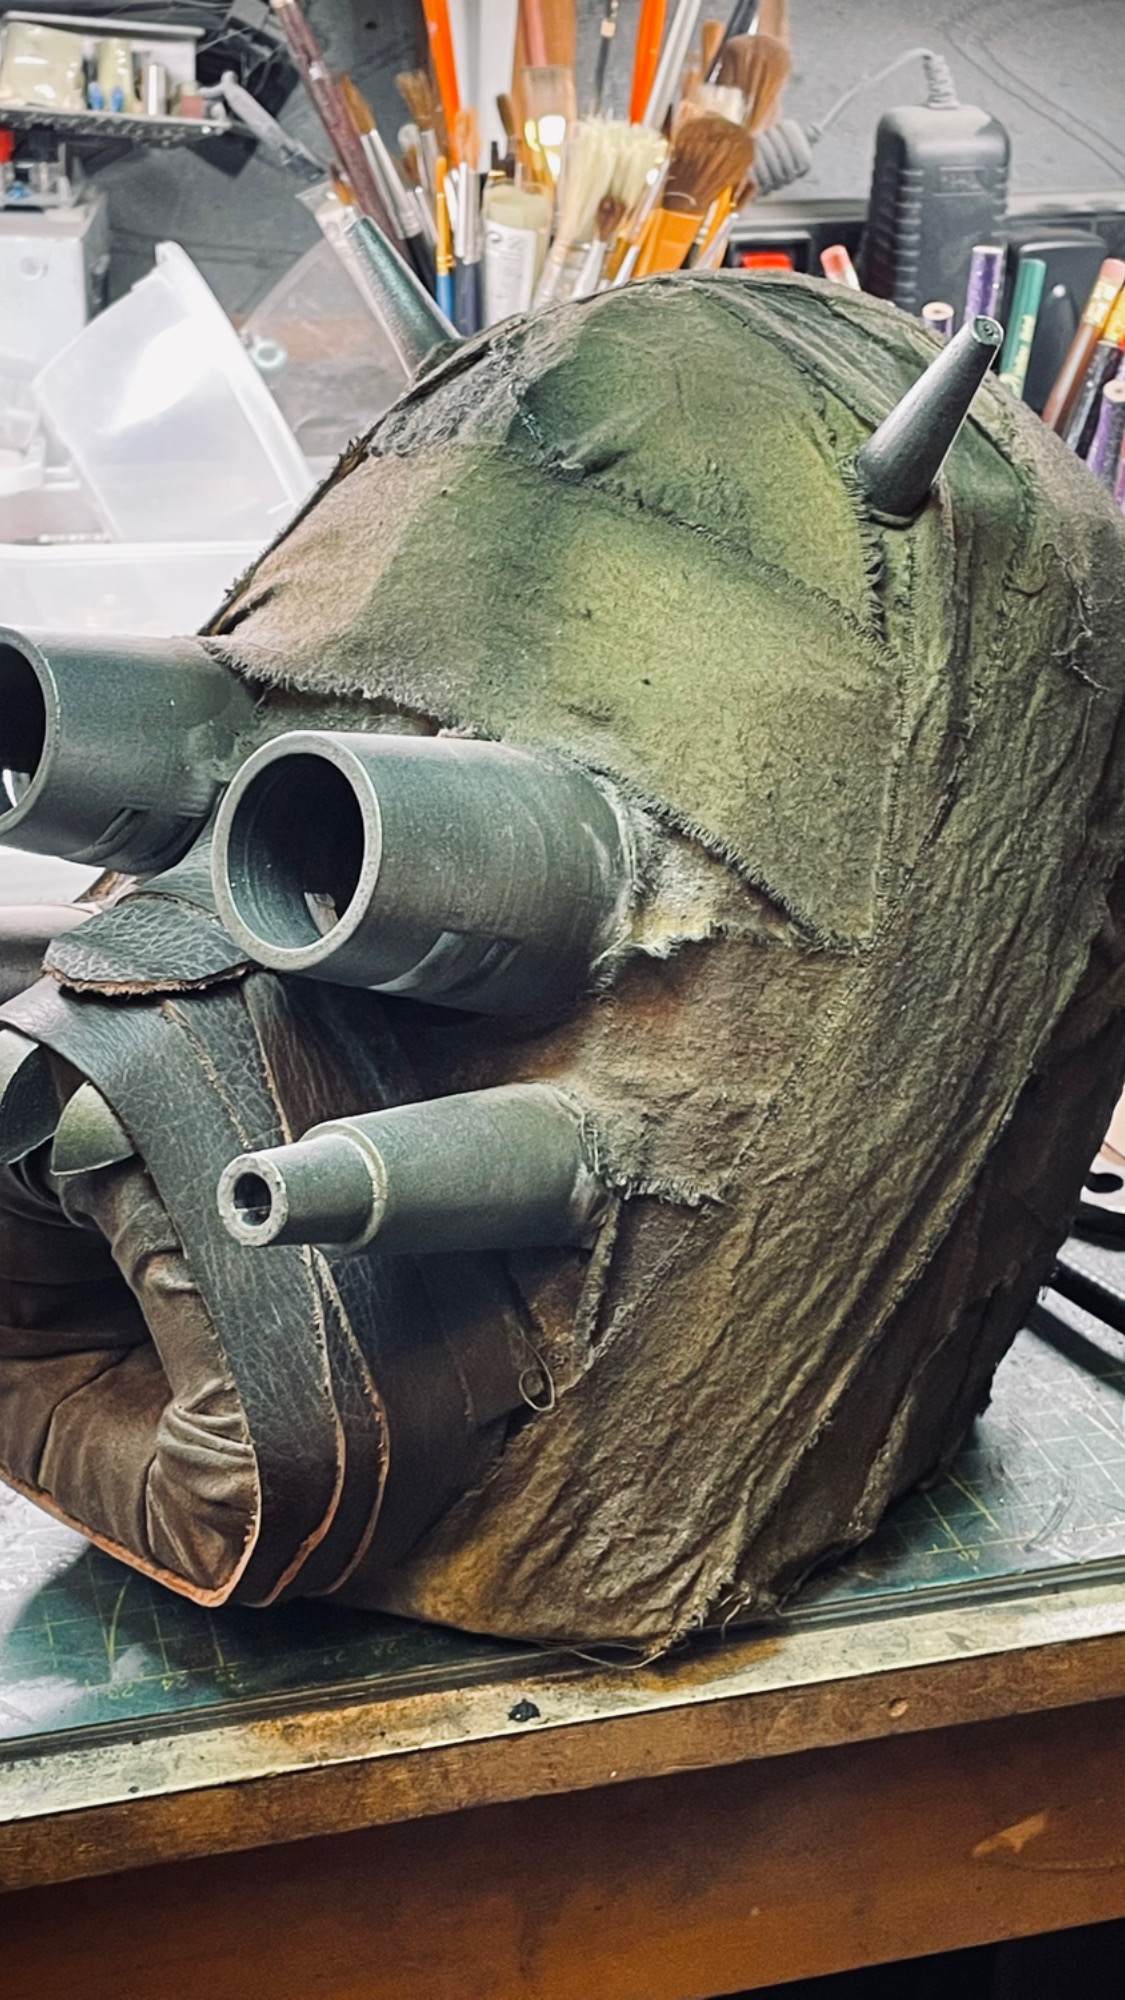
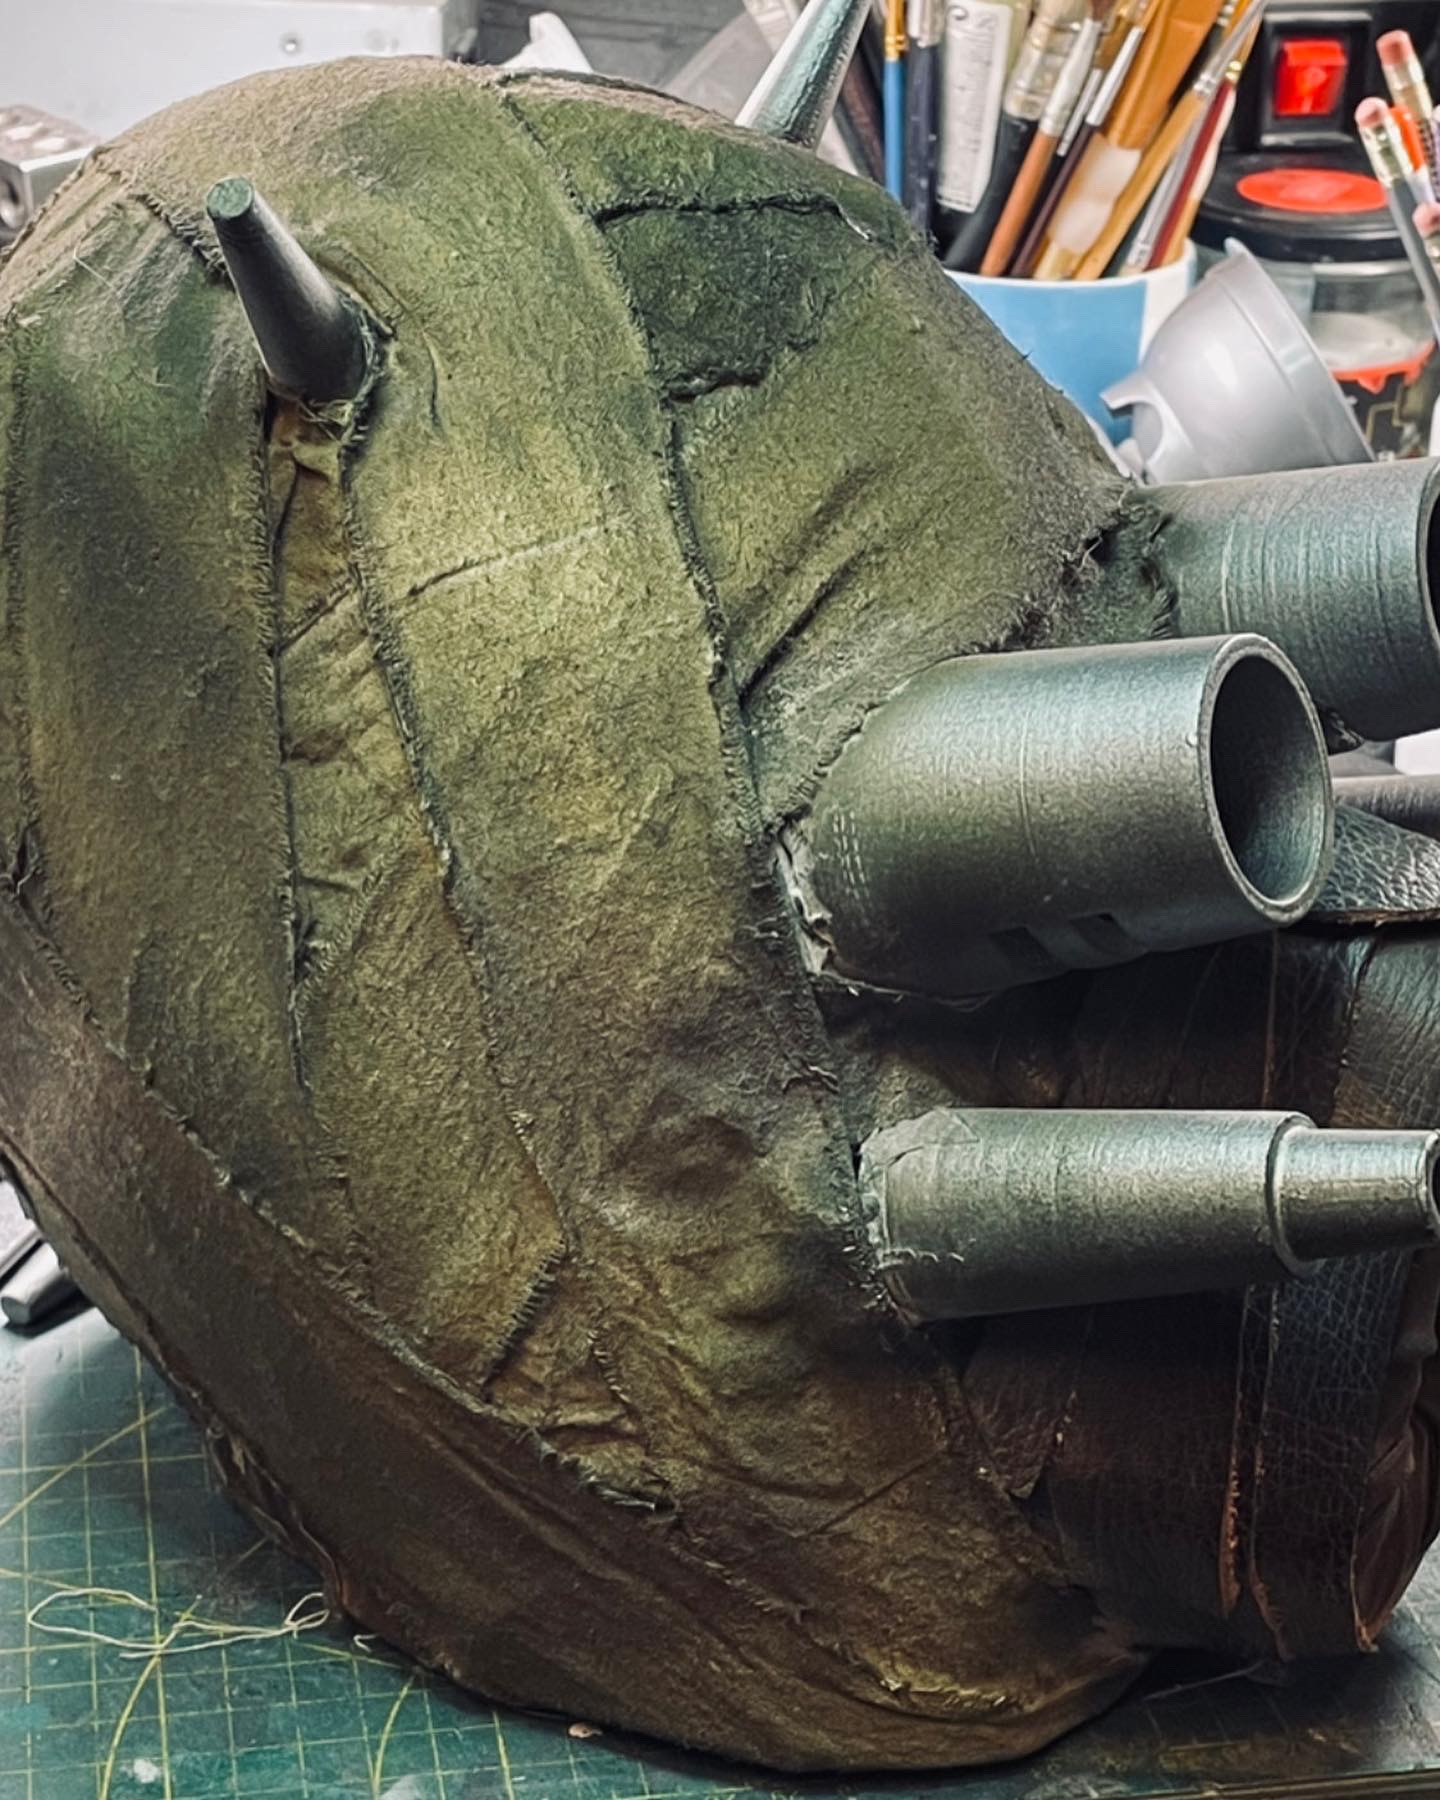
The bulk of the finish is the cloth. This is a ‘B’-grade linen which I tore into strips and bathed in some dirty water, actually various solutions of acrylic paints in water, firstly as a full immersion to get into the fibres and then as sprayed, rubbed, dripped and otherwise random applications as seemed right. I also used a spray bottle of coffee across the strips to give a deeper ingrained dirt look. After the wraps were applied I did some further applications to tie the separate pieces together and in place and some dark airbushing was used to give for additional definition.
The 3D printed bits were simply sanded and sprayed with metallic silver before being fixed in place.
The snout wrappings were given a dusty look with the liberal application of fullers earth after the cloth wraps were put in place.

Materiels
- 10mm and 4mm EVA foam
- Amazon PLA filament
- Brown leather off-cuts
- Faux suede cloth
- Raw linen – ‘B’ grade
- Contact adhesive
- CA glue
- Yellow, umber and black acrylics for staining the cloth
- Coffee in spray bottle to add points stains to cloth
- Silver metallic spray
- Fullers earth powder
Tools
- I3-style 3d printer
- Rotary tool and sanding drums
- Heavy shears
- Craft knife