Background
Extract from the Fandom website (Darth Revan | Villains Wiki | Fandom)
Revan appears as the main protagonist of Star Wars: Knights of the Old Republic, the overarching protagonist of Star Wars: Knights of the Old Republic II: The Sith Lords and the titular main protagonist of the novel Star Wars: The Old Republic: Revan. He also appears as a major character in the BioWare MMORPG Star Wars: The Old Republic, the titular main antagonist of its expansion Star Wars: The Old Republic: Shadow of Revan and a supporting character in the Echoes of Oblivion storyline.
My friend Dan’s daughter Jessica wanted a Darth Revan helmet, so I did some digging around and found a pattern to make on from EVA foam. So thanks to Dovah Design for making this available!
Build
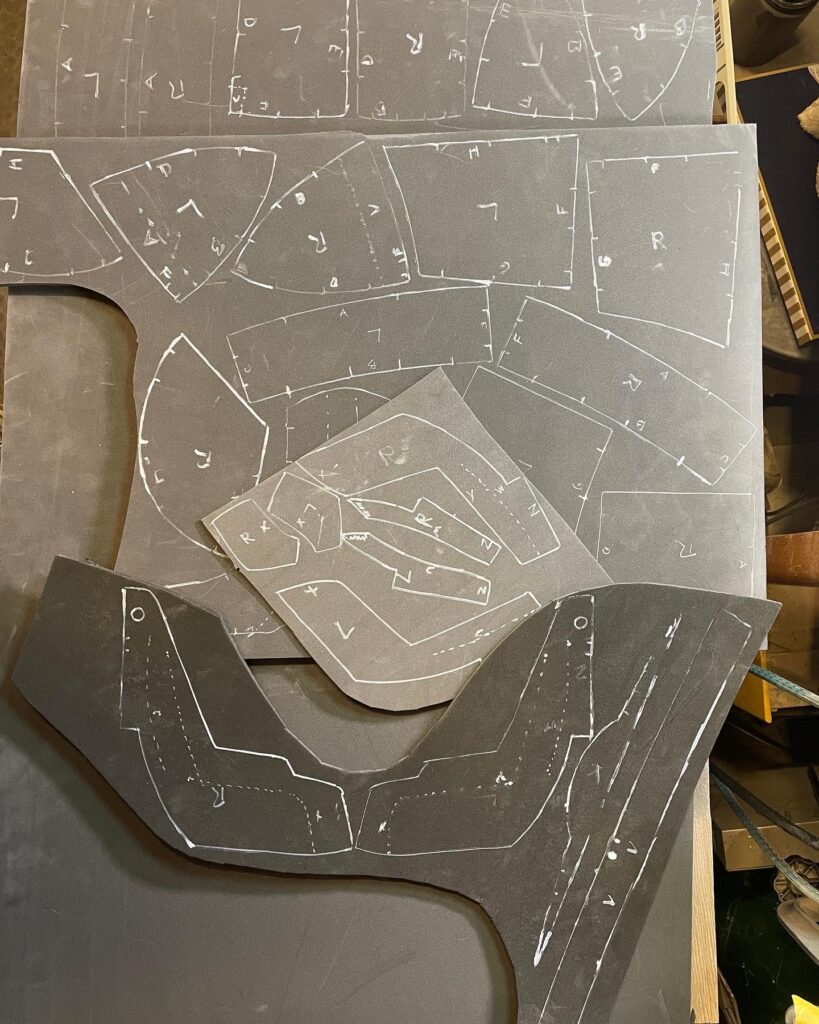
I printed out Dovah Design’s pattern and transferred to the relevant thickness of EVA foam. I used a low-density (60kg) form for most of the pieces and HD for the accept layers as I wanted to maintain a sharper edges on them.
I then laid the pieces out so that I could work out the assembly order, did a little bit of pre-shaping with my heat gun and got to gluing with contact cement.
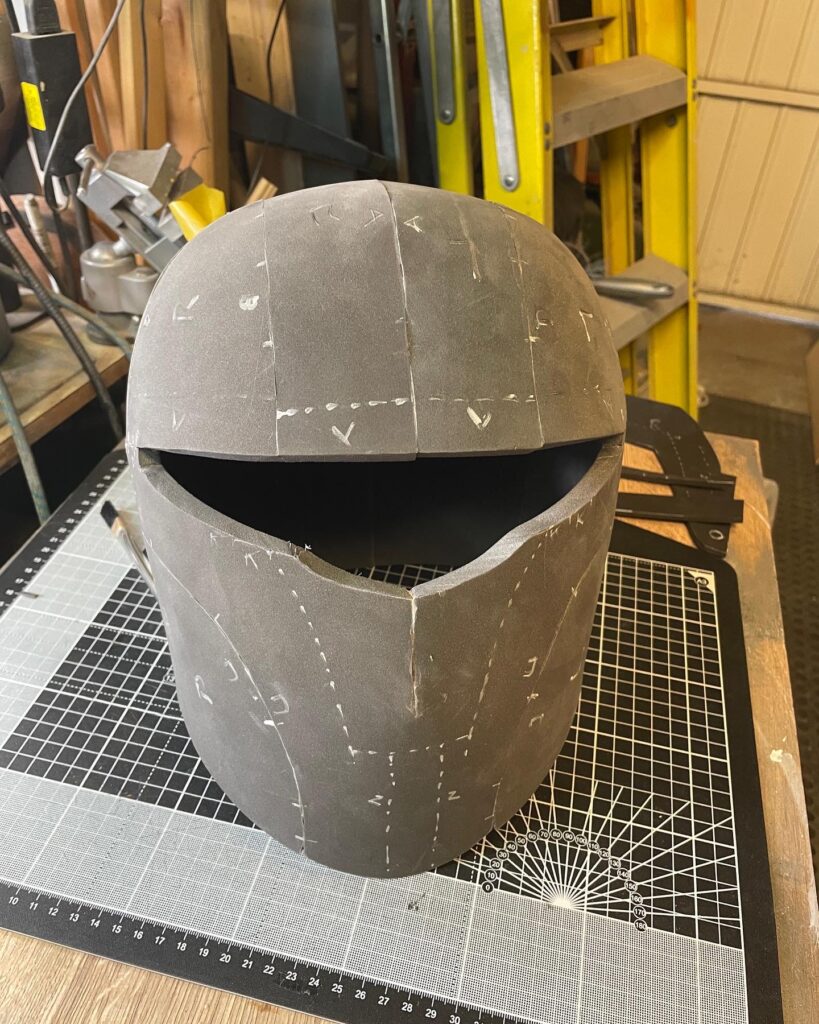
After forming the base shape of the helmet and doing a bit more heating and forming I worked on the seams, doing a bit of filling and sanding. Helmet seams are one area where I’m still a little way off being what I’d call good, but everything is work in progress!

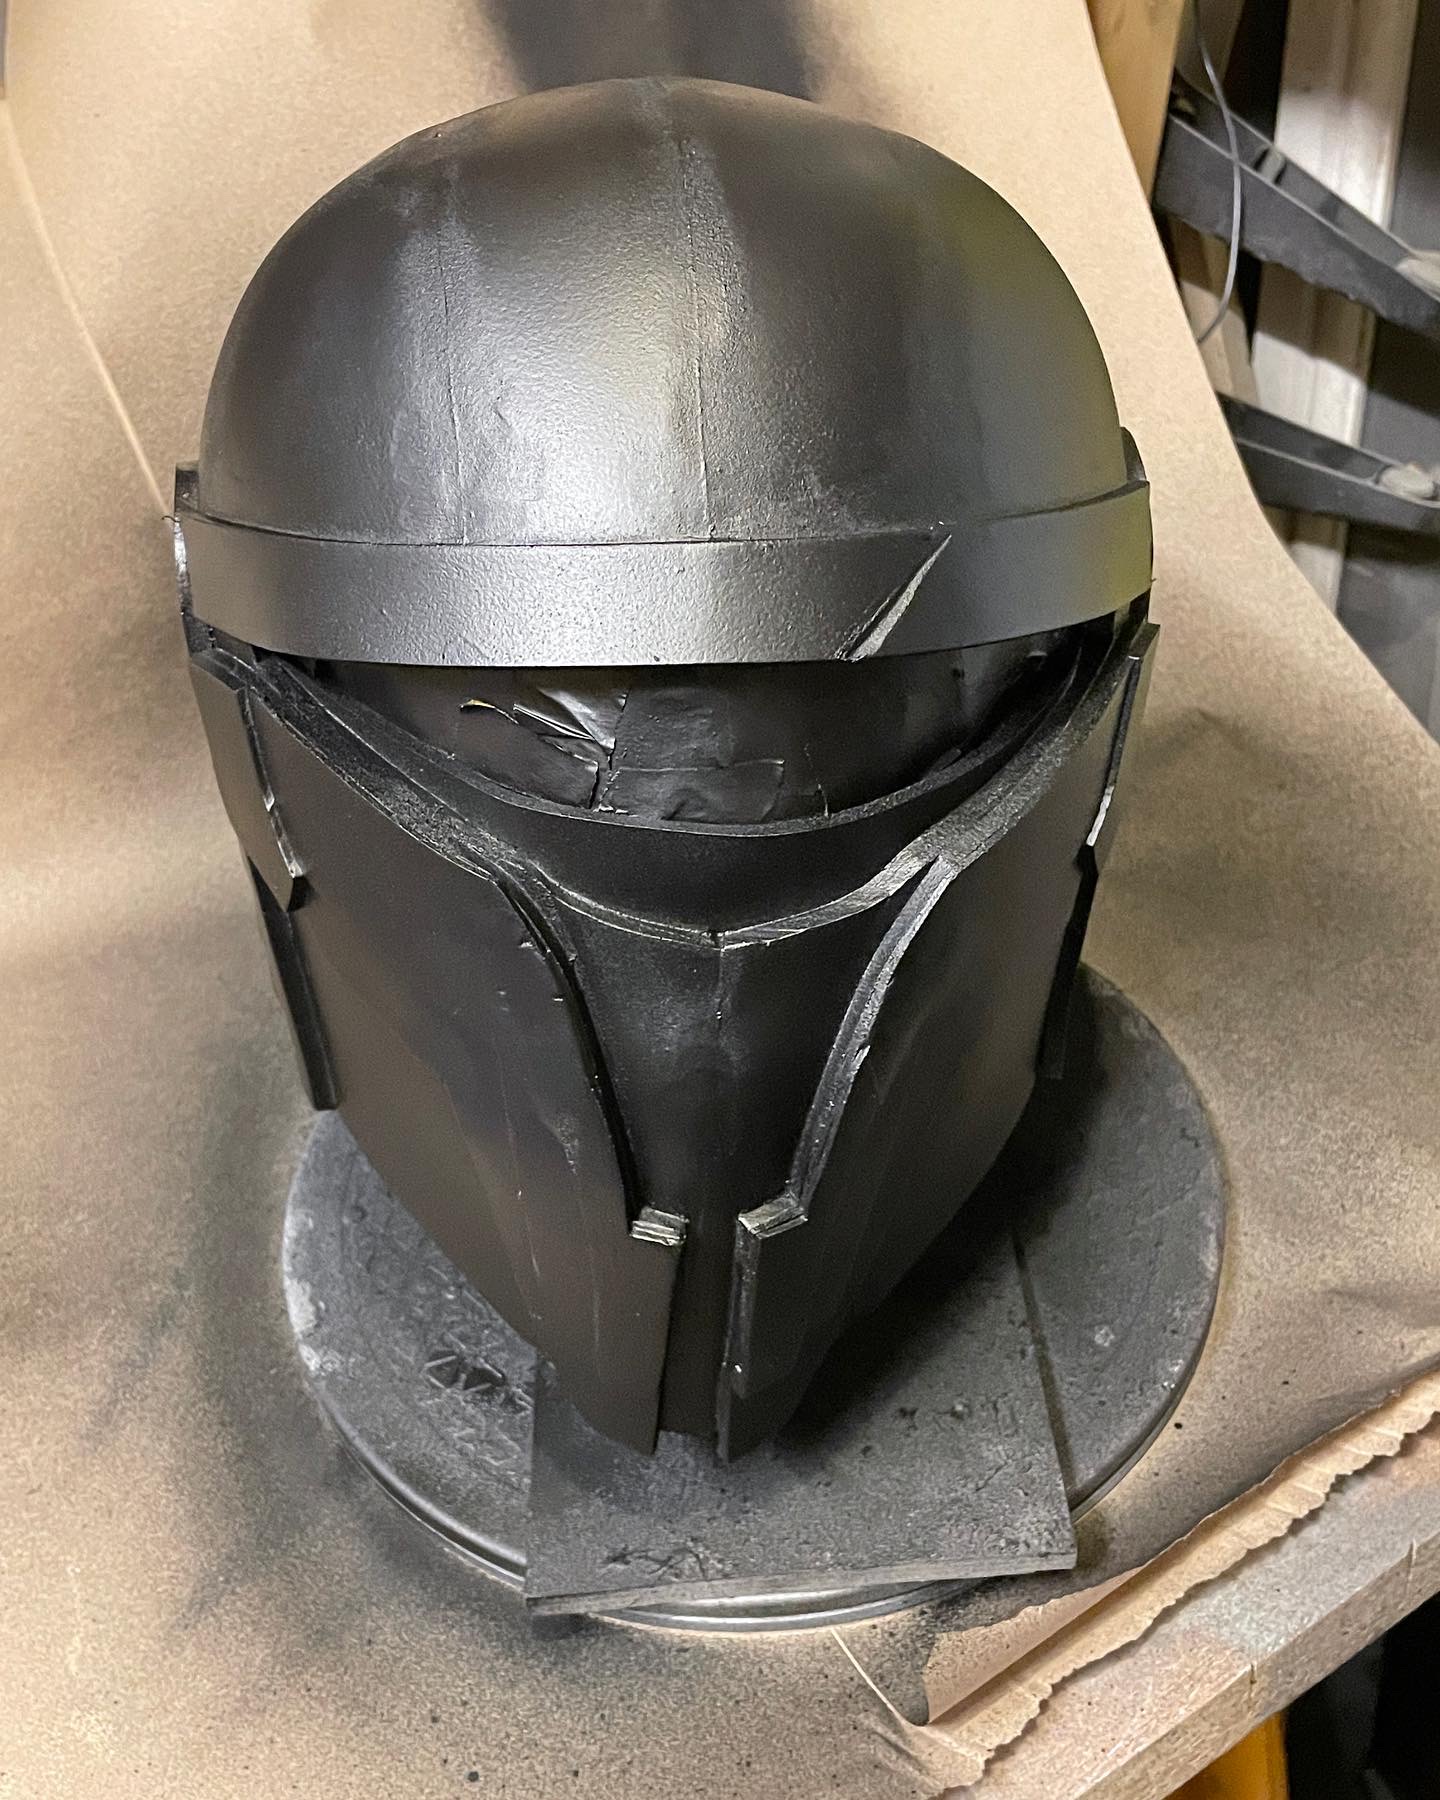
It was then time to add the detail elements. I did consider laying these up and then just applying to the helmet base. It would give me the opportunity to sand the edges flat and help to remove the layer seams, but the problem with layering flat is you build in tension which affects the subsequent fit to a curve… so I took the more challenging route of fitting each layer to the helmet and having to ‘fix’ the aesthetics afterwards. I’m pleased I took this route as I was able to ‘inform’ the shape of the helmet further through the addition of each layer with the laminations helping to form the shape rather than fighting against it.
After shaping the whole thing got a blast with the heat gun to seal the surface.
Then it was time to fit the visor. I could have waited until the end for this but I wanted to be able to manhandle the helmet without worrying about paintwork so it got done at this stage and was masked off. Visor is a polycarbonate flash guard from Amazon which I cut to shape with enough spare to secure inside.
Finish
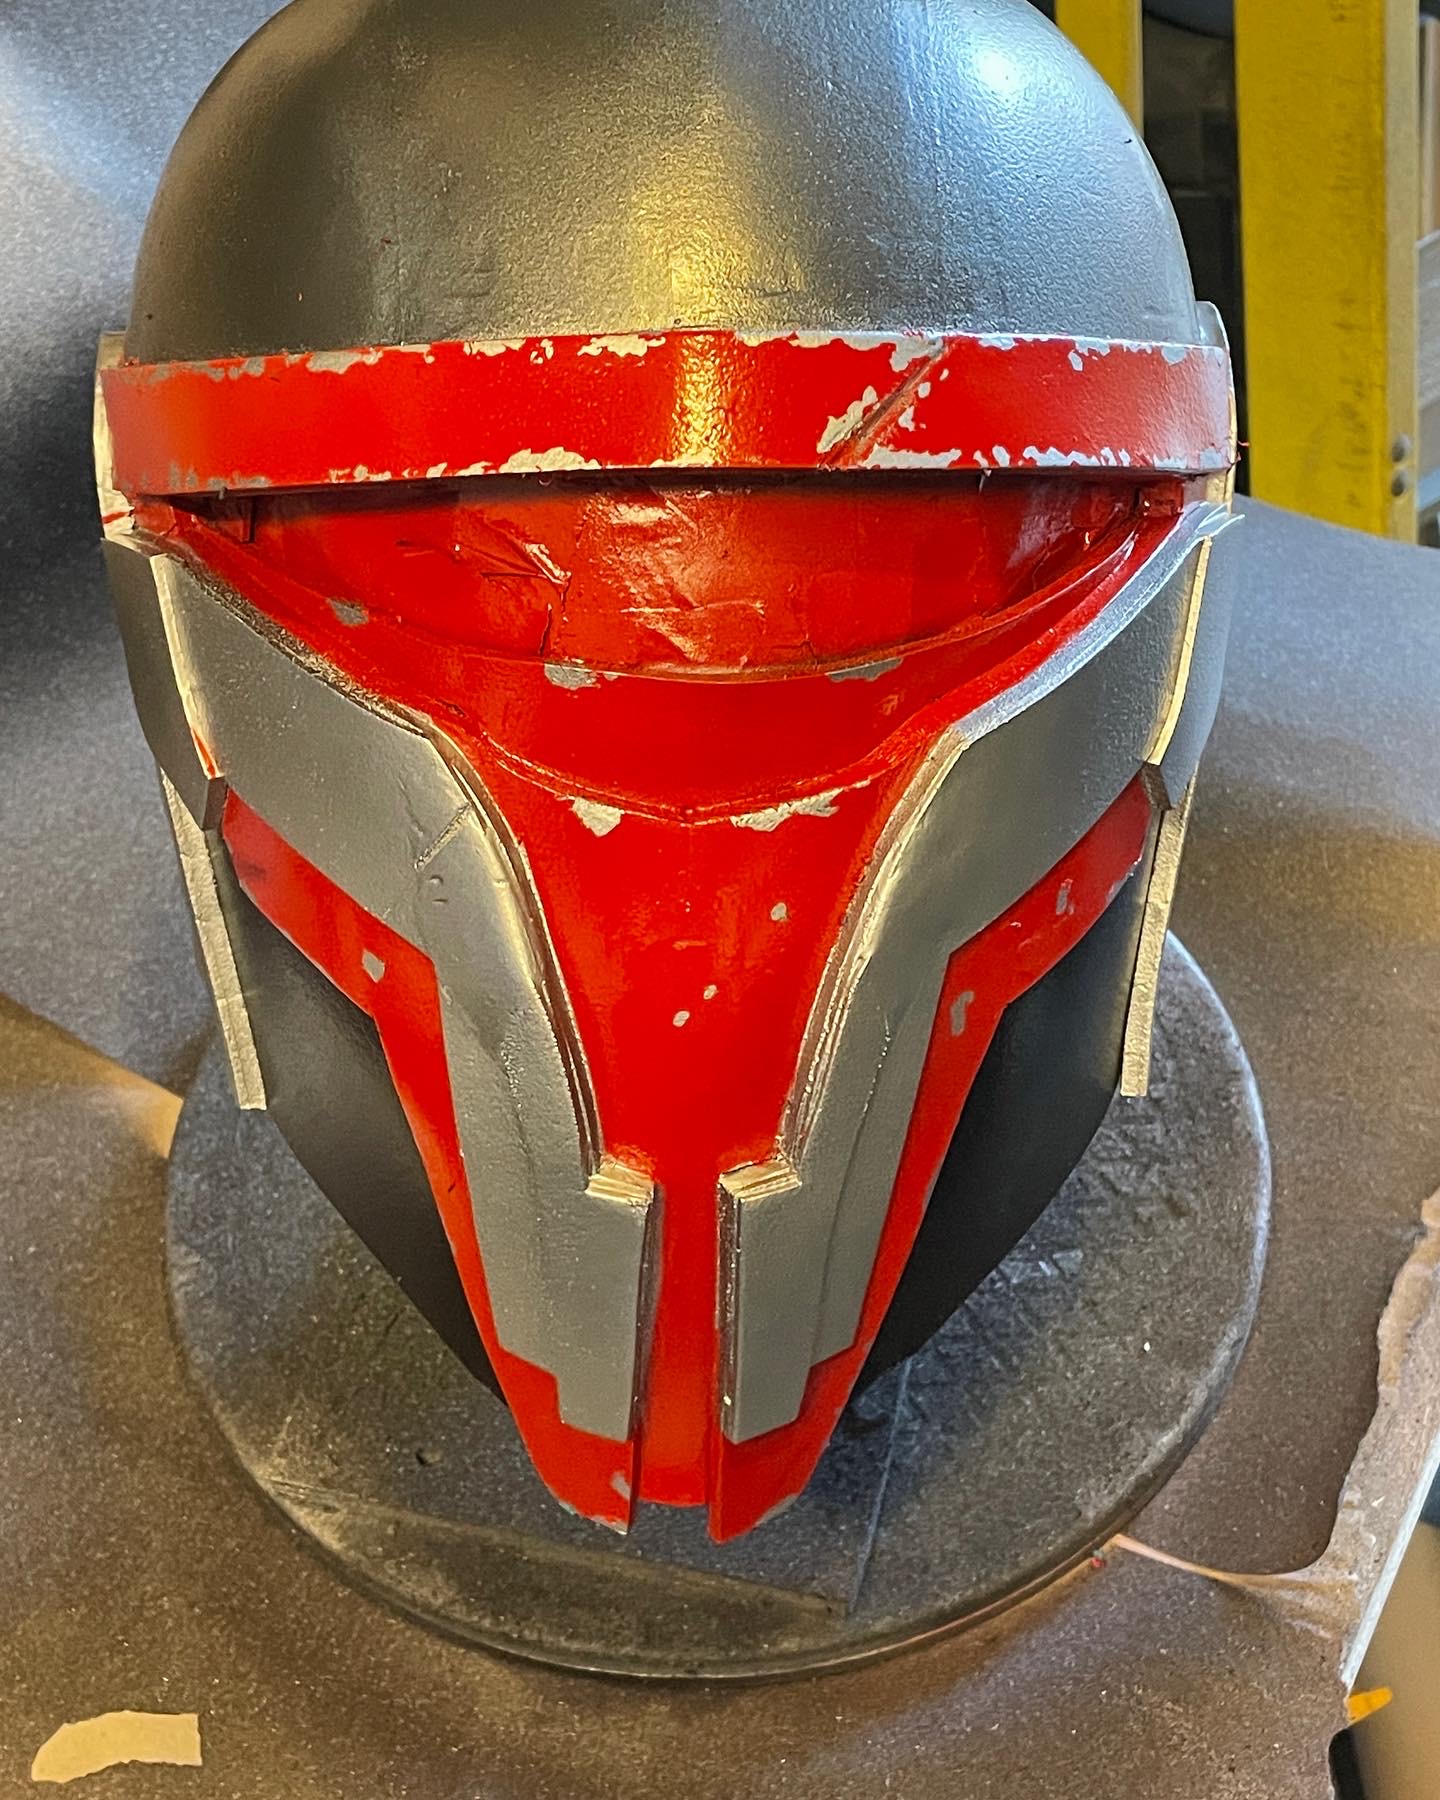
It took me a little while to work out how I was going to do the paint layering on this. Principally because I’m always a little reluctant to mask on top of fresh paint, I’ve had paint lift off with masking tape in the past and it’s REALLY annoying!
But I thought I’d take some time, do some spraying, let it harden, lacquer over as needed and then mask up for the next layer.
The helmet was sealed with Plasti-dip to start with, then a metallic gun-metal was the overall base layer. The silver layer was then added in a couple of passes to make sure I had the depth and coverage I wanted. The Red is actually a little darker in shade that it appears in the photos and I used some liquid mask before spraying to allow me to create the chipped and peeling look around the edges. The ‘cheek’ areas are a satin black and were applied after even more masking.
When the black was touch dry I took off all of the masking and did a little bit of touch-up / clean up where I’d had blow-through. The final painting step was some black airbrush work to give me some depth and shadow and some texture.
I had a couple of brass cable connectors in my magic box’o’stuff which I took apart and used with some off-cuts of aluminium rod for the chin adornment and it was done!

Materials
- 10mm, 4mm and 2mm EVA foam
- Tinted visor – Amazon Link
- Black Plasti-Dip
- Metallic Gunmetal acrylic spray
- Silver acrylic spray
- Deep red acrylic spray
- Black Vallejo airbrush paint
- Clear lacquer
- Liquid Mask – Amazon link
- Contact adhesive
- CA glue
- masking tape
- Widgets for the chin adornments
Tools
- Craft knife
- Rotary tool and sanding drums / bits
- Airbrush